


OCT/2/2023
I learned some facts that will be useful
Blueprint is a wrapper around a C++. Float and double = float 32 bits and double 64 bits. Double(64 bits) helps make a more accurate perception. Bits are used in color music.
The teacher went over Game Instance, which is the class we can use to reference Variable, and this is meant to be more accessible, simpler, and more professional. For a simple run-down, we are going to use BP. This session was used on Making Menu, Which I was familiar with in college. Sir's method is similar but more organized thanks to Game Instance, so you can easily reference and it's not clumped together, making it messy. Another reason we're using BP is because, later on, we will decompile to understand the code and recompile.
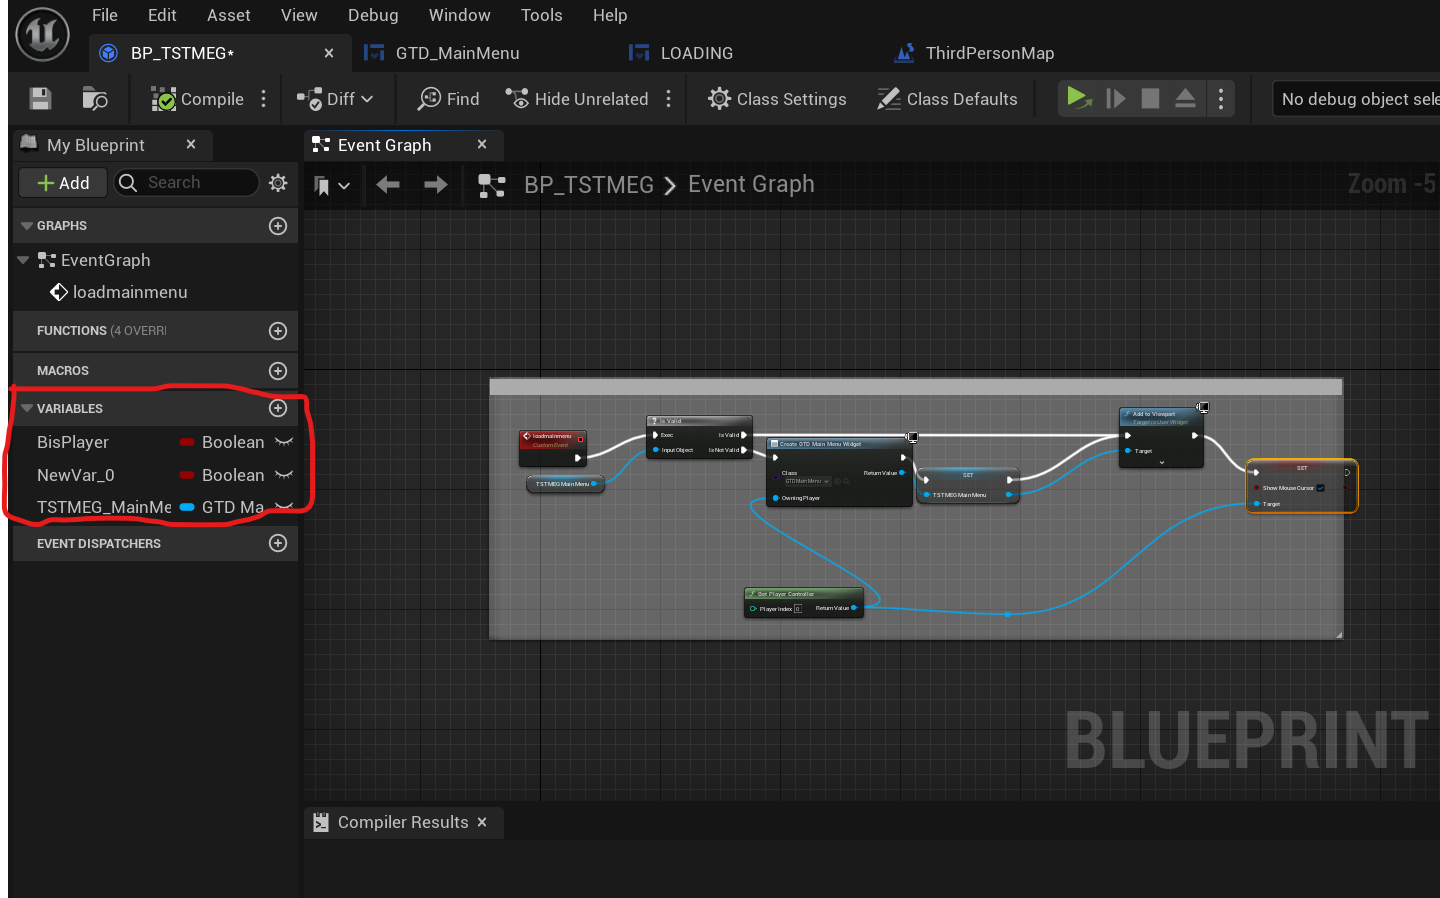
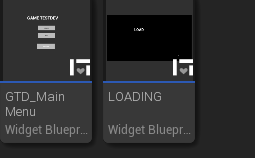
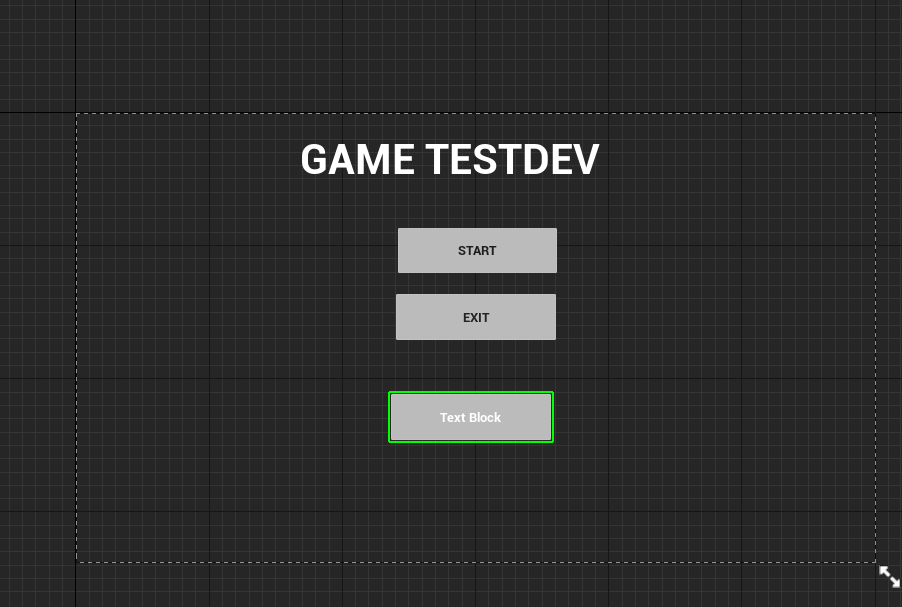
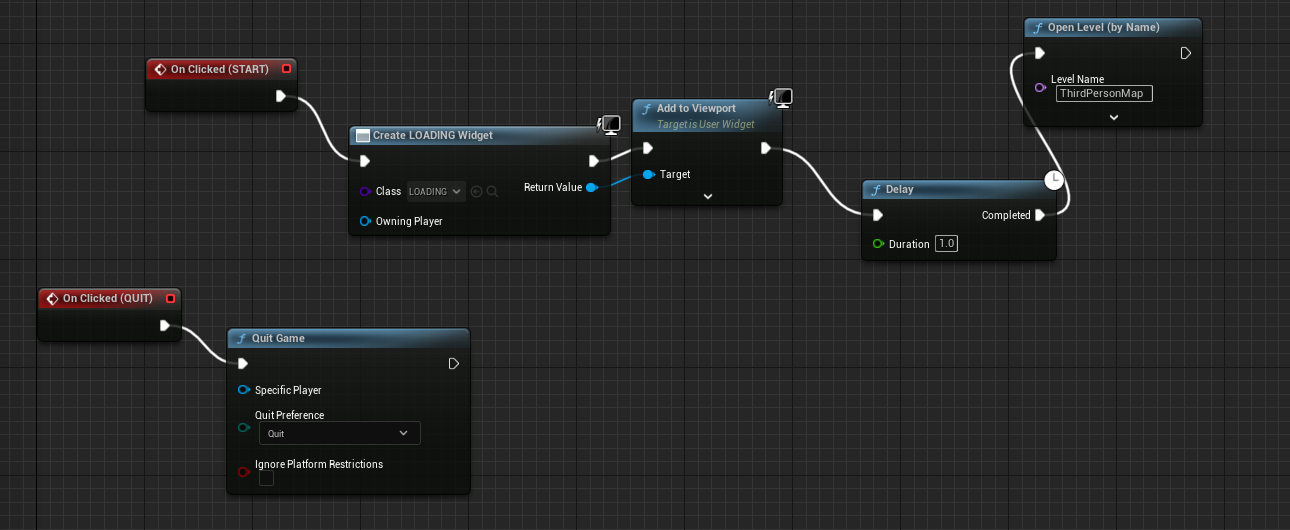
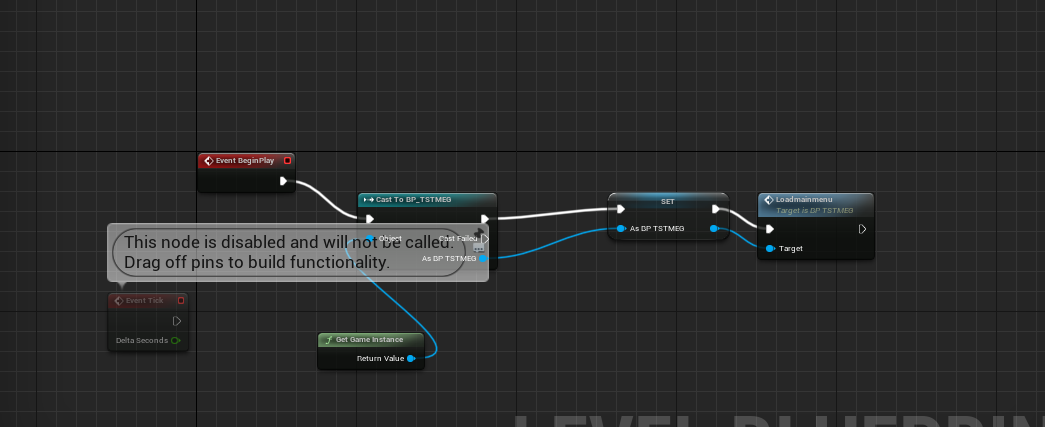
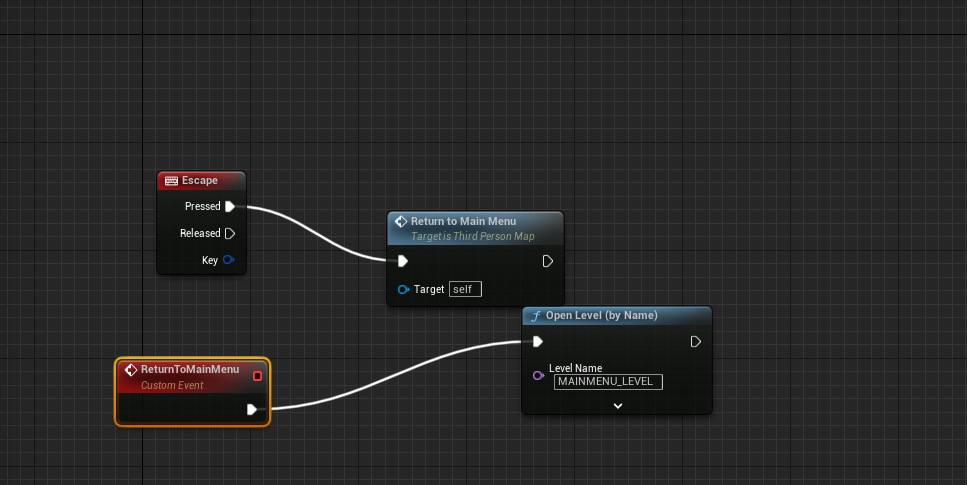
So, I created the folders I will use to manage my files and assets. For this one, I will be putting the BluePrint and Widget. I made the Game Instance BP and included the BP visual code they showed us. As mentioned, it is less messy and easy to ref, and other functions are divided but linked together. Then I made the Widget BP and placed it in the UI folder, set it up with the Designer placing text, button ref it to an event, and then switched the graph. OnClicked start link to open level(Name: ThirdPersonMap). When you click, it sends you to the level map and OnClicked Exit link to quit). Then, I created another map level to host the main menu and placed the bp code in level bp. You can see the ref node from the Game instance, showing it is easily linked. The return function on TPM bp has return bp code return it to the main menu.
We then reviewed the packaging to test if it worked; even though we can check in the engine, I need to know if it works when packaged. I always felt the packaging was a pain in the butt; that is all that I know. I learned, but it has issues. I don't know if it is UE5, but Prof is way more accessible, which is cook and package; before that, add the map list you want to use. I added a load screen to be extra.

OCT/9/2023
For this session, I learned a new term, "Draw call; polygons share the same materials. which I didn't know. We did a small run through unreal basics like "actor," "construct script," "spawn actor," event, etc. Some stuff I already knew, and others I got to understand on a grander scale, like construct script and Tick = is every frame in the game.
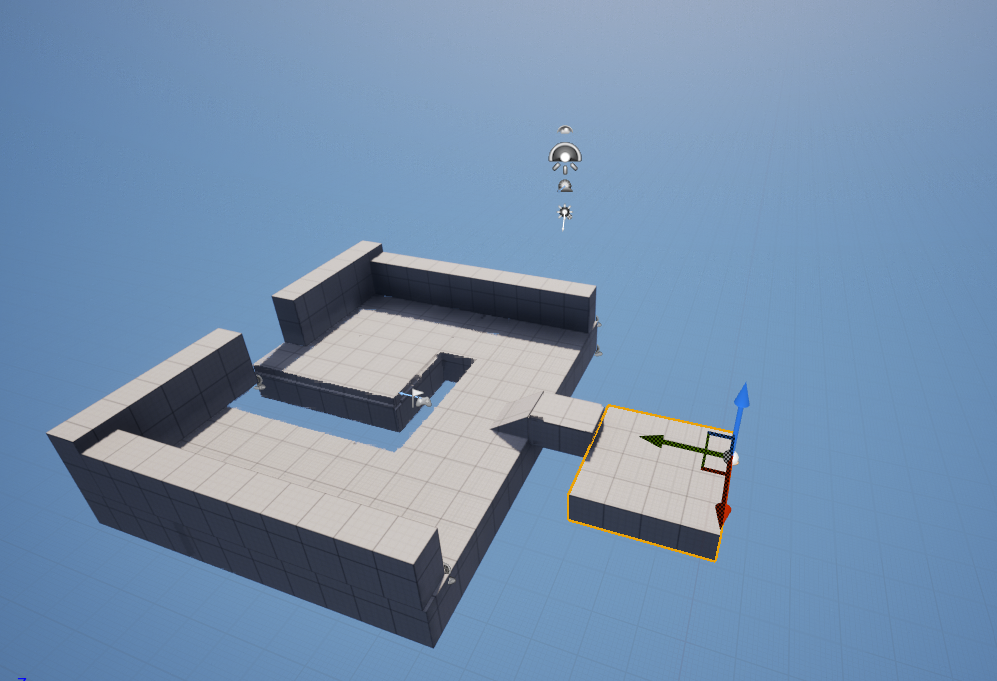
On unreal, we learned a new technique: to modify the size, length, and height of a block by just coding. Programmers need to know this. To test that we had created a wall, we followed sir's instructions on how to do so. And by the way, we did it all in construct script.
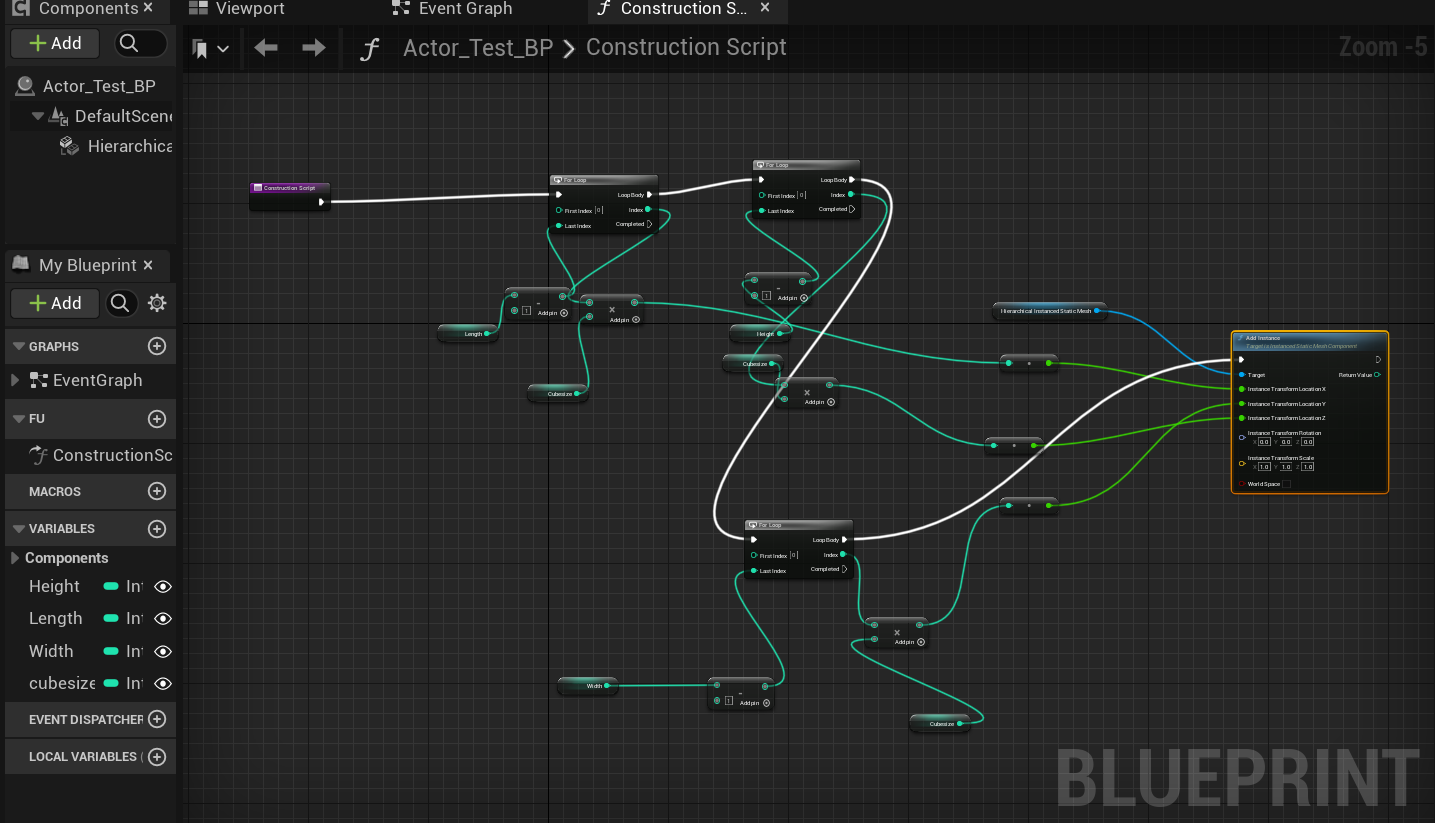
Construction script is a tool to script and run components in the component list, and we can modify values in the engine (unreal), similar to unity.
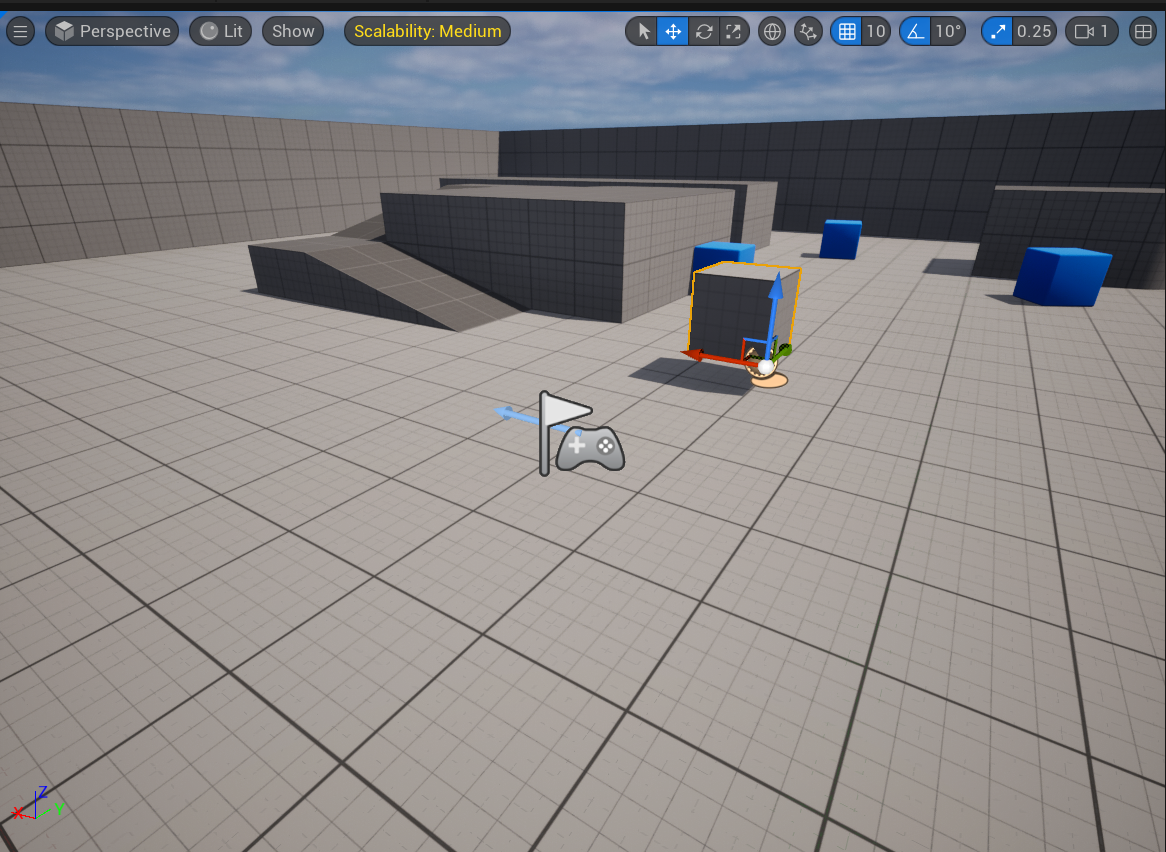
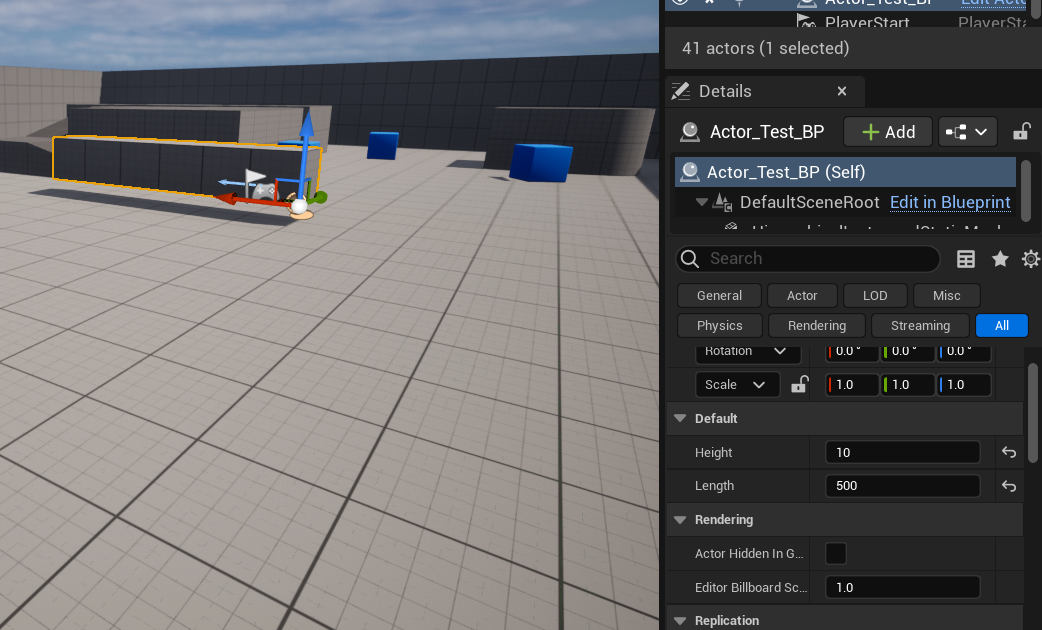
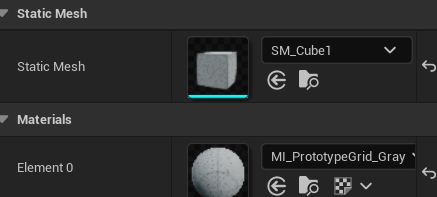
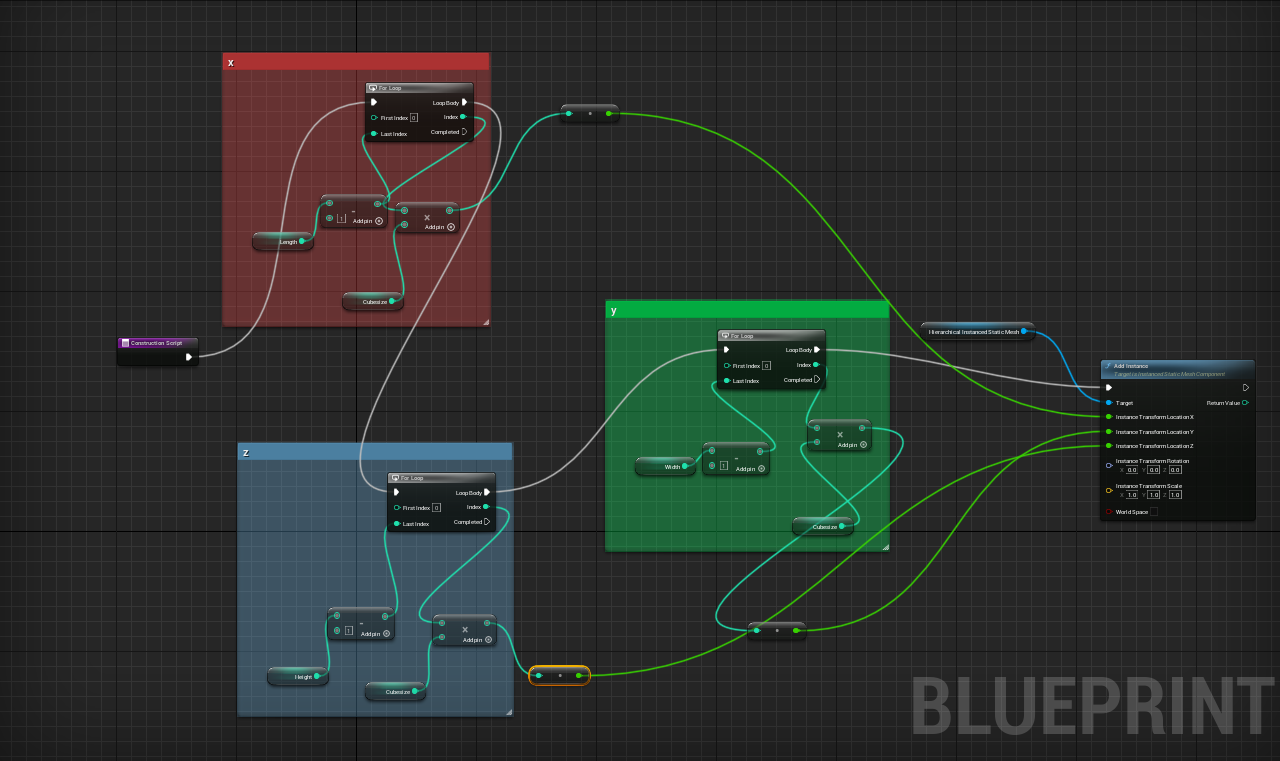
From the teacher's guidance, I made an Actor class BP, then added hierarchical instanced static mesh; we used the static mesh block, duplicated it, and attached that one to the HISM. We went to construct the script and created three integer variables: Height, length, and cube size. I also made width thanks to a classmate I'll mention later. We get into Loop, which loops the node constantly, and add an instance for XYZ axis. ...... When setting up the script code. I added a width variable and another loop and function. I changed the width size of the model.
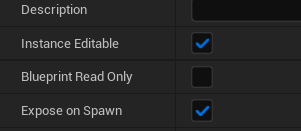
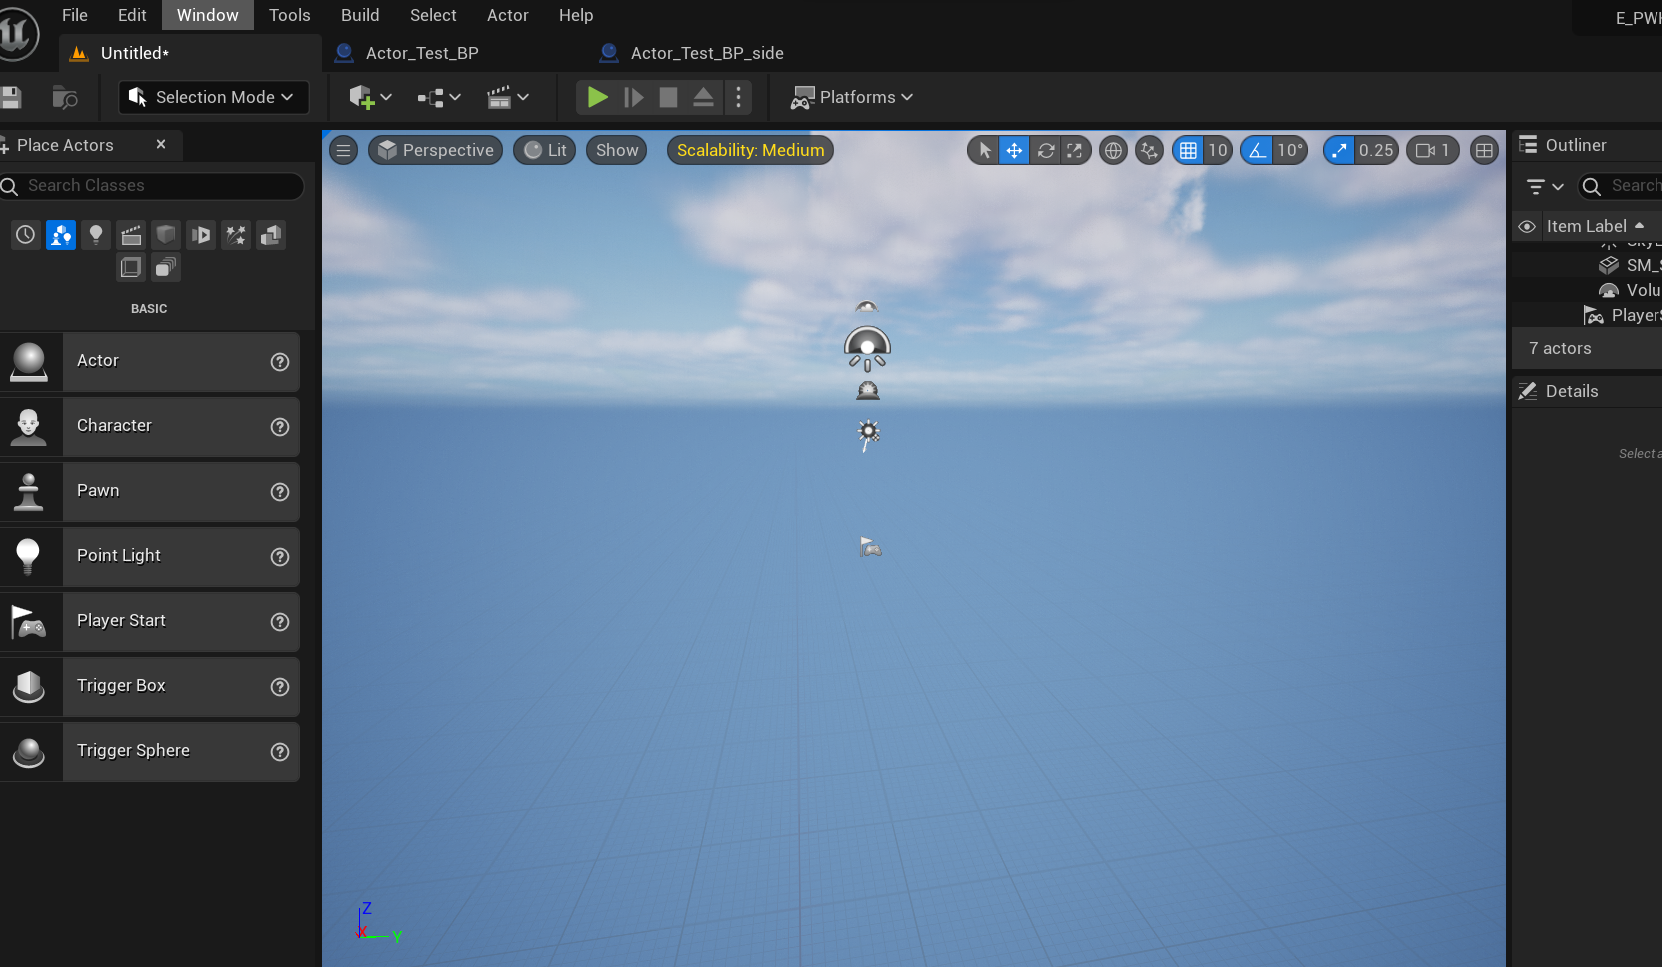
I added the BP in the level world. I edited the values I Details> default that appeared thanks to script code, made my wall, etc.
I got an assignment to create my scene, either recreating the demo scene or starting my background using that technique.

OCT/11/2023
Today I finally went attempt the (Project) assigment, and attempt that I did let just pain in the butt. Before I continue talking about the expereience, I would like to say the lesson and assissigment focuses on CONSTRUCTION SCRIPT and open my eyes on how importanant it is and the fact that I will doing it more often in the future. At the end of that lesson |I relized that it was similiar to what you do on unity making fascinated.
Any who, The task at hand was to either recreate the demo or make our own scenery using only CS that we made, and boy , oh boy it was something else.Task sounded simply but made sense at the sametime aswell It started simply but quickly became an issue.
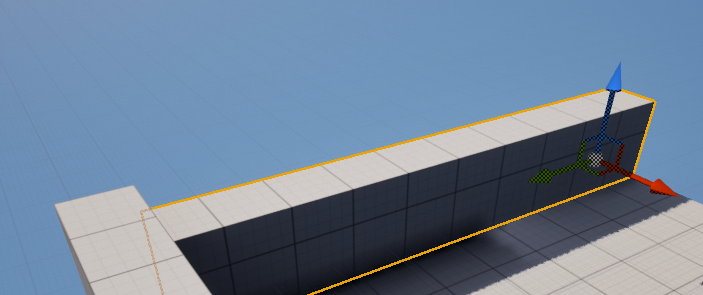
I started off duplicating the BP and calling it same name but added flr, to say it will used as floor. H,W,L,C underneath defualt in companant list, this was created from construction script add the value I wanted until issue occured the floor mesh I created was flickering like crazy, funny thing same similiar issue when we went of the code for CS. For some reason expand values it slow my pc,chr but we put lower it will go back to normal and it will flicker. Seeing this made so concern. I did some research couldnt find anything as useful of how to make the block not flicker but nothing was helpful, one unreal page talked but the instruction didnt make sense. My hyposis is that the code is not polished to handle it and unreal doesnt likeit.
For the mean time I'll leave and focuse making the scenery and come back to later.
The more time I add a new BP with CS it gets worst and it's make UE slow, flickes and it is definitly the Code. It is making it hard proceed with task I will have stop comeback it next day.
WEEK 4 - 10/16/2023
Today lesson , not what I expected there wasn't many was done that I was hoping to do. We was going to learn how create a save_load...But let just their was some complication prevent that going throught on them and my part.
But here some Key thing we had to go reasearch some I'm already awhere off like, game instance,bp/c++,classes. Meta tags/macros allows you to configure how you display data. Uproperty is used to show dta to unreal engine.Wrapper helps manage resource by wrap around it.
WEEK 5 & 6 (edited)
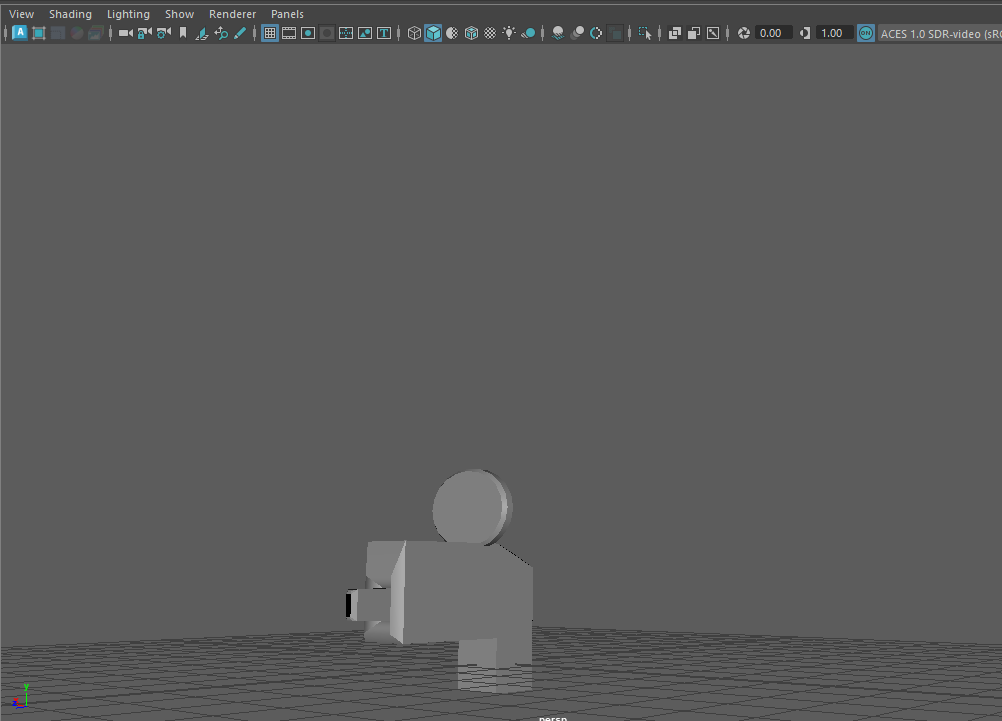
Maya 3d model part 1
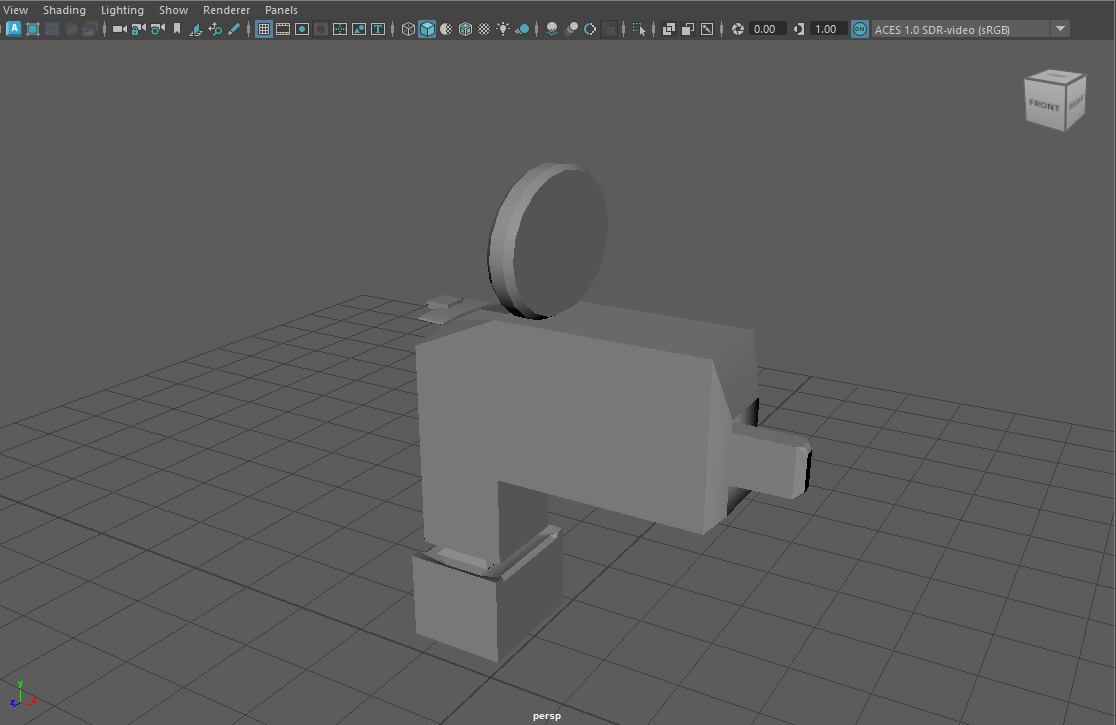
From what I can tell, I worked on a Maya model, as I was told in my previous lesson . So, I went to create a model. Here looks like, I'll continue it some more later on.
Engines & Pipelines Critical Reflection
I created a menu on WEEK 2 for Engine and Pipelines to start your game. This was our first engine pipelines lesson, but because this was early in the course and I needed a better understanding of C++, we did it in BP. I have made menus a couple of times using BP on Unreal, meaning I have experience with it. But this time, there’s a new edition to the method I know that the teacher taught us, which improved it. It is a Game instance, which class we can use to reference Variable, which is meant to be easier/simple and professional. We refer to a load main menu event in the event graph main menu world. Learning this teaches that there are many ways to do things, and it is an excellent way to tidy my BP without making a mess. This trick will be handy. I added the load screen from what I know to add a little pizzazz. The session was something simple.
WEEK 3, I reviewed the construction script, a tool to script and run components in the component list; we can modify the value in the unreal engine (unreal) similar to unity. A new term called " Draw call" means polygons share the same materials. I didn’t know that, but it was good to know—from using construction script, guided on how to make components that can change the size of the asset(actor), like what we already have on unreal. We added hierarchical instanced static mesh and integers with some math that changes the size amount and a loop tool, making it run constantly. And we chose the default block mesh as a test. It worked somewhat fine, kind of. A homework task was to create a level using this, but we had to multiply the BP we made by copying and pasting.
On Wednesday, I attempted the homework and drew a superficial-level layout design of what I would build. I quickly organized the construction script into colors to make it look presentable. At the same time, I was adding the actor mesh and changed the value size using components. There was a slight problem: the more significant the mesh, the slower the game engine gets, and there was a minor glitch on the mesh flickering out. I tried to build as much as possible, but it got more complex. I tried to look for a solution, but there was no use. My hypnosis that I said was “that the code is not polished to handle it and unreal doesn’t like it.”
Week 4
I found out it was an accident on sir's part, and from what I understand from him, there is a missing part to make it function correctly. Also, here are some Key things we had to research, some I'm already aware of, like game instance/c++ classes. Meta tags/macros allow you to configure how you display data. Property is used to show data to unreal engine. Wrapper helps manage resources by wrapping around it.
Conclusion: I got something out even though it wasn’t much, but not all is lost; I will experience more and learn more new things next semester depending on how many programming lessons we can get to move on to more Engines and pipelines. This is why I’m doing self-studies to help me learn what I’m missing. But like I said, exciting things like game instances and construction script were excellent go-overs.
WEEK 9 - Engine & Pipeline Critical Reflection PART 2
WEEK 7
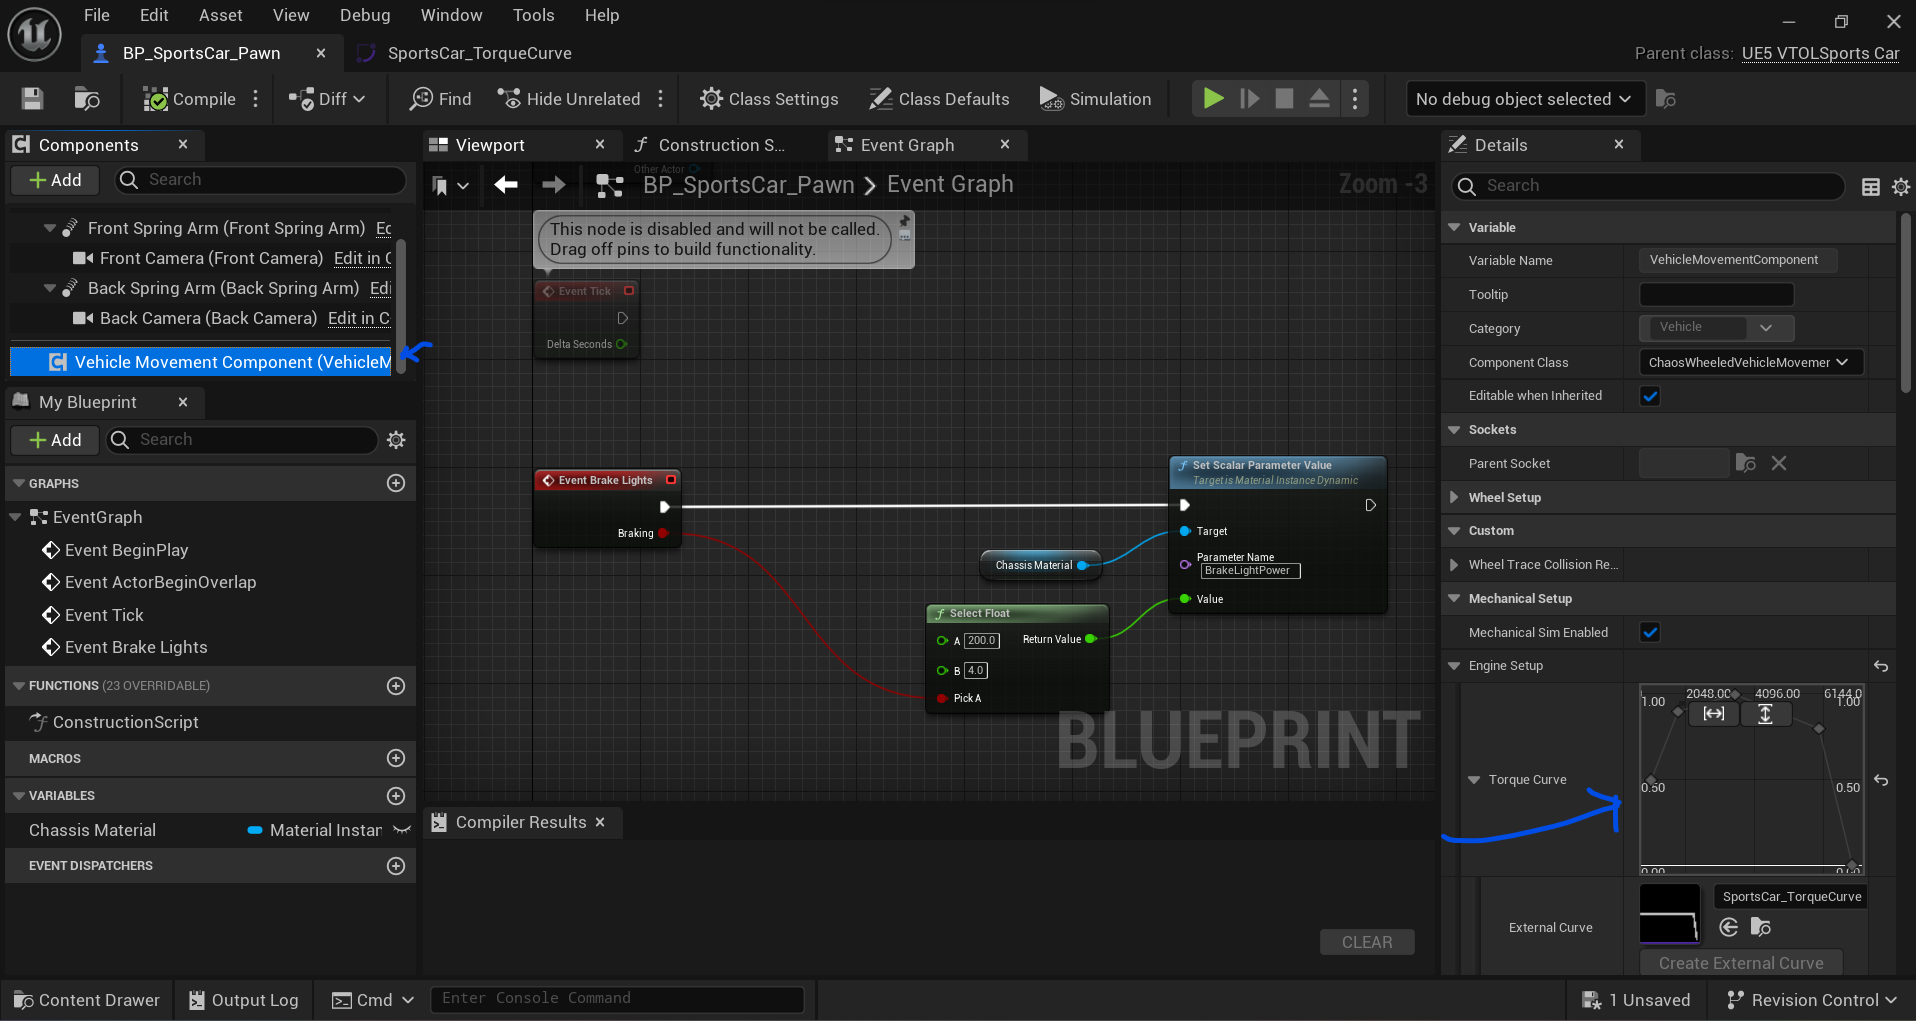
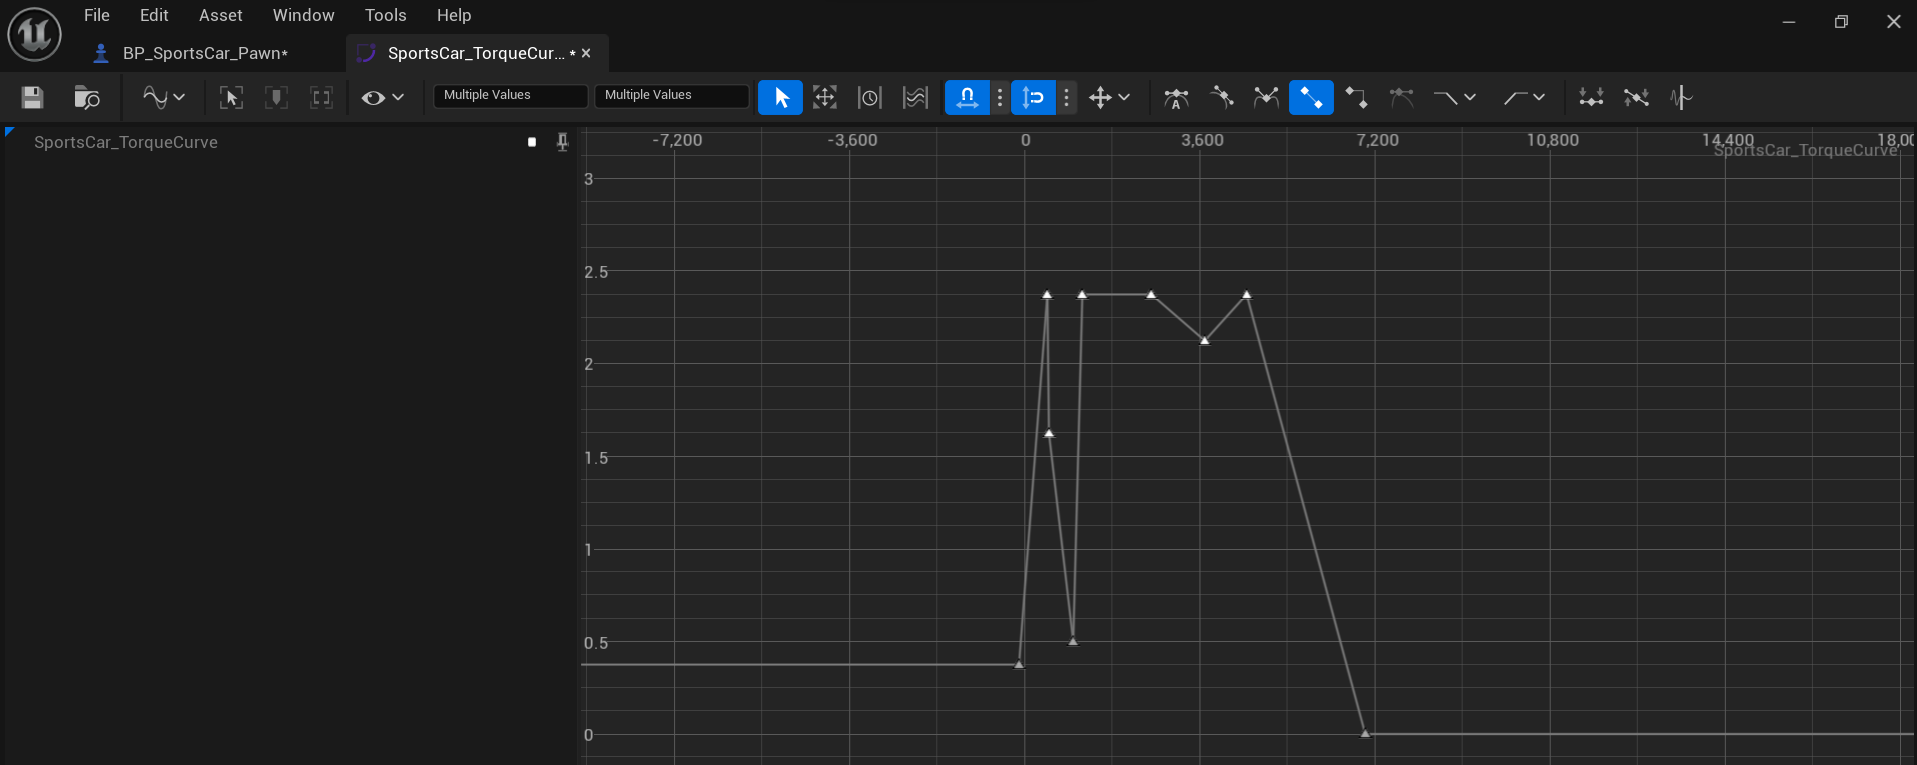
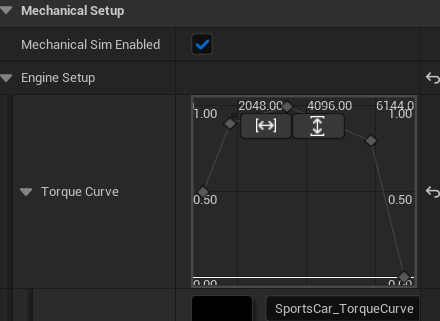
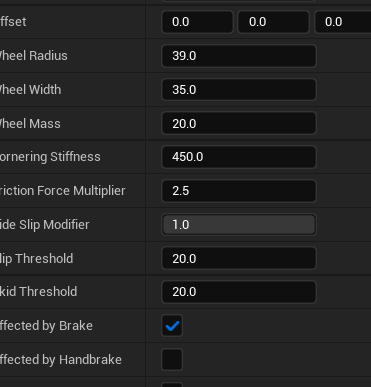
This week, for engines and pipelines, I only focused on my journal most of the time. But I got to try to test how to make a car drift. I had to change the numeric and curve graph in the BP. It was challenging and I don't know if I made any difference, but I made the car slippery, which was some of an accomplishment.
WEEK 8
This week, we discussed with another teacher. I spent this lesson doing self-studies, but at the same time, we had a small introduction to Maya scripting, which is scripting code on Maya that models an object through a coding pipeline, which was surprising. I didn't know you could do that. They did a lot back in the day. It's great to know about this.
WK11
We had to make sure our portfolio was up to date. And we won't have everything we need until the deadline hits. As well as where to put our assignment work. I am already continuing to improve my unity work. I created a weapon switch from Brackey's video. By scrolling, it switches weapons. I would have liked it if I could use weapon animation only for the character, like an animation montage in unreal. The way I created the layer, did it make it harder to do so. I try to experiment more to figure out how to do so. Another thing I learned was about splitting the upper and lower bodies and having them have separate animations in a way that combined animations. I could do this in unreal in the past if I remember correctly.
WEEK7 - (NOV)11/6/2023
I was mainly focusing on my journal. But I tried a small attempt on the Unreal engine, And that was to figure out how to make a random Unreal five-car default drift. Nothing much. All I did was change the curve line and the numeric in the BP class for the wheels. I couldn't tell If I made it work or not. But I was able to make the car slippery, which was the primary goal.
WEEK 8 - (NOV)11/13/2023
I will use some time to work on my self-studies and go over a minor intro scripting in Maya.
The video I was supposed to watch didn't work out. Some technical difficulties, like #include, were messing up everything. So opt for another one.
Week 9-11/21/2023
For this lesson, we continued from the last lesson and attempted to work as a team to make a game using the console log. The game we decided on was to create a base gun RPG game. I came up with the idea of having an RPG-style fun. We decided to use the gun c++ template we worked on before and use it as our base code to build upon it.
Week 11 (DEC)12/4/2023
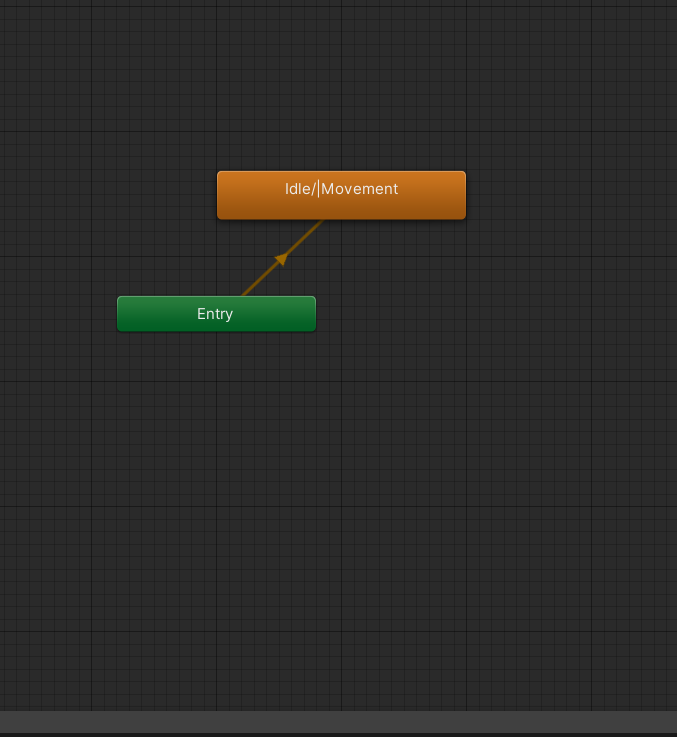
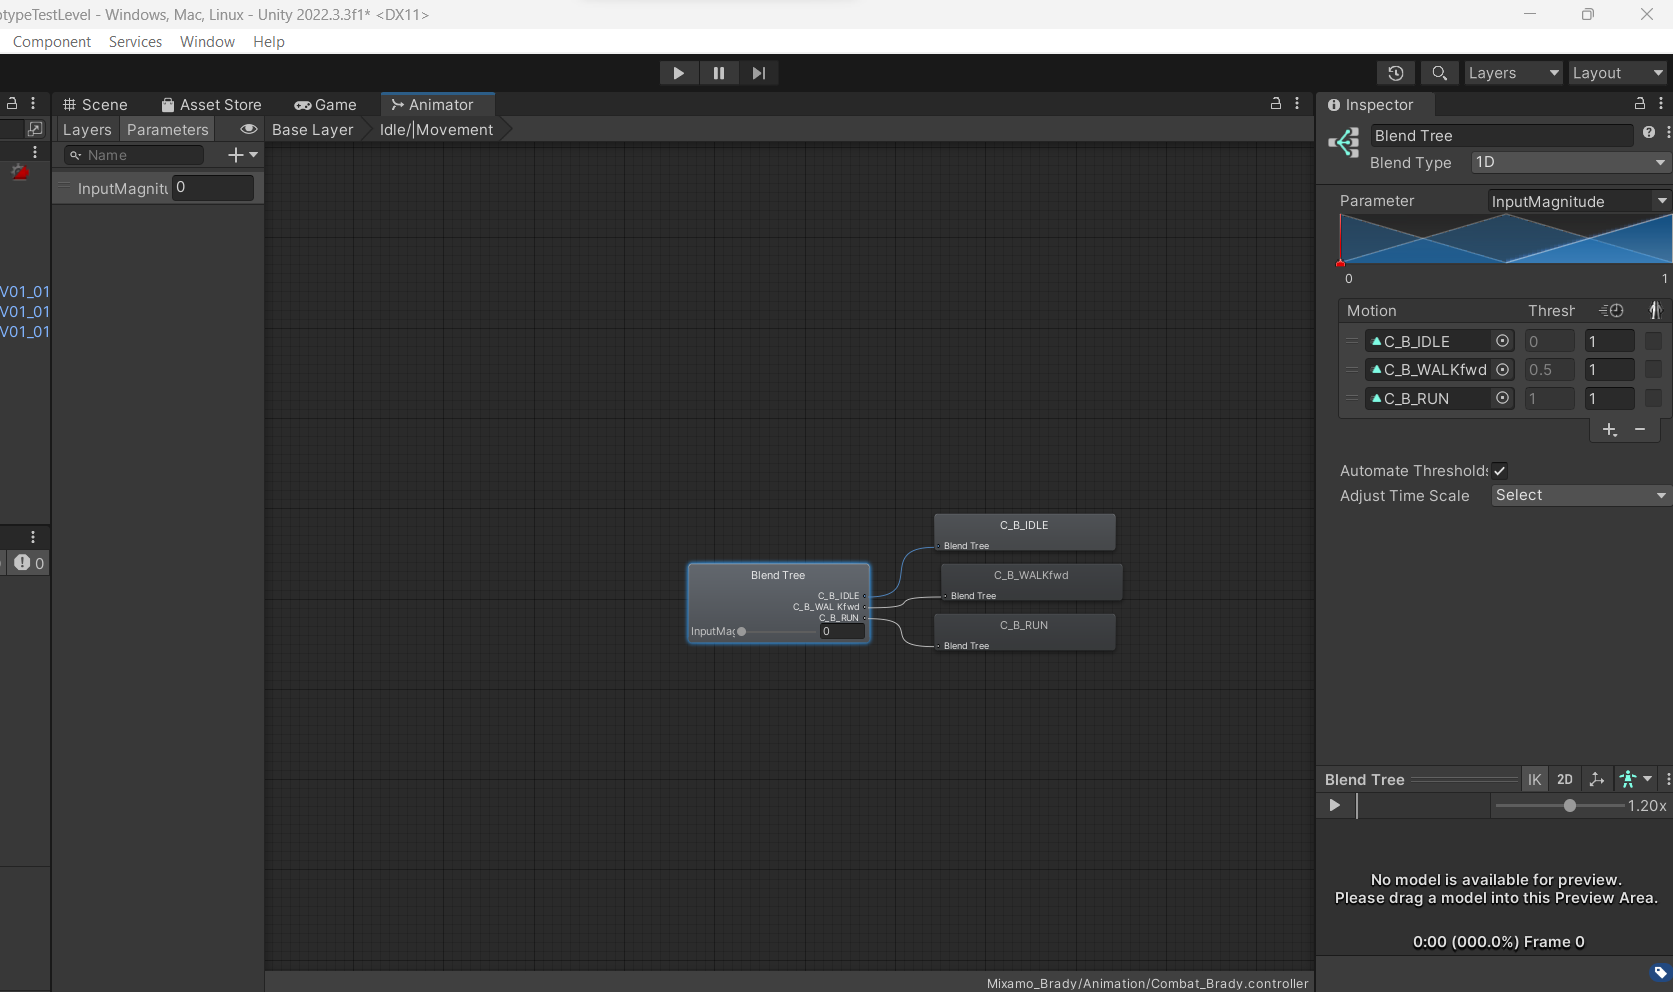
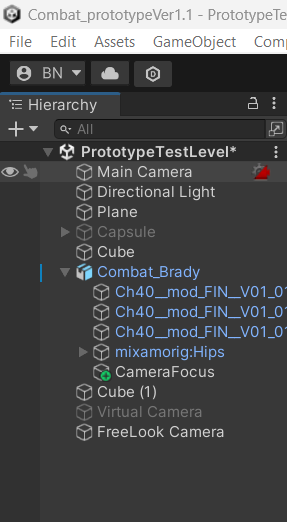
I was working on a small prototype on Unity that will help me when I get time to do my final project, which is already on the side from Wednesday to Friday. I knew we would do that because of the previous lesson in PLP. All my models I left at home. I used a prebuilt Third-person build default that I made thanks to the video I watched around August, but it wasn't good enough, which caused some issues with the animation blend. The model I tried wasn't good, so I used a model on Mixamo. My prototype will be a combat game, hack-n-slash swords, and maybe some firearms (who knows). I attempted to include jump because I had a set of videos follow. Still, my animation issue was because of the code, so I rebuilt from the ground following a YouTube Kiera. I can get a third-person character built properly, allowing me to add more and better things to make my story the way I want and make it unique.
12/6/2023 & 12/7/2023
Dec/6th :
On this day, I continued on my small project prototype. My prototype and self-studies will merge for this and a few weeks onward. The reason is the Prototype is part of my assignment and I usually do these days self-study, so I decided to combine both & I got to learn new things, which was the original plan.
I was able to make the Jump animation for my player thanks to a YouTube tutorial I was watching, the same one that helped me rebuild my third-person build: https://youtu.be/sJvWmFYSQFY?si=XcSZgwadLaCbbHZ7
It took a long time to get to it because I had to rebuild the TP.
Dec/7th:
I went on to create simple roll animation on my own. I did have a small animation BP influence on where to put the roll state, but I did the rest on my own, learning how the true and false works on unity for the animator and script. I was able to figure it out to make it. Also, later that day in the afternoon/evening, I made a simple Sword animation combat from a video,https://youtu.be/gHaJUNiItmQ?si=64uTsRXxivsnW2w, But going step up watch a different that different way and also include weapon system that switches weapons. I will probably get it done on Friday.
Dec/11 & 12
Another thing I did was to learn about is to split the upper and lower body and have it have seperate animation ,in a way to combined animation. I was able to do this in unreal in the past if I remeber properly.
Week 12 -(Dec) 12/11/2023
We are working on our portfolio to make sure everything is ok. And that everything is up to date.
Until the deadline, I'll just be working on my project and uploading it on Aula.

WEEK 13 - Until Deadline- (DEC)12/20/2023
Maya 3d model part 2
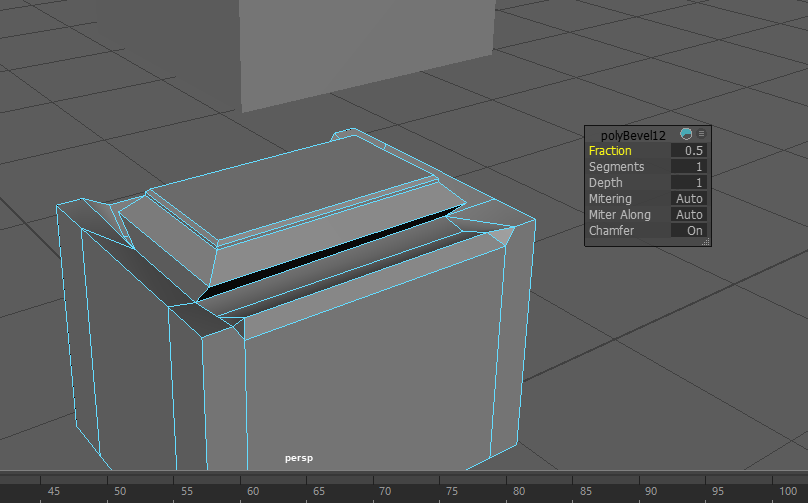
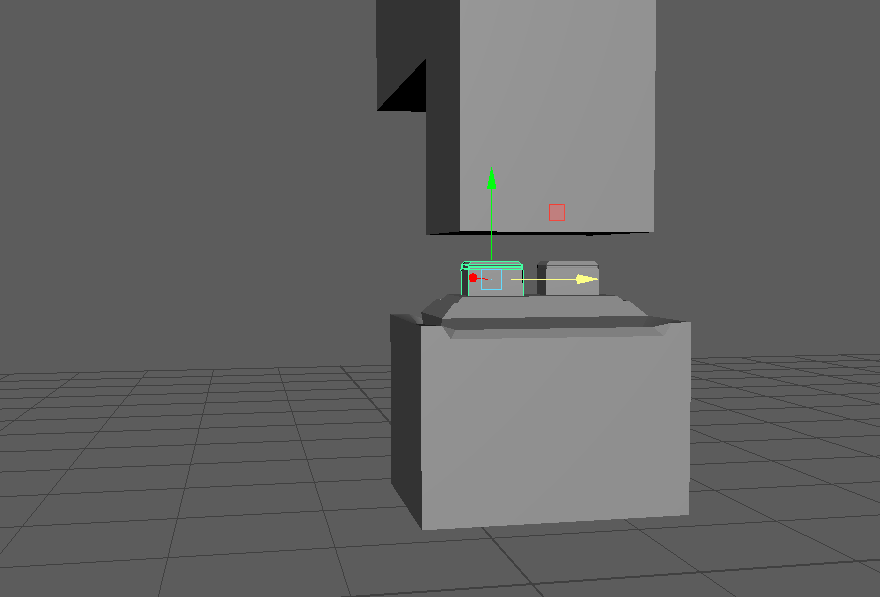
Added some things to the Maya 3D model, which was the external battery ammo and think that help cock the gun back.
WEEK - 12/20/2023
Unreal Inventory Part 1
Vid: https://www.youtube.com/watch?v=vHT4MhmwacE&list=PL4G2bSPE_8umjCYXbq0v5IoV-Wi_WAxC3&index=1&pp=iAQB
Today, I'll attempt to create an inventory on Unreal again using a blueprint. I tried using C++, but it didn't work out; I have had a lot of tries and attempts that will never stop me. I probably won't be taught C++. I want to learn it in this class, but I will only use it for other stuff, limiting my knowledge, and I will be using a blueprint most of the time, so I am preparing my BP skills. I opened up my recent unreal project to build on this. There were a lot of helpful tutorials that I could pick from, so I decided to choose the one I'm currently watching. Every part goes into detail on different aspects of the inventory system.
Even though my game project will be Unity, I hope to have an unreal project to have half on half on what I can do and have both be shown.
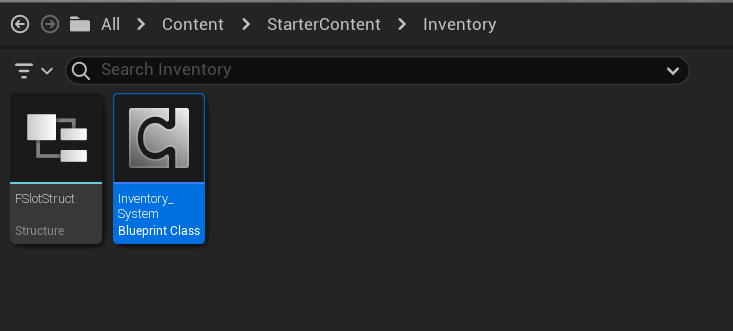
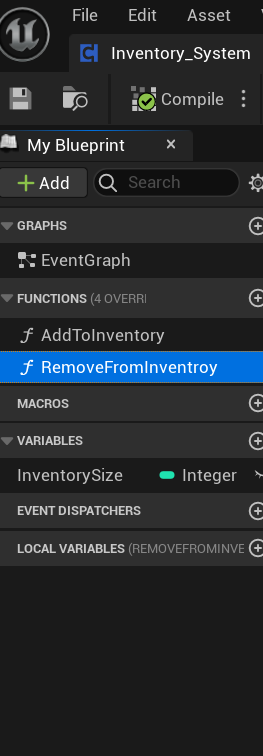
Following the Tutorial, I created an Inventory folder, made a Blueprint Class called, Which was an actor component, and named it |Inventory system. This is where all the primary functions and heavy visual scripting will go to run the Inventory. I opened it up and made two Functions: AddToInventory -- the function that will add the items to the inventory & RemoveToInventory -- Which will remove the "Item" from the section. As well as a variable called "InventroySize." This will be set as an Integer.
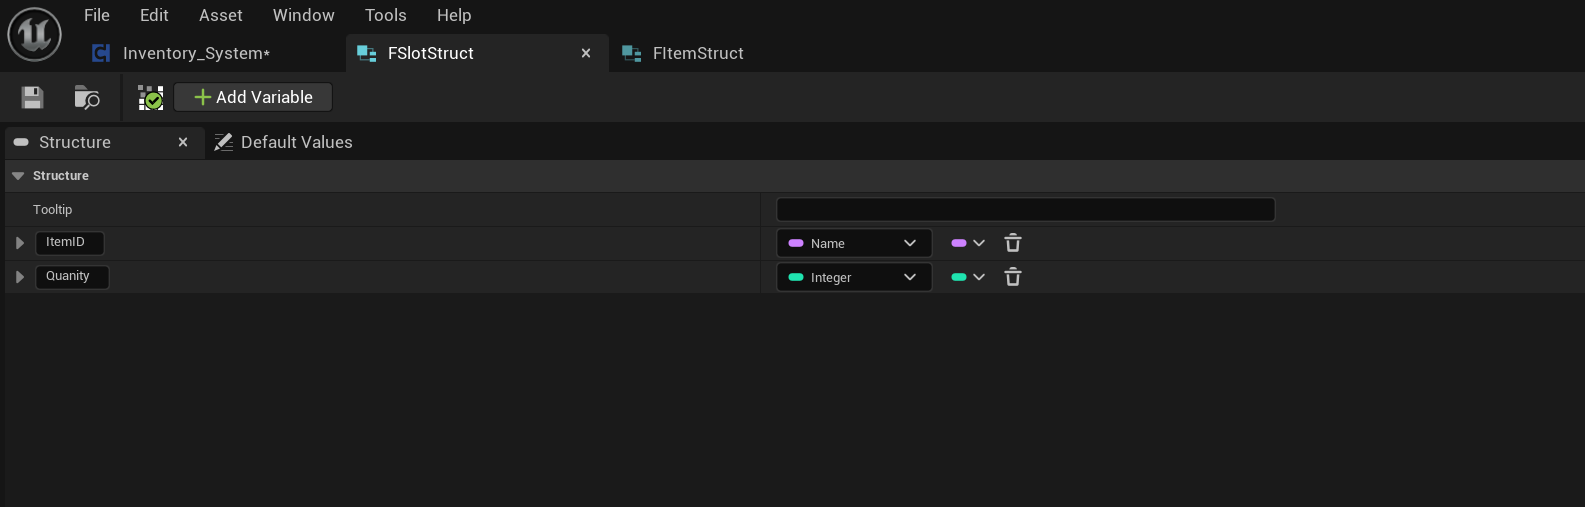
Then, I created Two DataStruct named FSlotStruct & FItemStruct. Struct contains different variables in one place. FSlotstruct, Which has a "name" variable called ItemID & Integer var called Quantity, is the available amount slot.
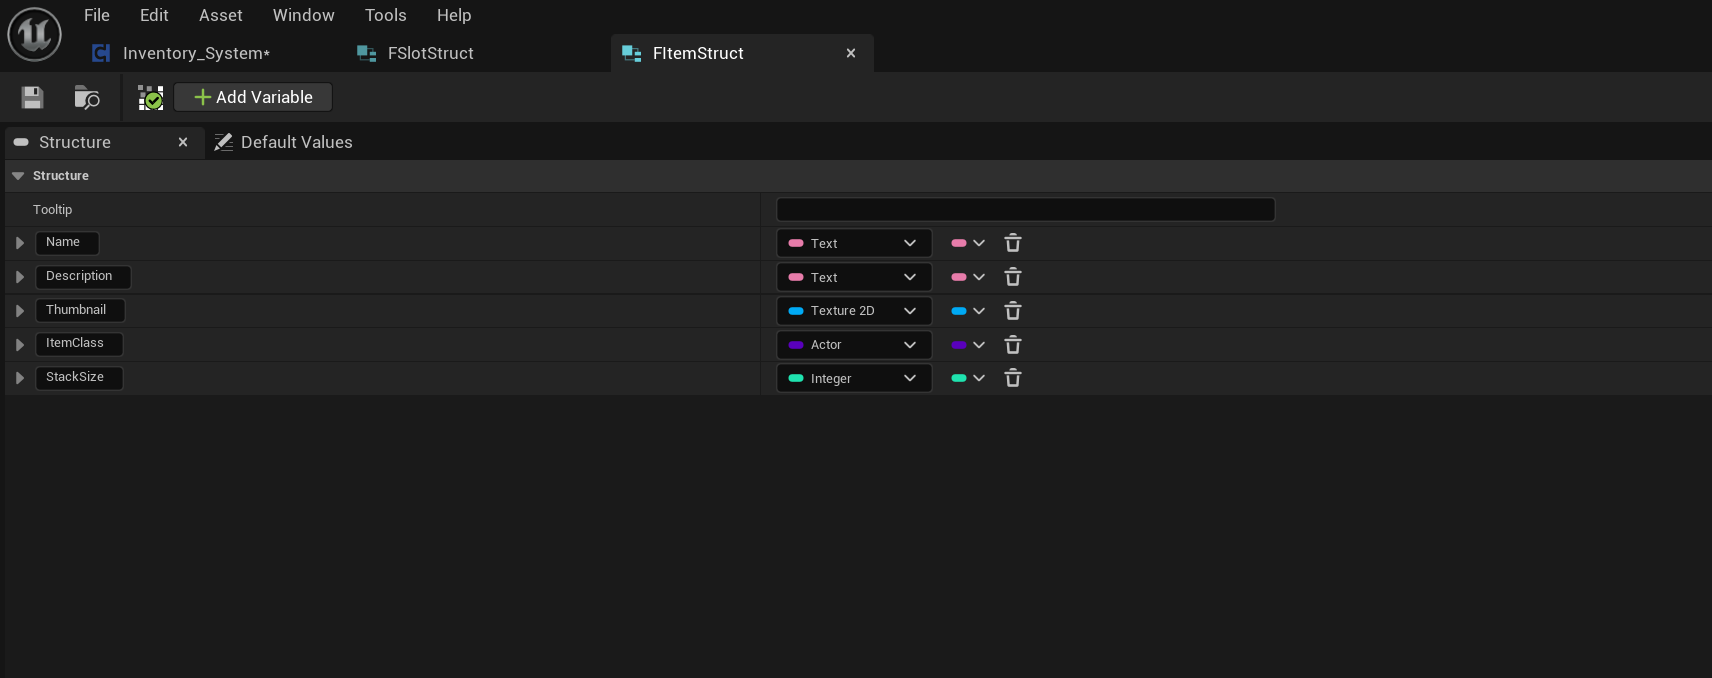
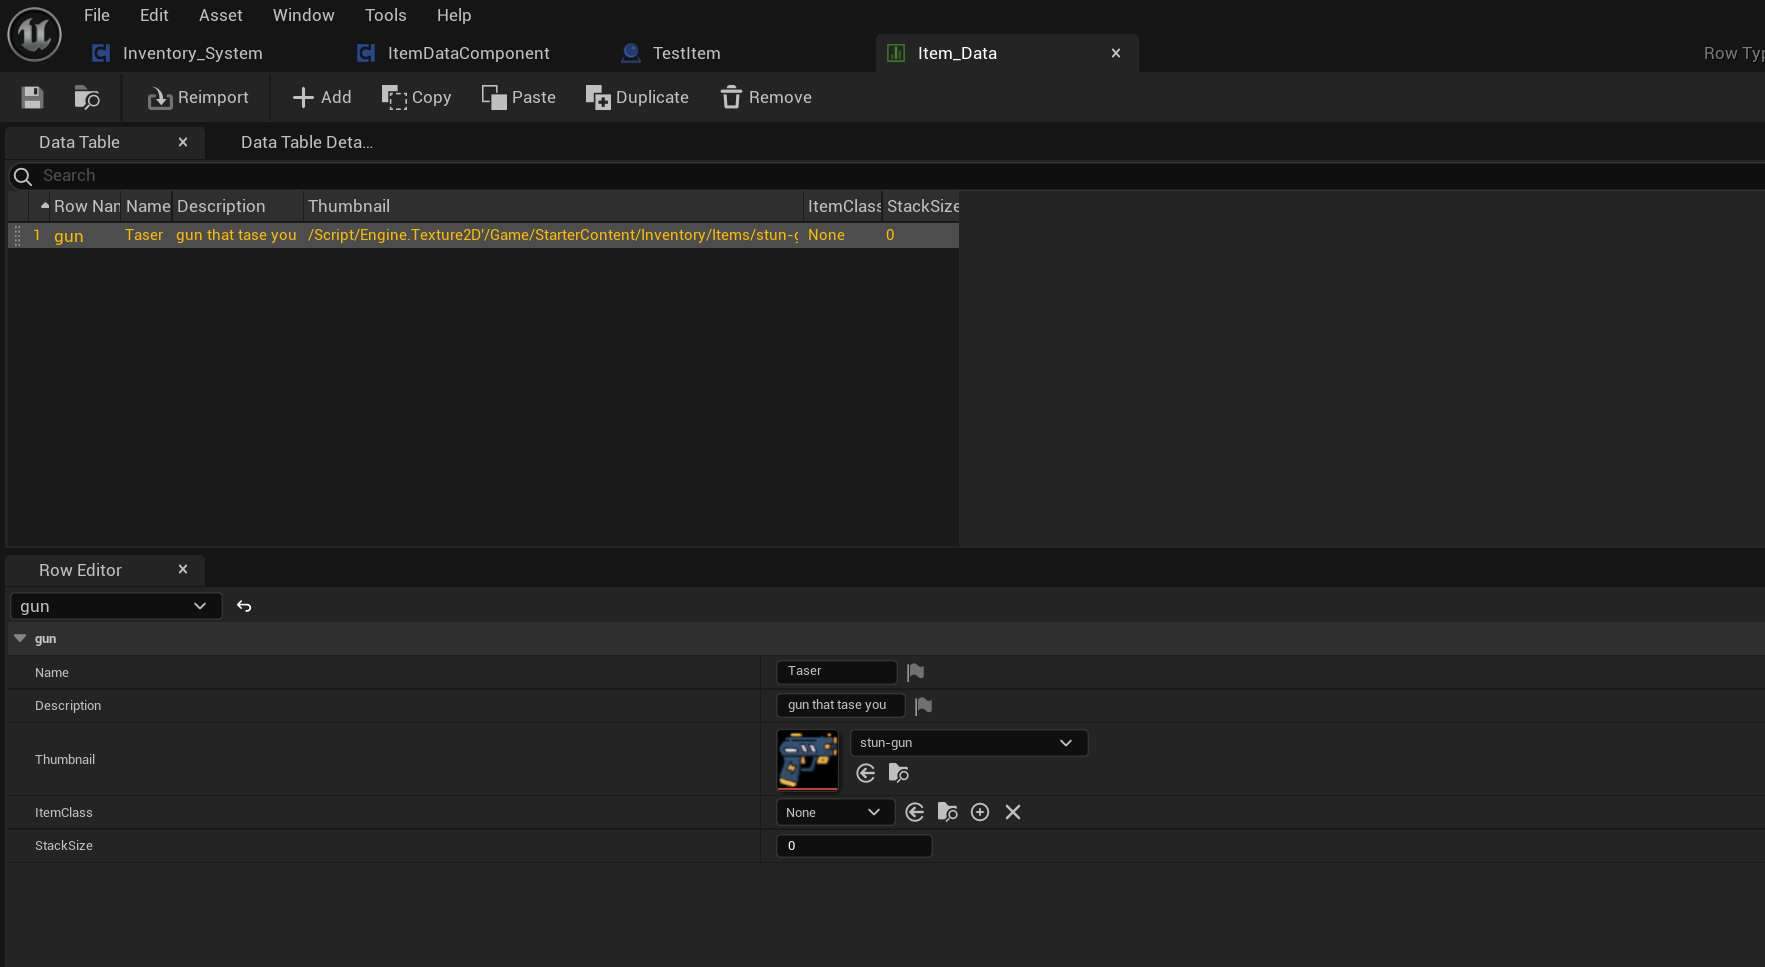
Then there's FItemStruct t has Two text Var, "Name" & "Description," which is self-explanatory (your Item has the name and description on it, for example, when you hover over the item ). The thumbnail uses Texture 2D because we will use Image Icon for our inventory. "ItemClass", set as an actor (Class preference), will differentiate the type of items we will drop. "Stacksize", set as Integer Var, helps determine how many items a single slot holds until the rest are in a different slot.
Then created a DataTable which will continue next video.

WEEK 13 - 12/21/2023
Inventory system part 2
Vid: https://www.youtube.com/watch?v=F0Q_6mOlc-M&list=PL4G2bSPE_8umjCYXbq0v5IoV-Wi_WAxC3&index=2&pp=iAQB
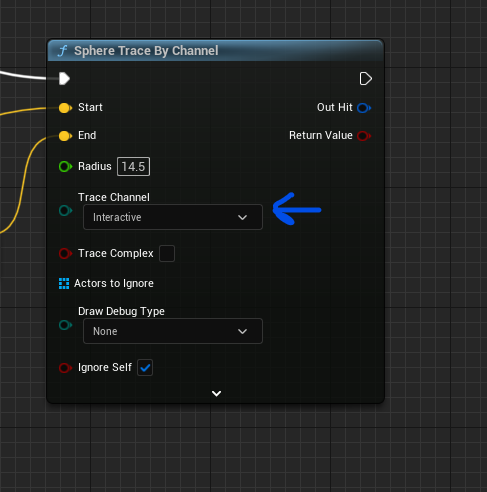
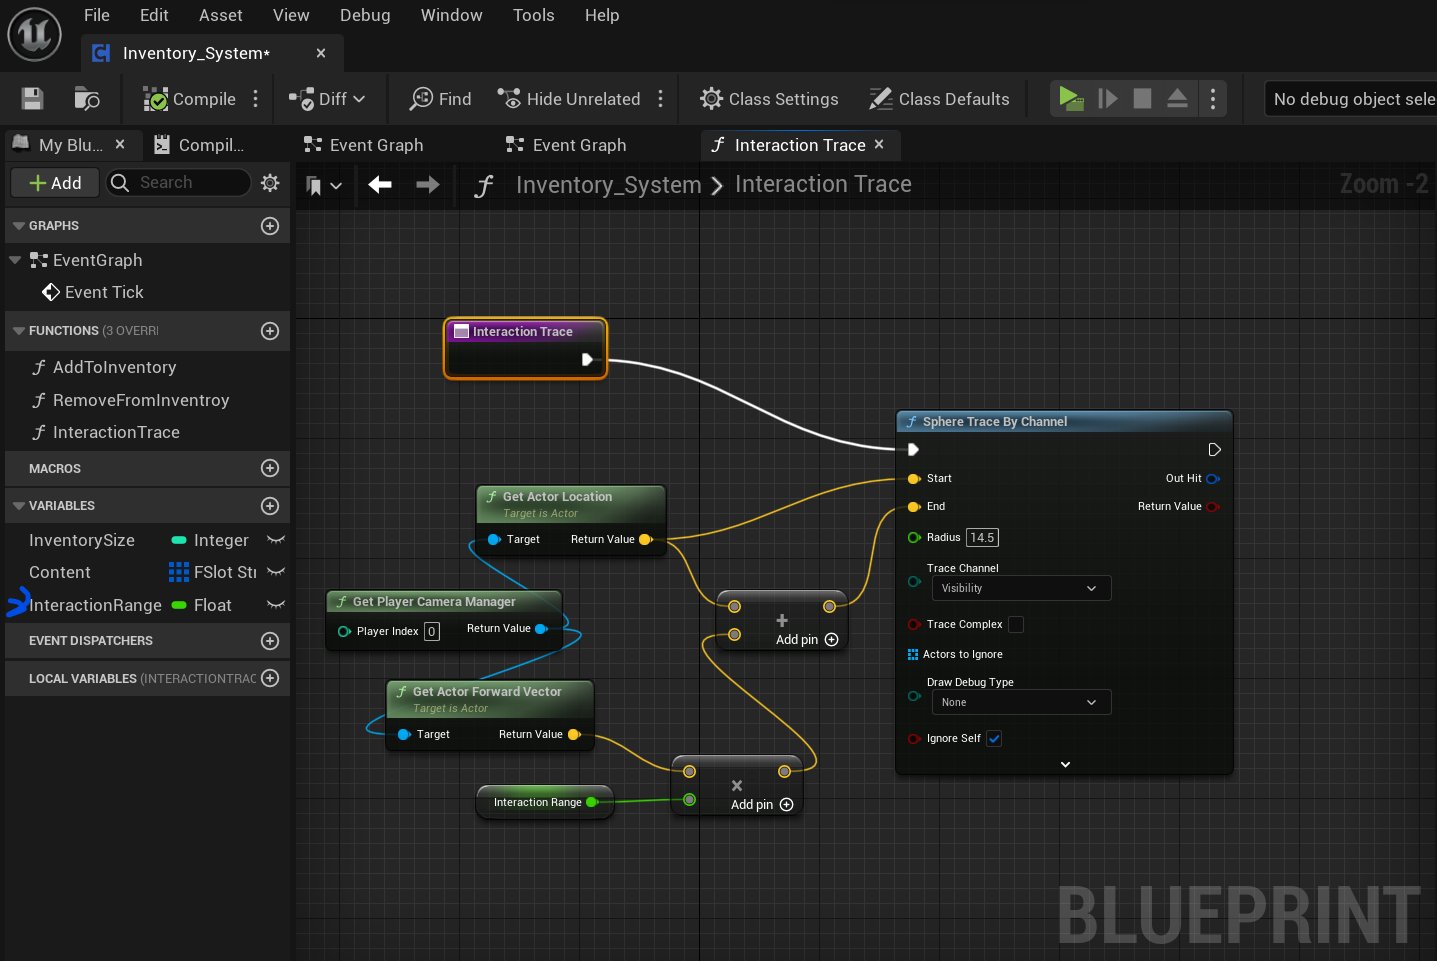
I created an interaction trace function inside the Inventory. Then, I dragged it into the graph and linked it to the Sphere trace by channel. Next, I took the player camera manager and linked it to the start in "Sphere trace by channel". I also linked the "Actor locator" to this section. After that, I linked "Player camera manager" to "get actor forward vector" and then to a "multiply" node. I converted the bottom pin of the multiply node to a float. The forward vector normalized gave a normal value of 1, but I needed to increase it.
I quickly went to the project settings and looked up my trace channel. Then, I created an interactive channel, and put it as ignore, and put interactive on the trace channel section of the "Sphere trace by channel". I made a "get owner" and made array component link both and linked them to "Actor ignore" on the "Sphere trace by channel".
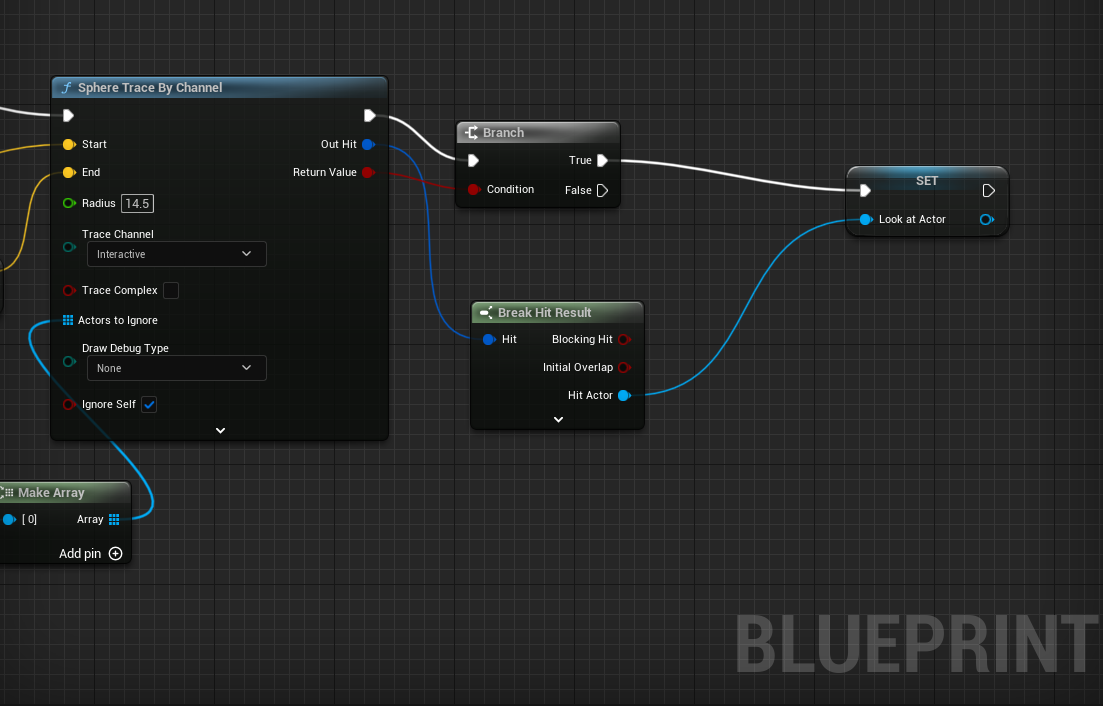
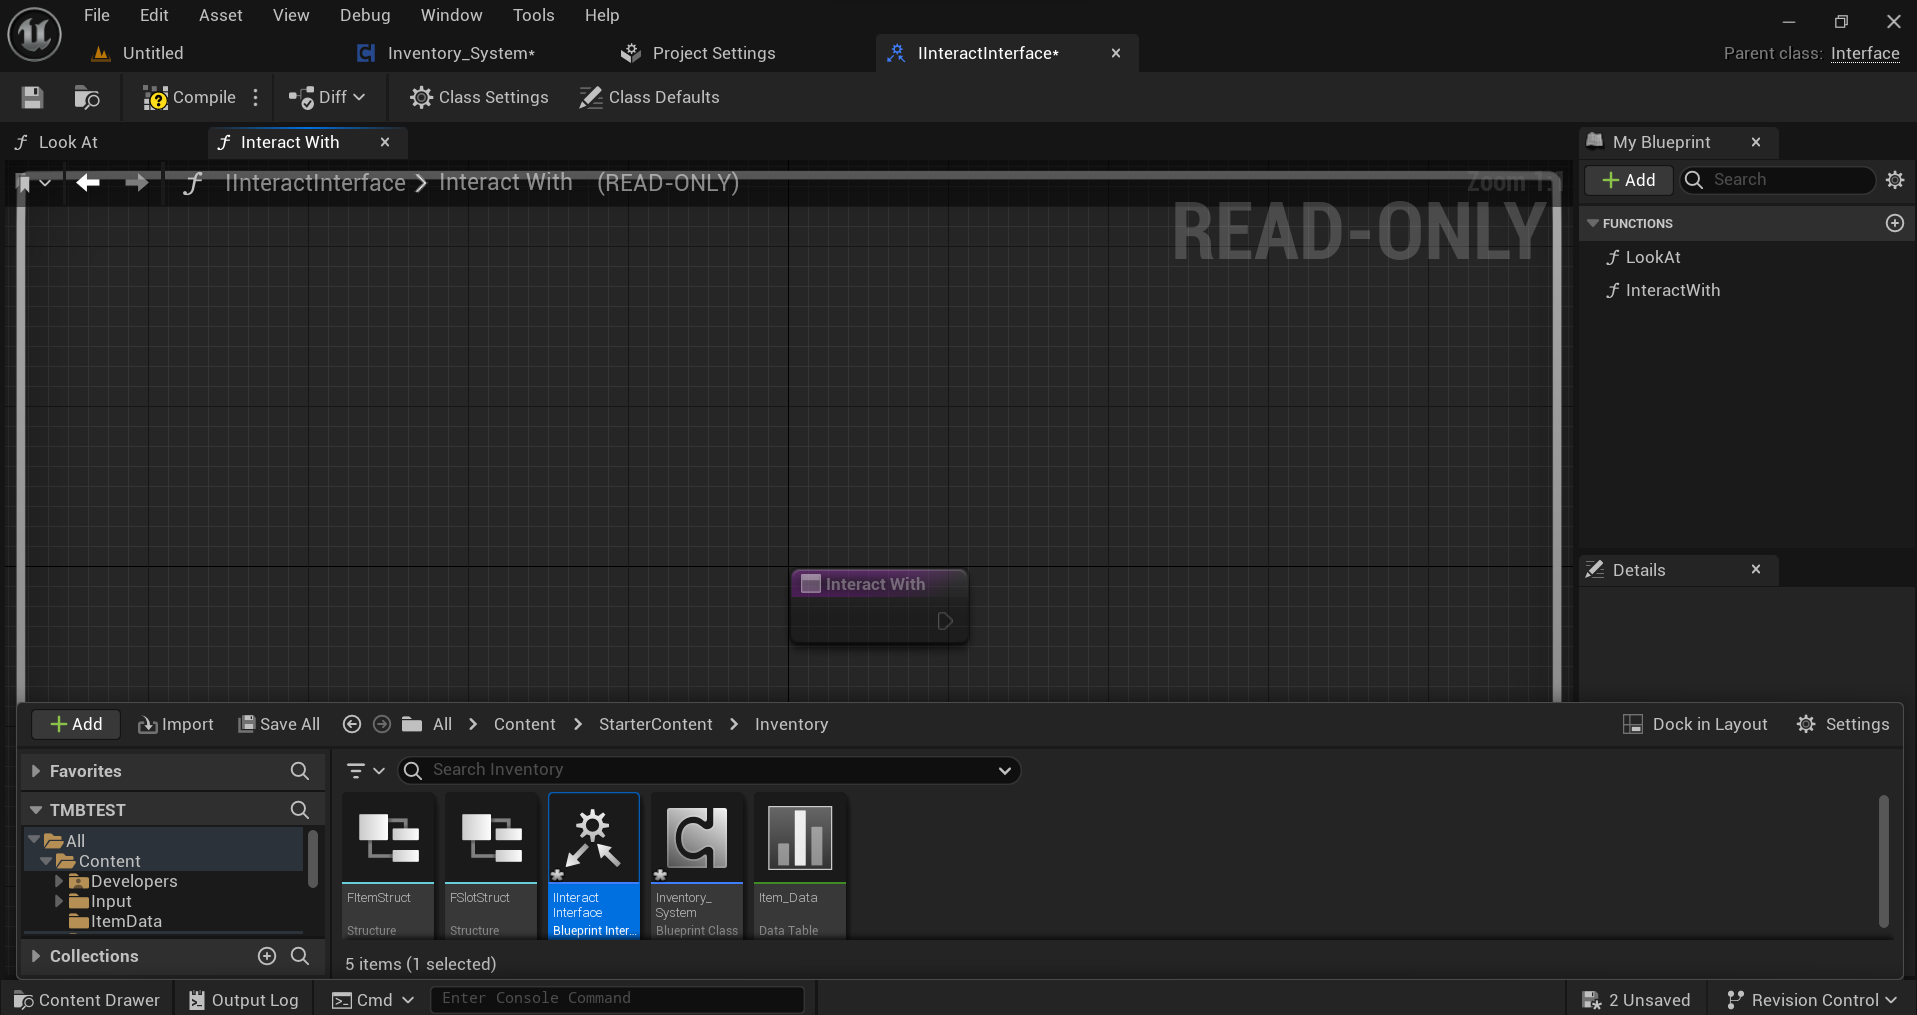
I connected a branch to the Sphere trace by channel and connected the out hit on trace by channel to the break hit result node. I opened it fully and on hit actor, I made a variable called LookAtActor. I quickly made a blueprint interface and named it "Interact Interface".
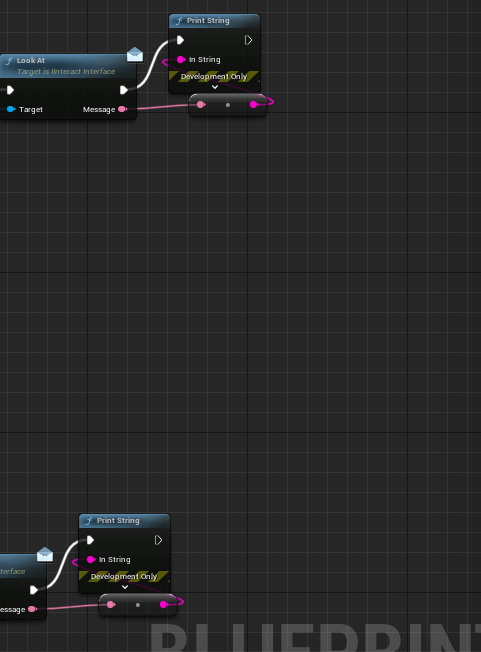
I created an actor BP and used it as a test item. Inside the class settings, I added the IInteractInterface in interfaces, which allows it to use the functions. I put a block inside for the test. I put a message in the LookAt function return node so it would show up when I interacted with it. Then, I linked the Look at to print string for it to work.
Just a small clarification, the message didn't show up, but luckily I saw a comment that helped me fix the issue. The reason my code didn't work was that I did it in TPS and the video was in TPS. So, I edited some numerical and copied the whole thing again in the same graph for TPS. And I placed ignore in the collision.

WEEK 13 - 12/22/2023
Inventory system part 3
Vid: https://www.youtube.com/watch?v=TKtvgRUTuuA&list=PL4G2bSPE_8umjCYXbq0v5IoV-Wi_WAxC3&index=3&pp=iAQB
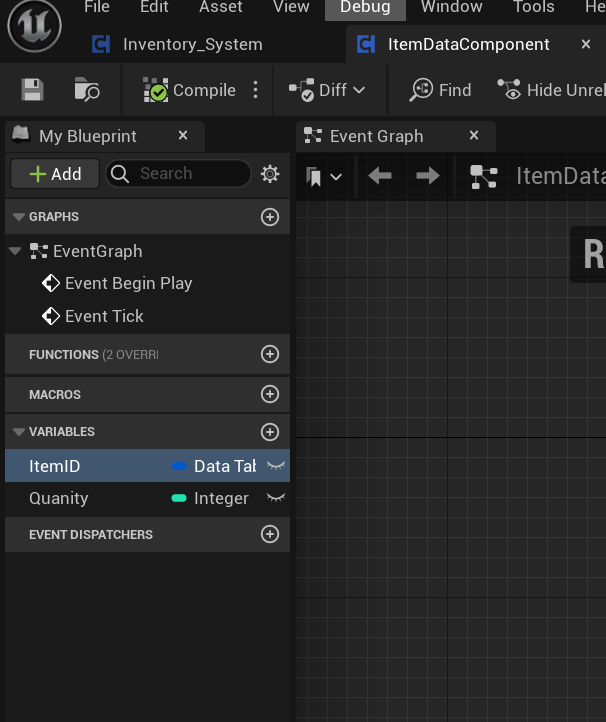
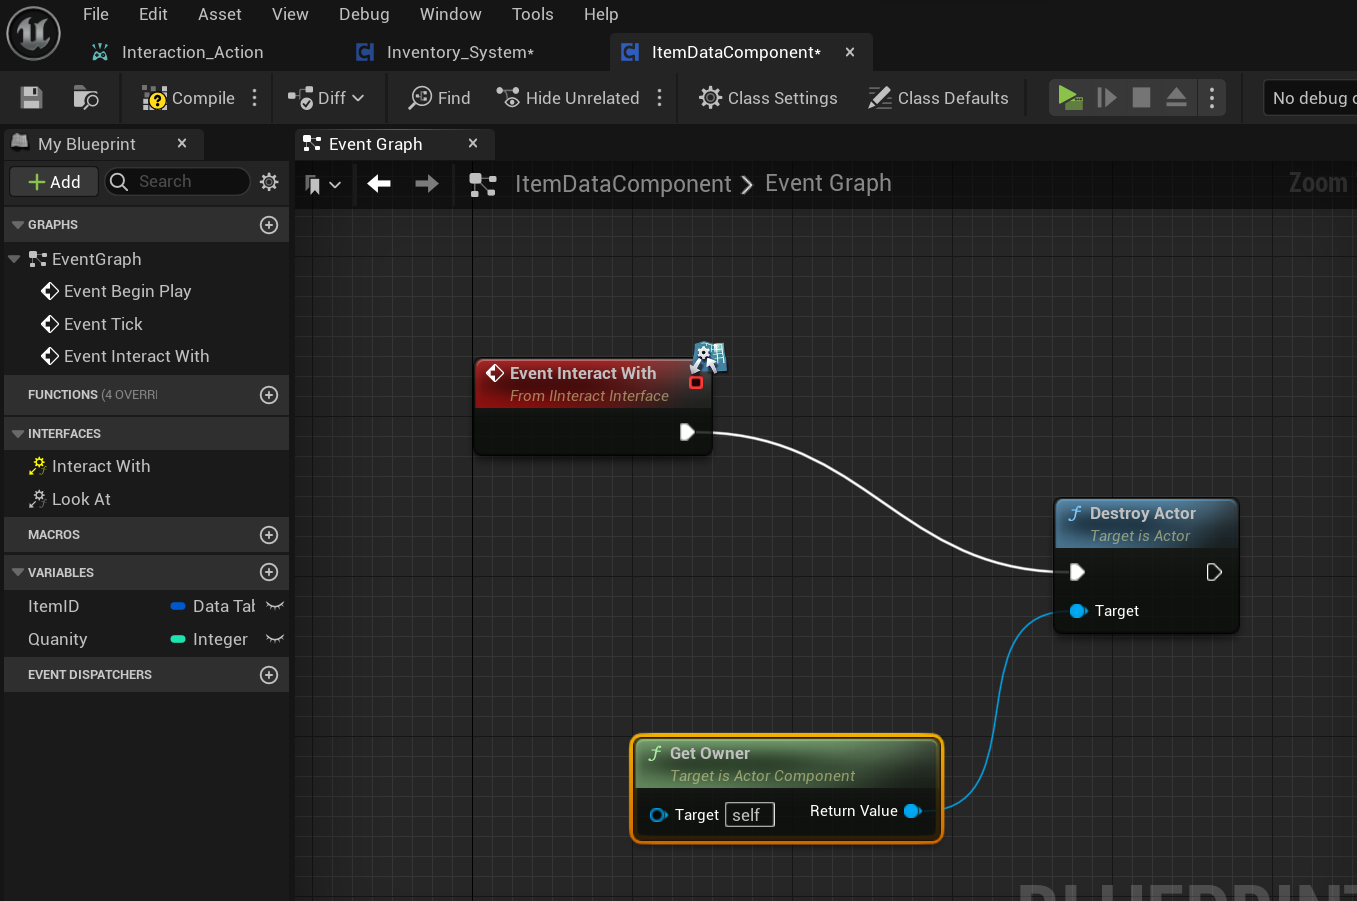
I worked on the Item Data section, which allowed me to add information about the items such as their name, description, and thumbnail. There was an Item Data component where I added the Item ID and Quantity which is important. I edited the LookAt the function to blend well with the row data table. I also made a small fix on the text print.
WEEK 13 -12/22/2023
Unity dev
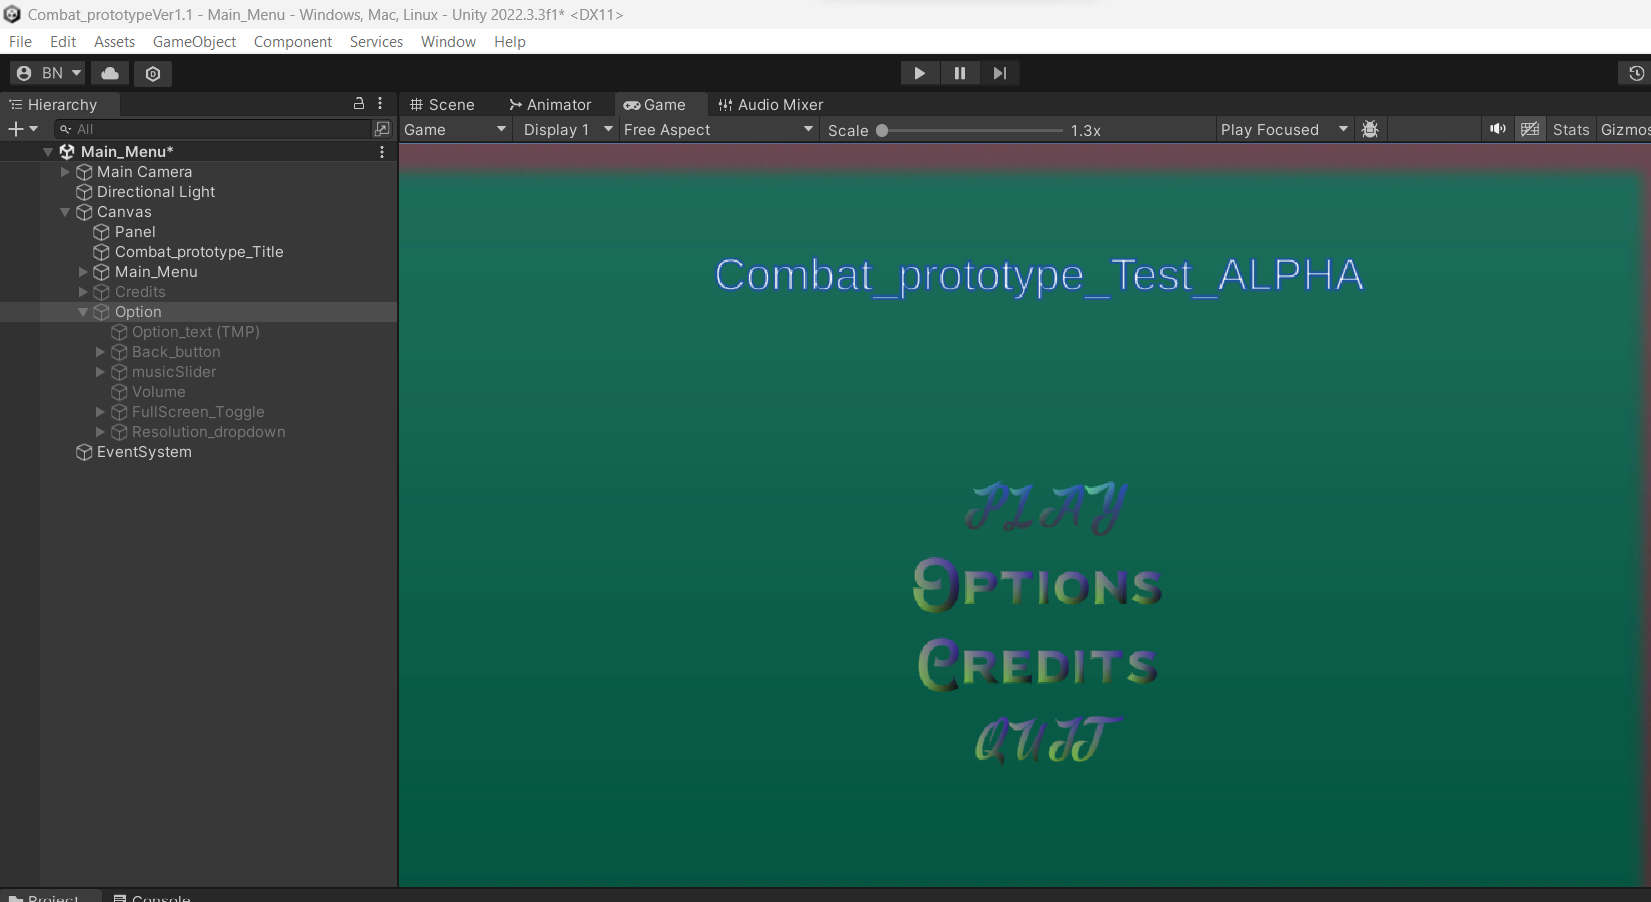
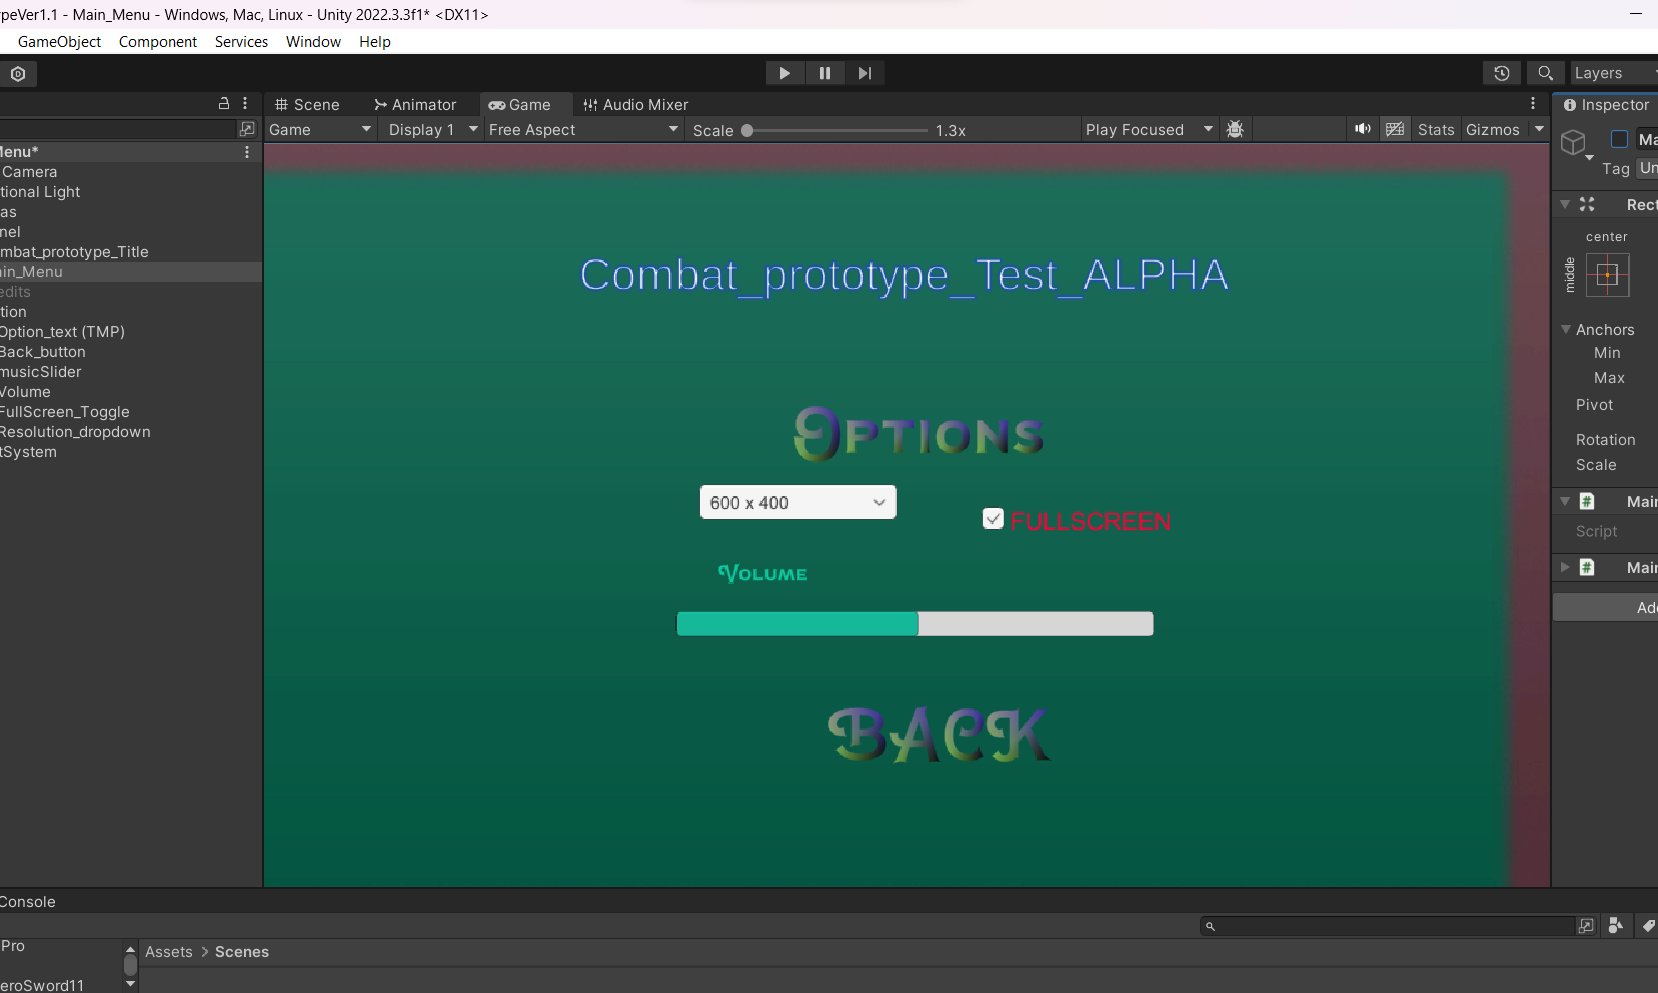
While comming back to unity I decided cut things out That I wanted include.The reason is time and I'm near deadline and the other is that I have I'm new to unity and some of things animator, based layer, modular system and many more I'm not famaliar , and I have don't have time for this deadline trying to find solution just for it too fail. So i decided cut for the mean time and in my spare time learn and develop my skill and understanding of those things so I can better prepare myself. But aye for attempt, it was ok , I made the character move and perform some simple animation combo. Which is ok .
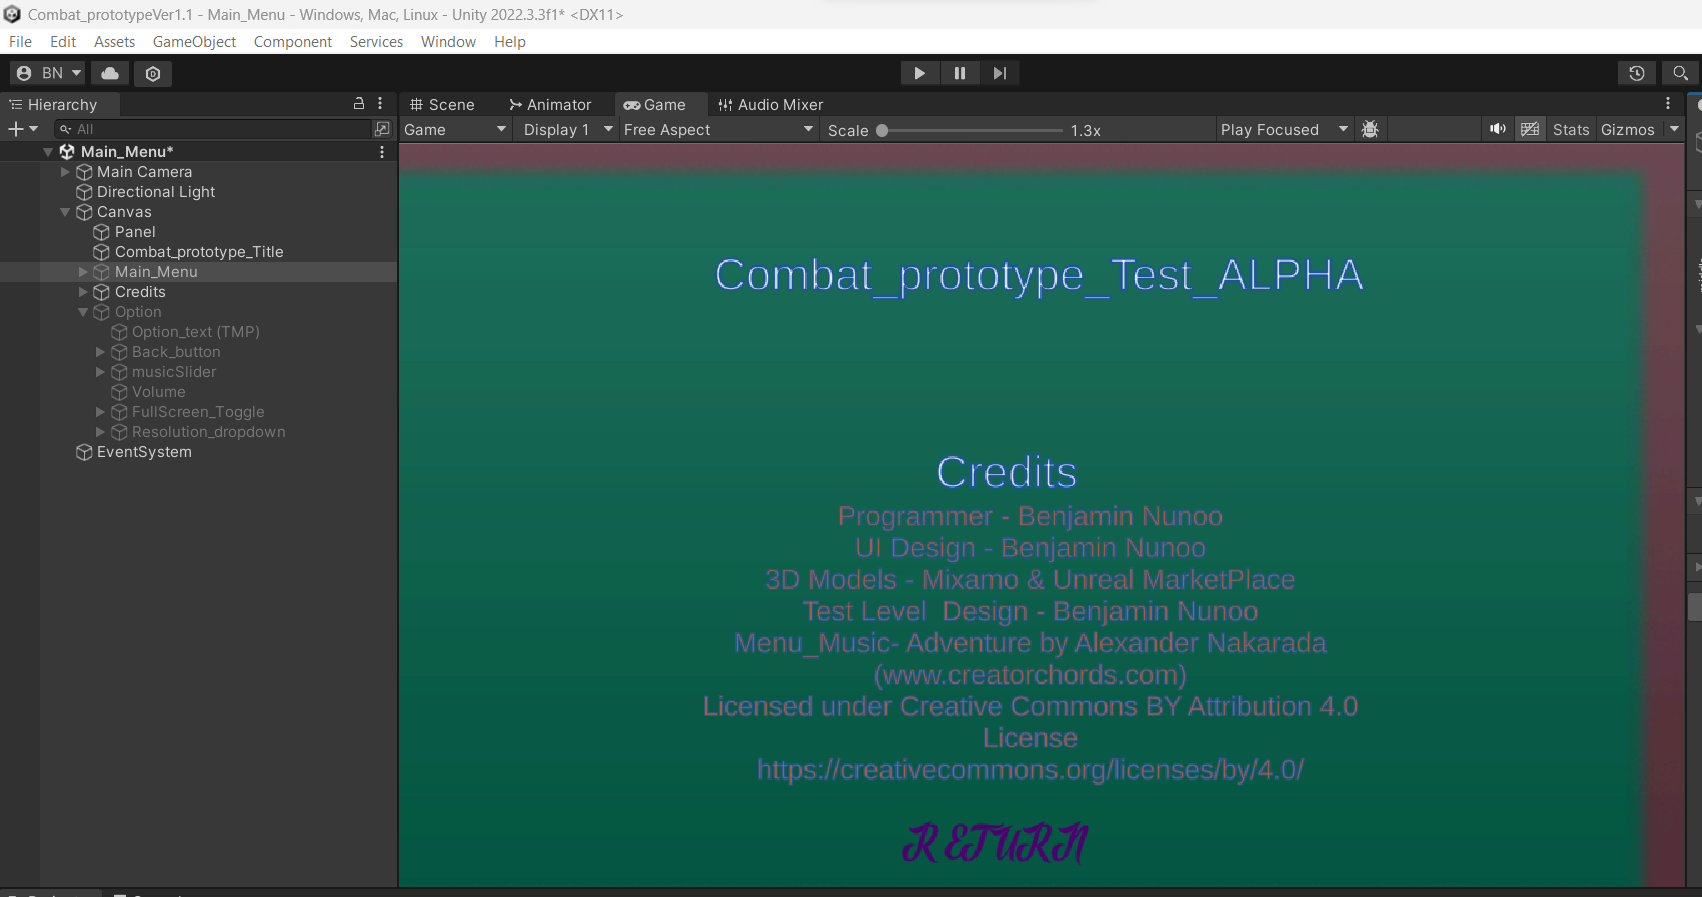
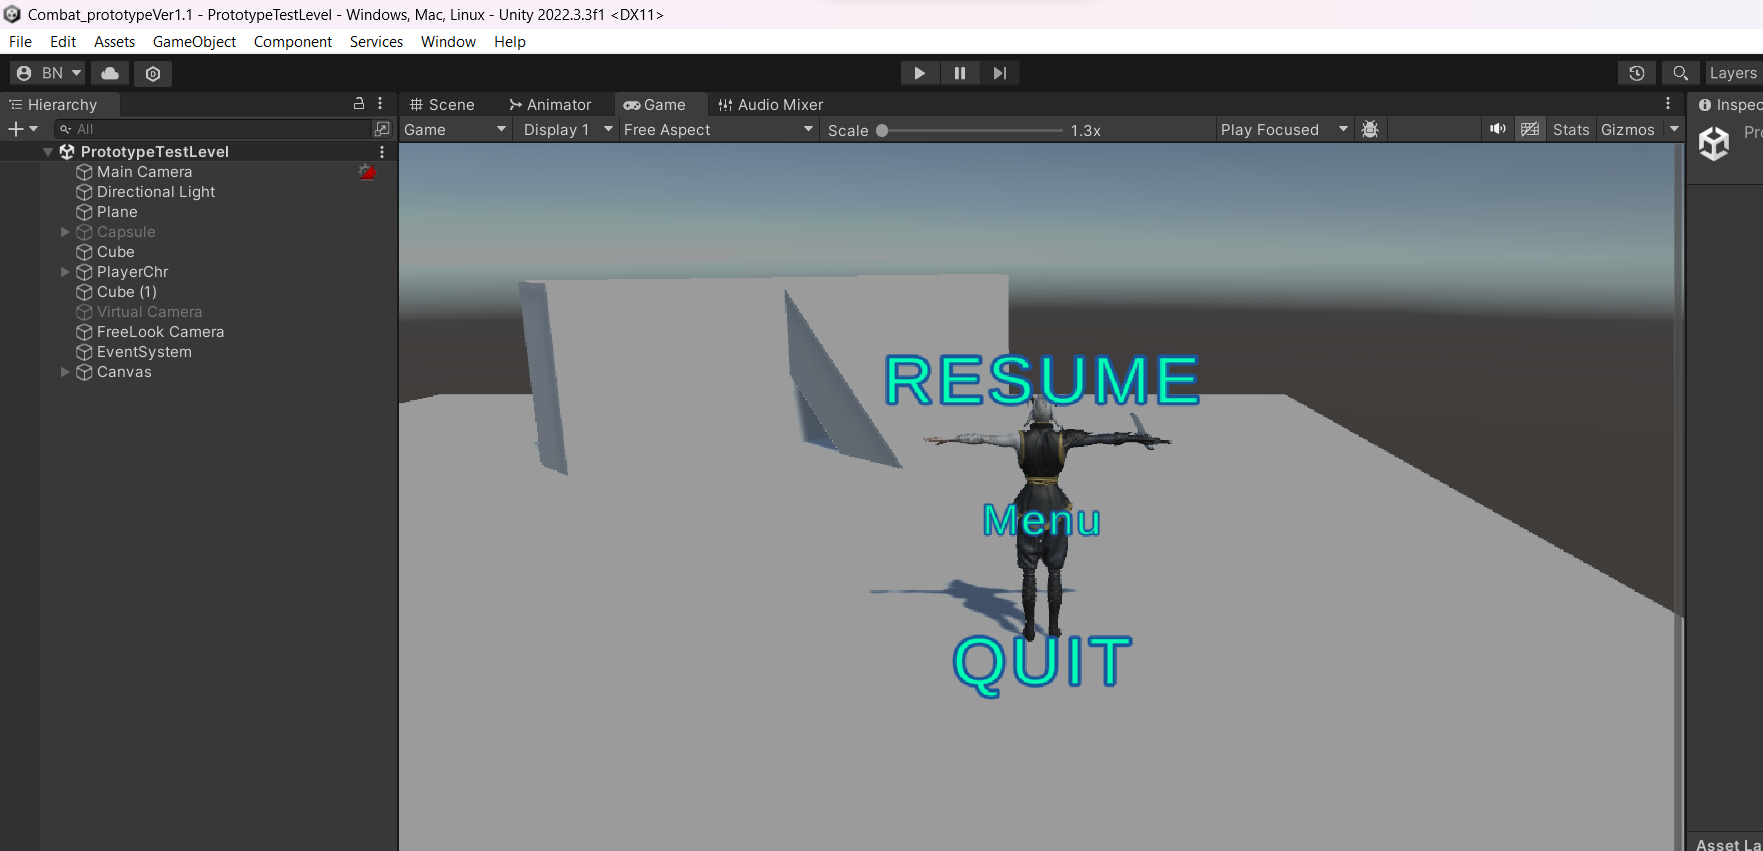
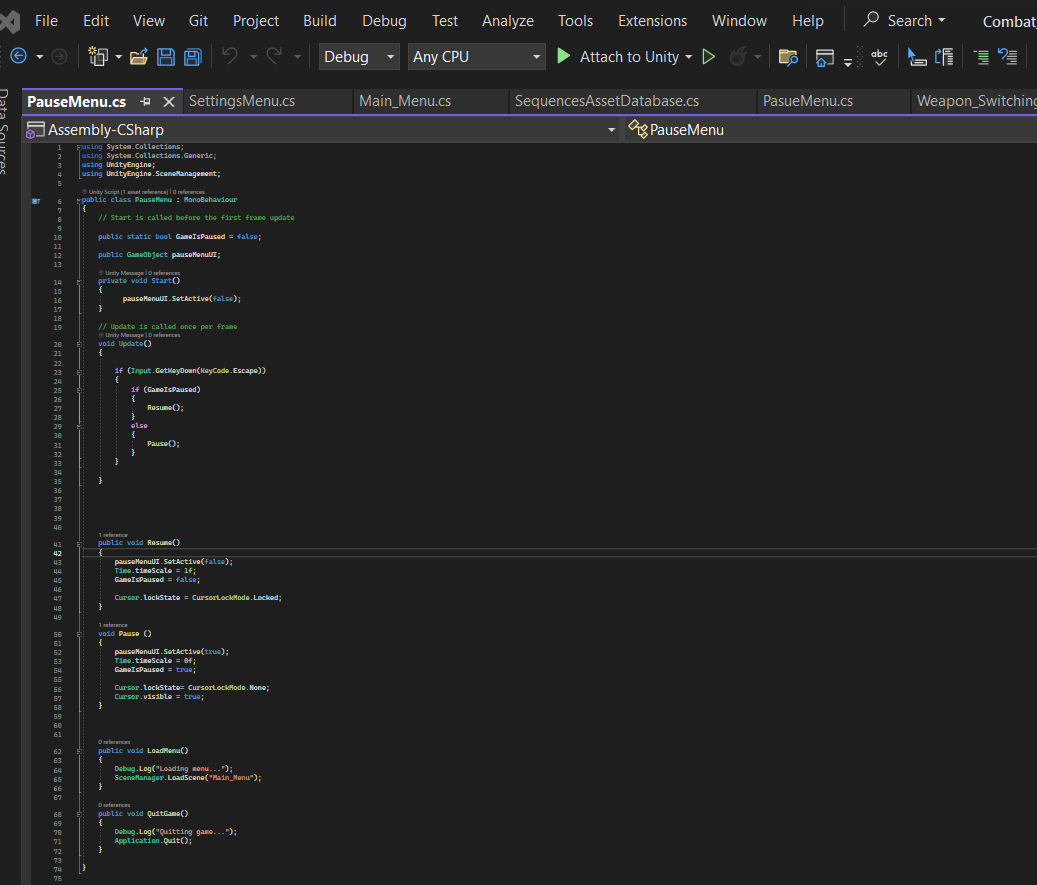
Today I rebuild my main menu and made a pause menu for the first time. The interface on developing it is similiar on unreal, I did have some issue but soleved it all to do with cursors and funny enough , the code for it I found in comment on the youtube video I following, (https://youtu.be/JivuXdrIHK0?si=vybn1HOsryN1x18E).
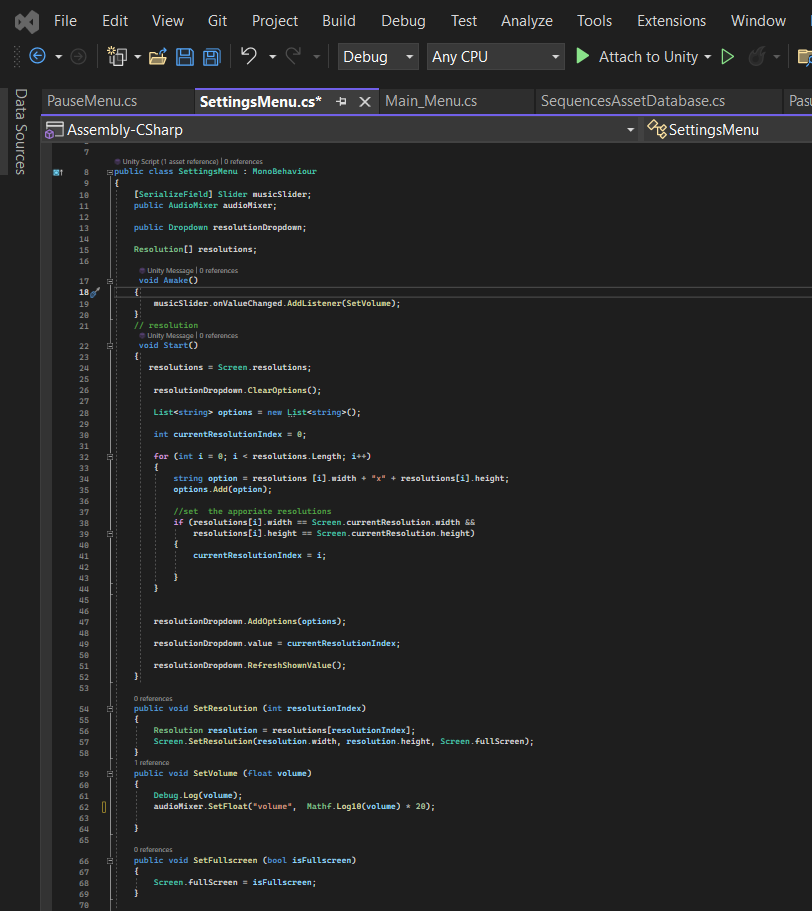
I made options section, from resolution , fullscreen , but I couldnt get slider for music but I could only just placed sound at specific volume.
I build the prototype.
If I have time I might make weapon wheel or inventory( but I making on unreal).
WEEk 13 - 12/24/2023
Unreal inventory part 4
Vid: https://www.youtube.com/watch?v=4bXYl11sFew&list=PL4G2bSPE_8umjCYXbq0v5IoV-Wi_WAxC3&index=4&pp=iAQB
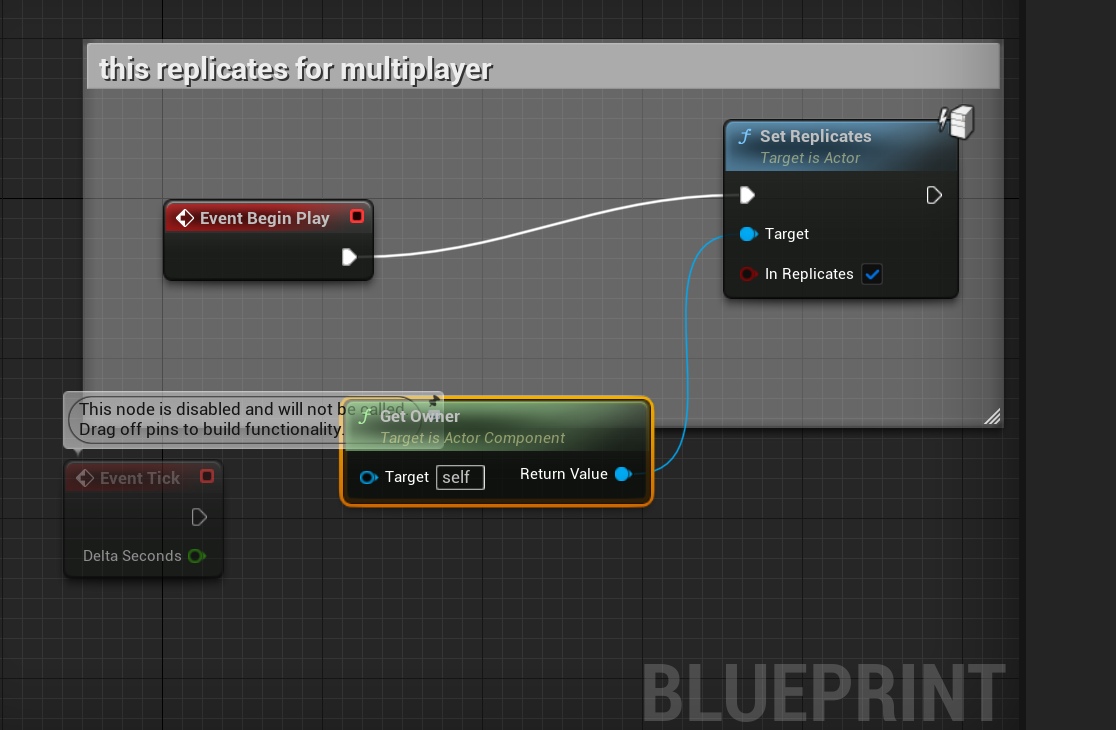
This part I'll be going over Item dispearing, this also include replicate dissapearing in multiplayer , but not attempting it multiplayer in this prototype, but implement it incase.
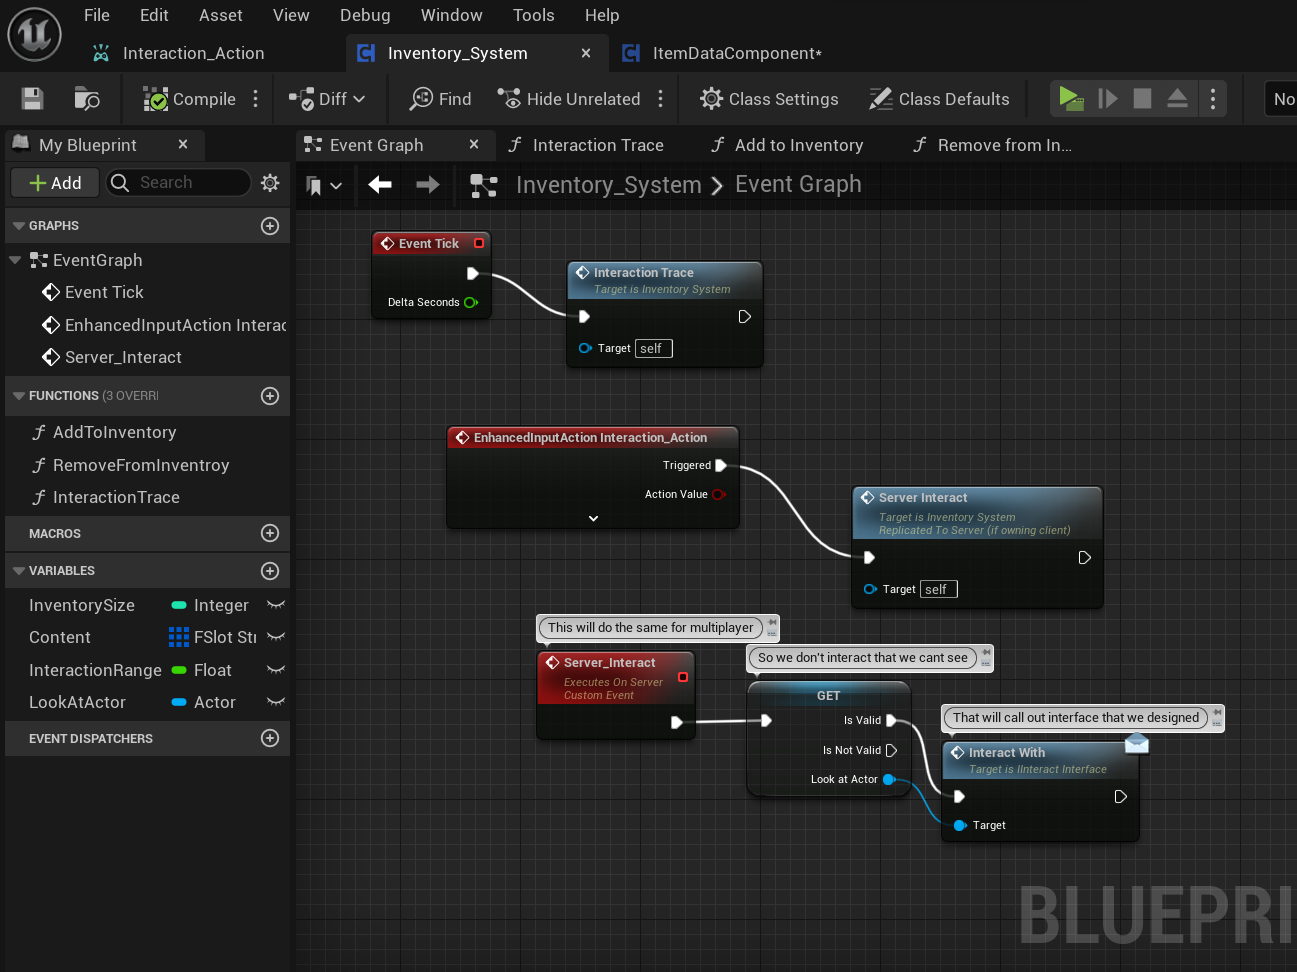
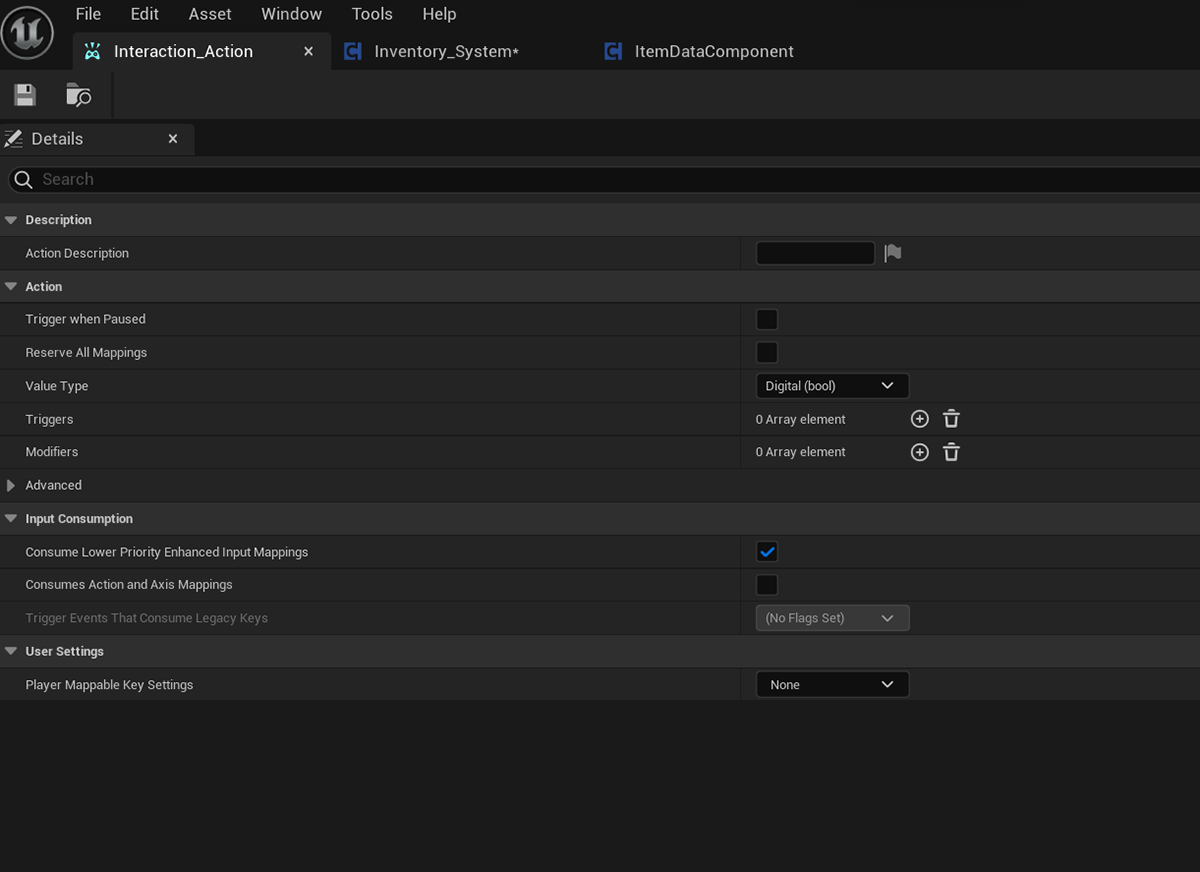
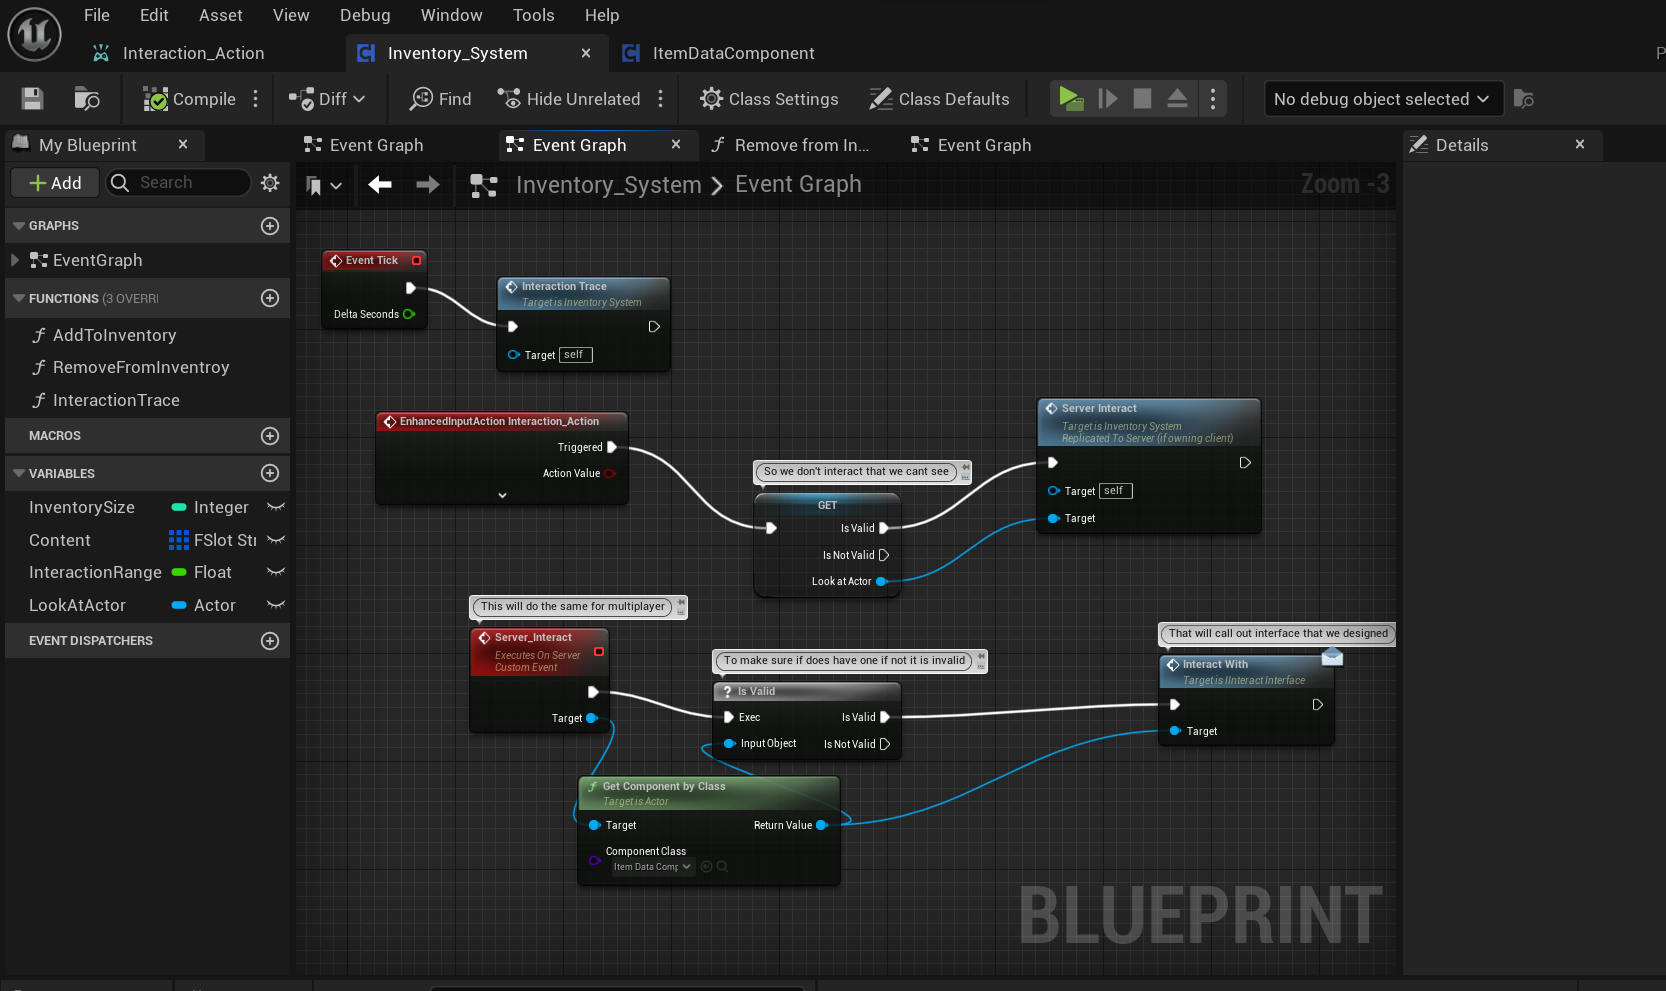
First in the Inventroy system I created, a custom event called server interact, that will replicate the same destroy action in a multiplayer server. Follow with a IsValid?(To make sure if does have one if not it is invalid) . As well Follow with a Interact with reference , which we made custom event in the item data component to delete the actor.We used get component class to link the Server Interact and the reference(this is link with object when get deleted). I also used the Enhanced input Action for Interaction that I made when I tried to use it for c++ to make inventory . I link to "get invalid"(So we don't interact that we cant see) link to server interact, this will help multiply but also put the functionality for the interaction when I press "E" it will dispear. The event tick that I use start immendiantly, and it run the reference of interaction trace.
WEEK 14 - (DEC)12/26/2023
Unreal Inventory part 5
Vid: https://www.youtube.com/watch?v=-cdzw9YE-MM&list=PL4G2bSPE_8umjCYXbq0v5IoV-Wi_WAxC3&index=5&pp=iAQB
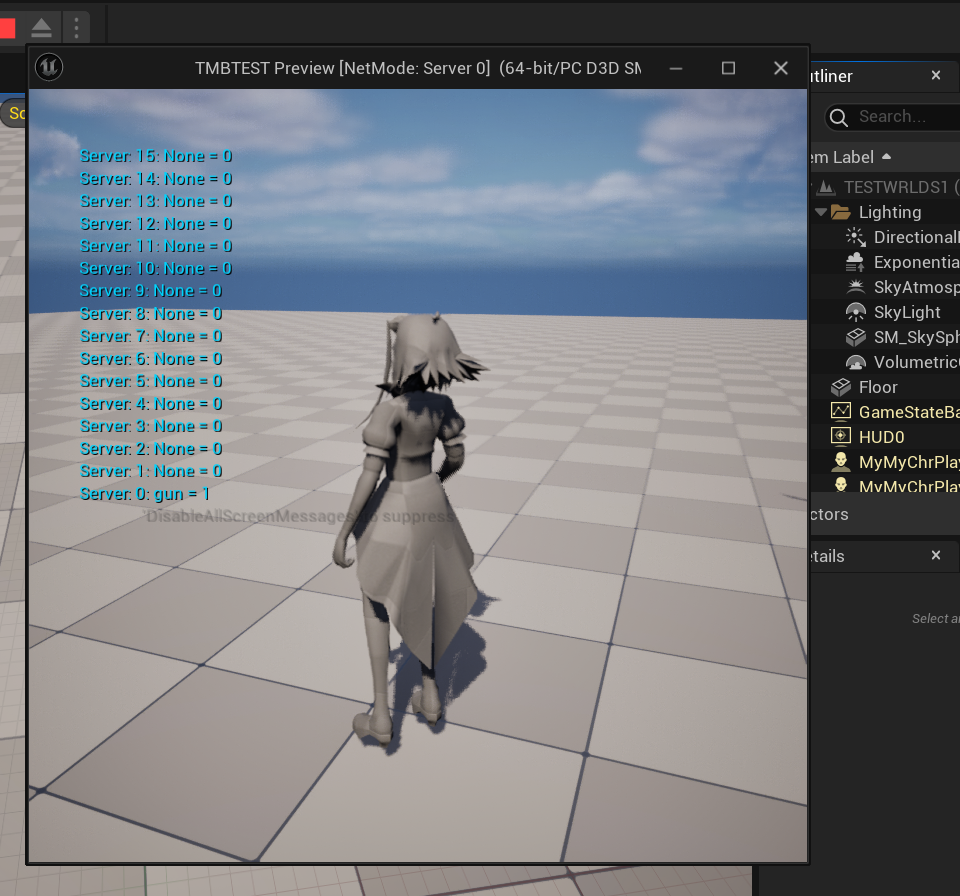
Today's part of the video turtorial , that follow was about "add inventory" was the main technical function of adding the item in the inventory , we had it shown on our print string as a name value and numerial .We made sure it was shown in both client.
WEEK 14 - (DEC)12/27/2023
Unreal Inventory part 6
Vid: https://www.youtube.com/watch?v=iqi-kg7n-io&list=PL4G2bSPE_8umjCYXbq0v5IoV-Wi_WAxC3&index=6&pp=iAQB
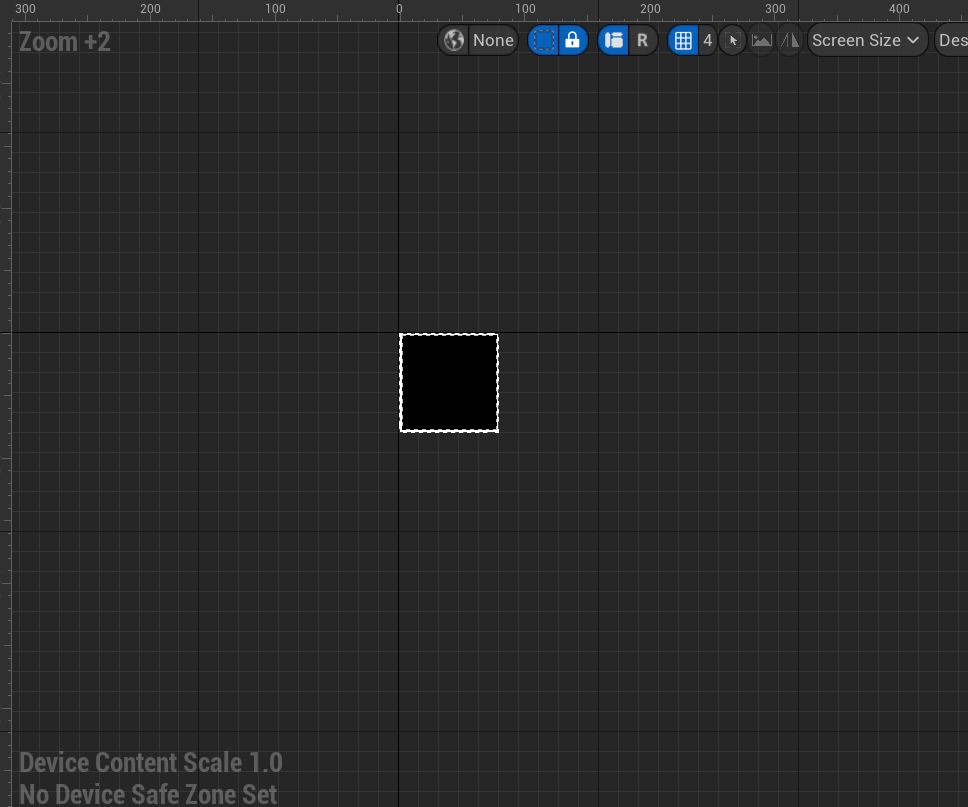
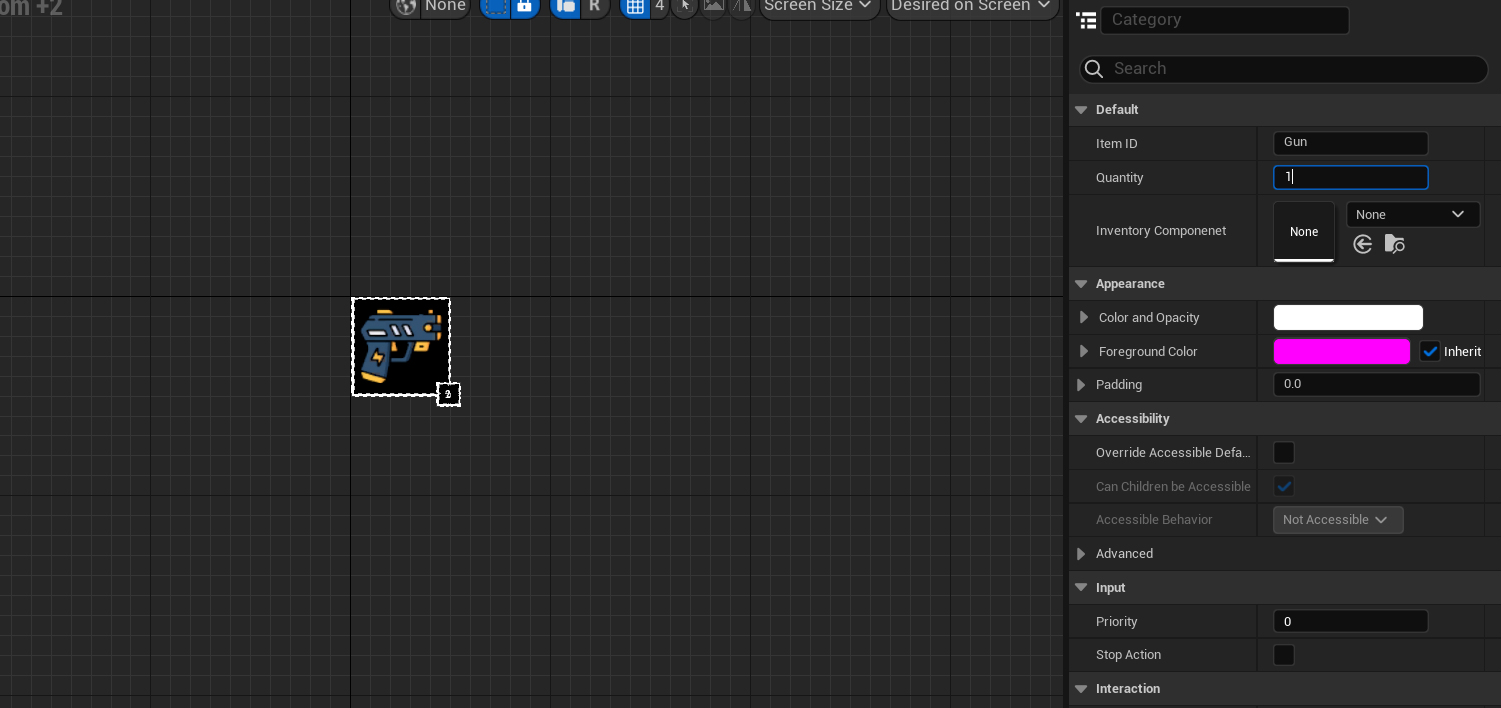
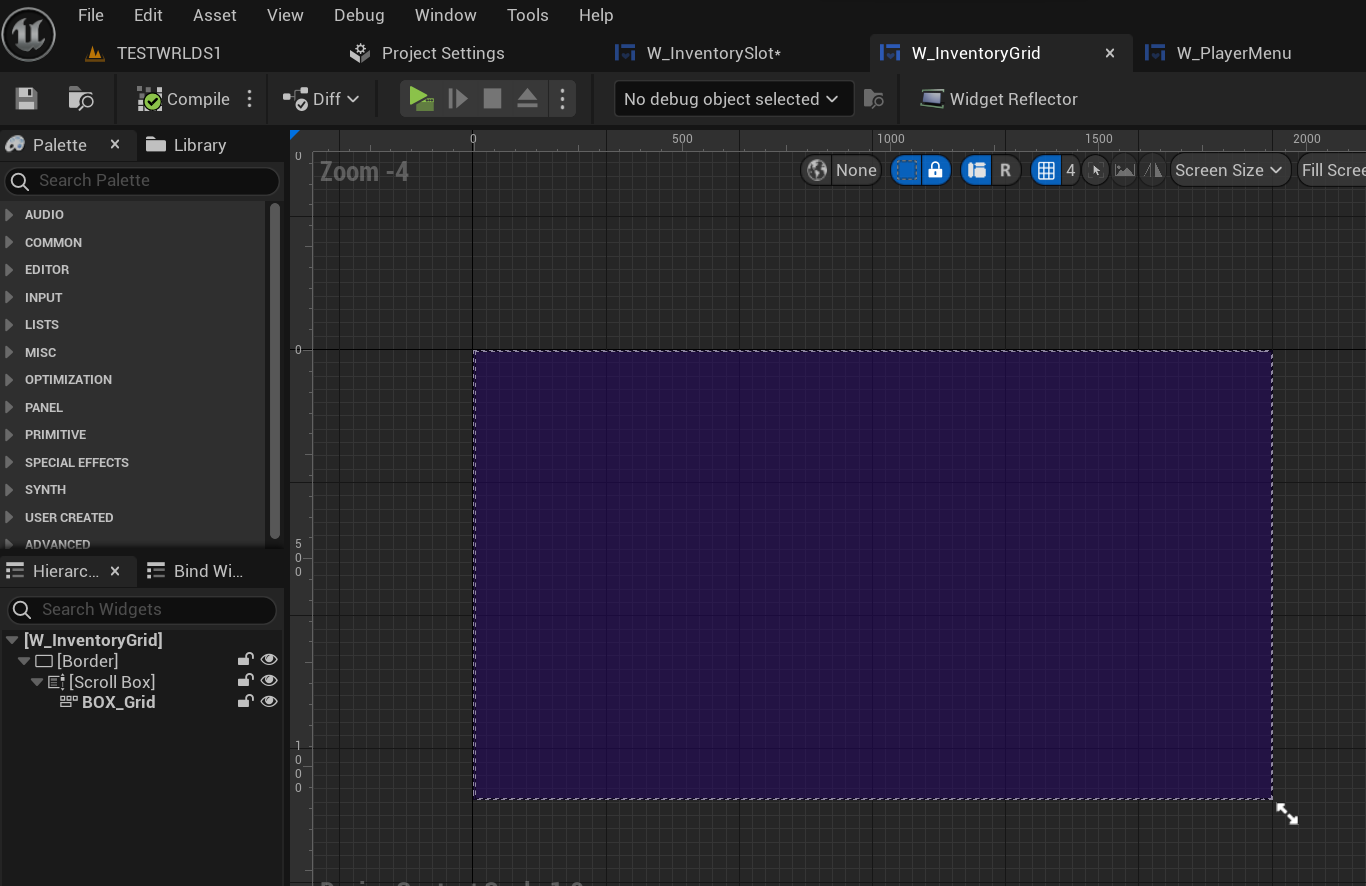
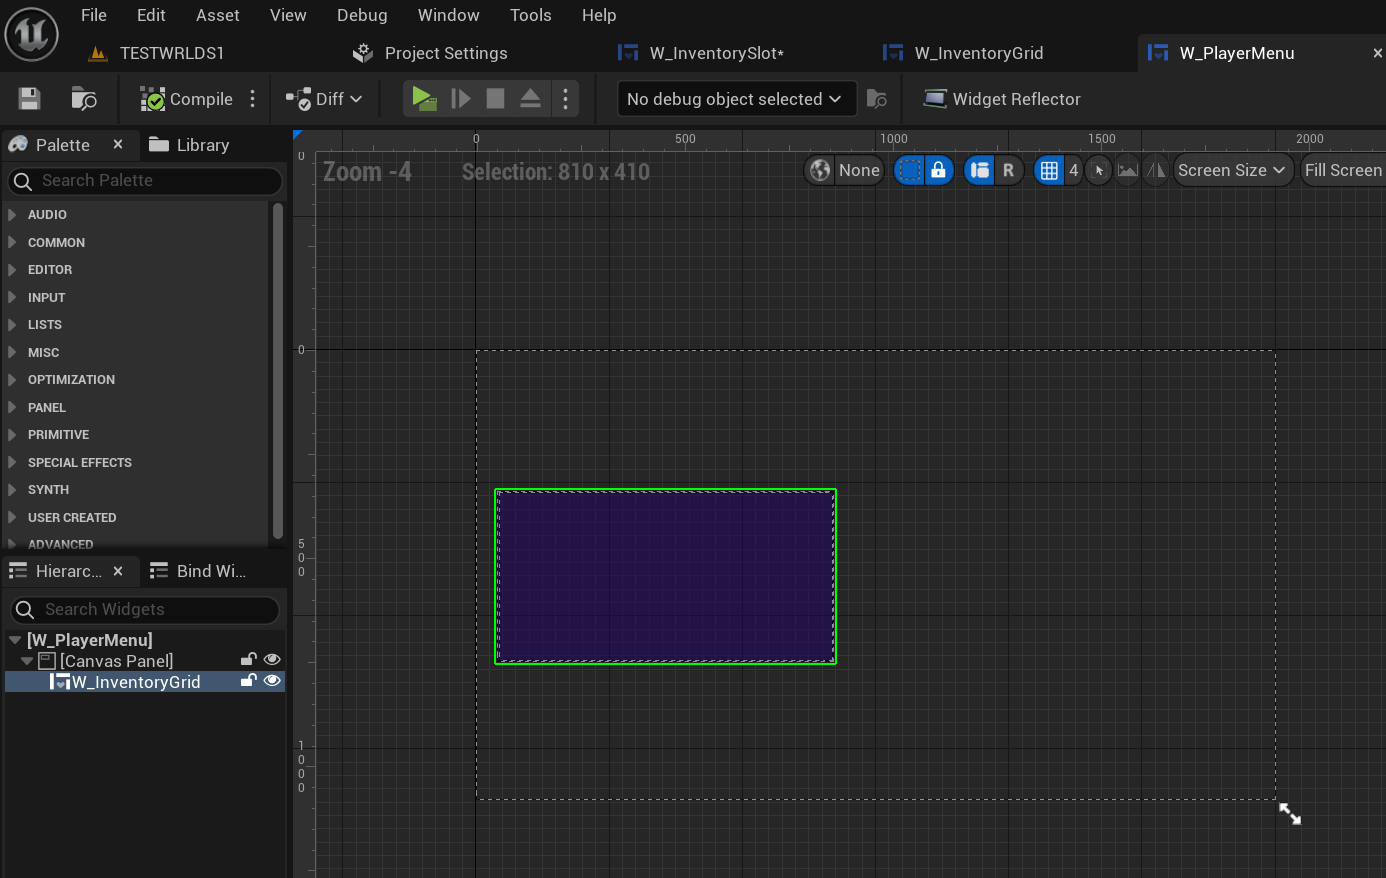
Today tutorial part I was following I am going to setting up the widget we will be using for the inventory. From the itemslot Icon to the widget grid.
WEEK 14 - (DEC)12/27/2023
Unreal Inventory Part 7
Vid: https://www.youtube.com/watch?v=yx3umVORujE&list=PL4G2bSPE_8umjCYXbq0v5IoV-Wi_WAxC3&index=7&pp=iAQB
In this Inventory pathway tutorial, I made it so that Inventory appears and disappears at the press of a button. We combined Parts 5 and 6, which are decent functional inventories.
Today, we will come to the end of this semester and our projects. I'll put the inventory development at a halt. I have put most of its functionality in the game project, and it works; I can open and close it, and if I interact with an object, it will disappear and appear in my inventory and show there. There are other functions that I would like to add, but I need to send in this work, and the deadline is arriving soon. But I will continue during my spare time.