This is the self-study section, Where I learn new things that might not be taught in class or might be taught in the later year and need to be prepared. I'm doing this out of my free will. I believe this will help now and in the near future. I'm not taking any chances from what I had to go through, and sometimes I am somewhat suspicious, and it matters in your hands. I take my craft seriously. I have one future and I need to make it count.





10/15/2023
For today's self-study, I went over C++ on Unreal; the reason is to have a better and early grasp of C++ and what definitely need to know. I learned from a Video(https://youtu.be/xZjZimU31wc?si=eKYl3TRFUcvJxqfv), How to Implement Player Movement in Unreal. As always, I made an Unreal project, set it to C++, named it, etc., and started. For some reason, there was some technical issue, but it wasn't a problem; I sorted and got Unreal started.
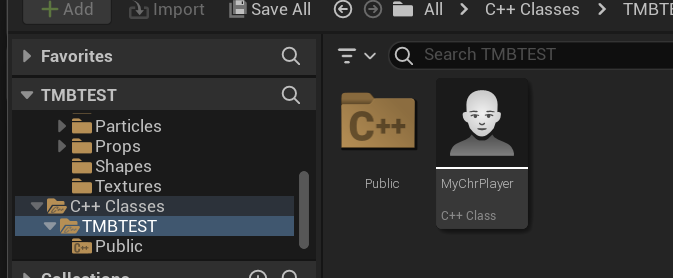
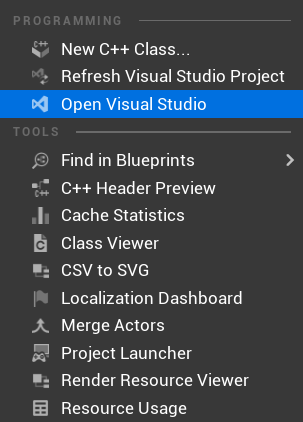
The first thing I made was a New C++ class, Which will be for a Player Character named "MyChrPlayer", This script is linked between Visual Studio and Unreal as well by pressing it will open Visual Studio. When Opening it comes H and CPP tab file. The H stands for Header, which is where you set up the function & CPP stands for which gives the function functionality. Headder>>CPP reference each other.
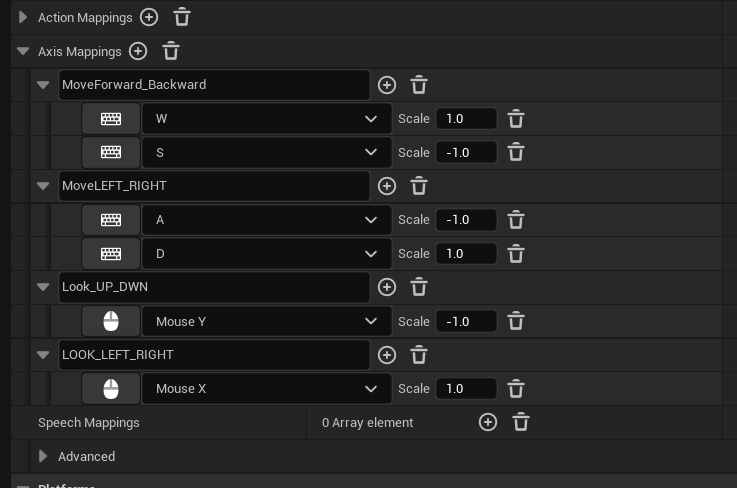
Before you continue make sure to set up key input by going to project setting > Input. It has axis mapping for movement and action mapping for action moveset(like combat input, redeem input, etc). One thing I didn't know and learned is you can only set 4 axis input, LooKup/dwn(as same section input), LookUPLeft/Right(same section input), movefoward/backward(same section input) & MoveLeft/Right(same section Input). And while also putting the two opposite keys on each, like "W" and "S" and "A" & "D", all you have to do is change the scale to positive and negative, like this W = 1.0 and S = -1.0 and it will go the opposite direction, nice trick.
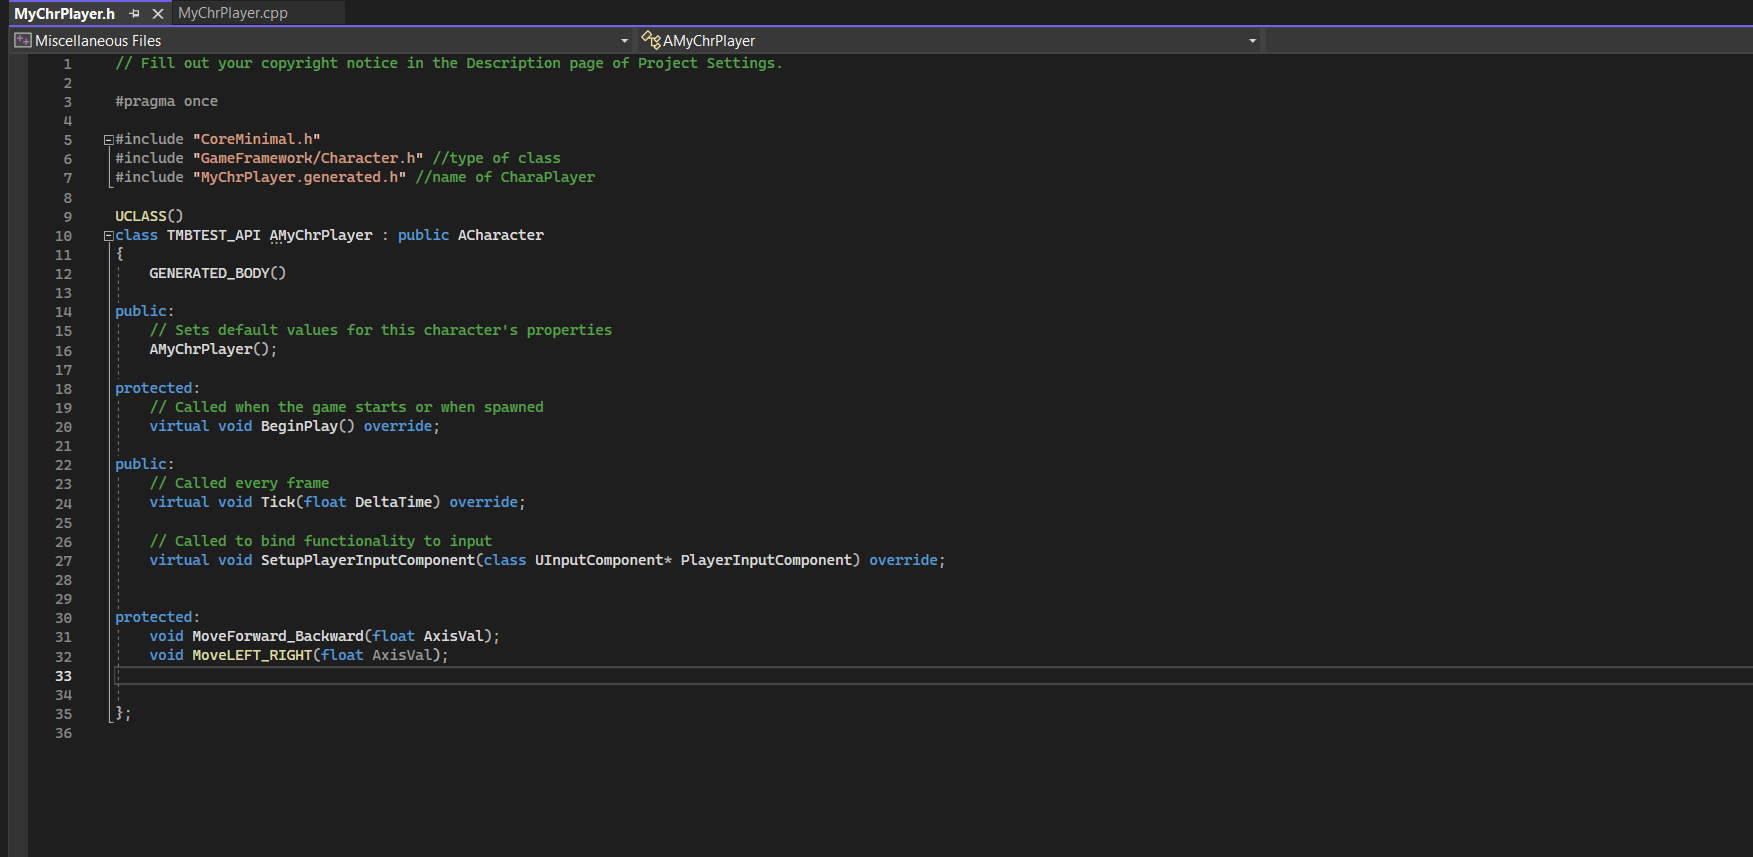
What I did was go to the Header tab and go to the bottom, like the video show. And create a protected class:( allowing only members in the list to access the package)under that type
void MoveForward_Backward(float AxisVal);
void MoveLEFT_RIGHT(float AxisVal);
void MoveLEFT_RIGHT(float AxisVal);
This will set up the function, and by highlighting it right-clicking, and going to action and refraction, you get to create a declaration and definition. This will create a call function in CPP for Input to put functionality inside. You will go to the CPP part, where the
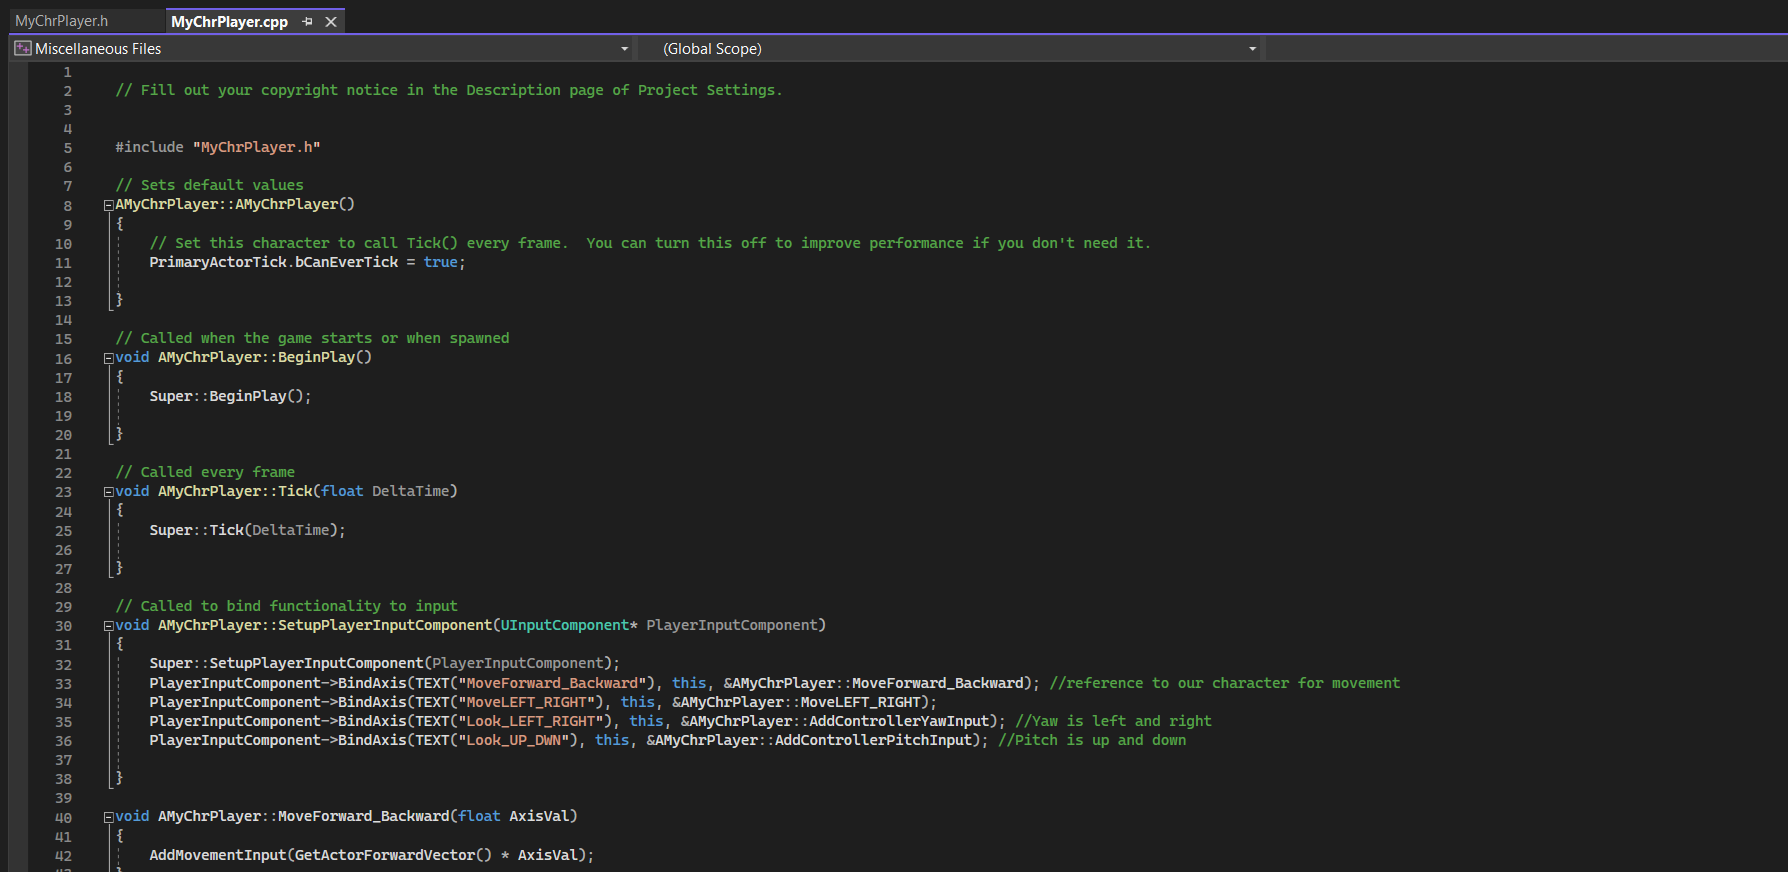
void AMyChrPlayer::SetupPlayerInputComponent(UInputComponent* PlayerInputComponent)
Underneath it, set up the playerInputcomponent. This will link and reference to our character for movement.
void AMyChrPlayer::SetupPlayerInputComponent(UInputComponent* PlayerInputComponent)
{
Super::SetupPlayerInputComponent(PlayerInputComponent);
PlayerInputComponent->BindAxis(TEXT("MoveForward_Backward"), this, &AMyChrPlayer::MoveForward_Backward); //reference to our character for movement
PlayerInputComponent->BindAxis(TEXT("MoveLEFT_RIGHT"), this, &AMyChrPlayer::MoveLEFT_RIGHT);
PlayerInputComponent->BindAxis(TEXT("Look_LEFT_RIGHT"), this, &AMyChrPlayer::AddControllerYawInput); //Yaw is left and right
PlayerInputComponent->BindAxis(TEXT("Look_UP_DWN"), this, &AMyChrPlayer::AddControllerPitchInput); //Pitch is up and down
}
Oh yeah, Yaw & Pitch is for axis, Yaw = left/right, and Pitch = Up/Dwn. For the function we created earlier that was created on CPP, In between:
void AMyChrPlayer::MoveForward_Backward(float AxisVal){
}
void AMyChrPlayer::MoveLEFT_RIGHT(float AxisVal){
}
You will put AddMovementInput(GetActorForwardVector() * AxisVal); in their first and AddMovementInput(GetActorRightVector() * AxisVal); in the second. This will give an actor the player character, and movement input from the axis in the project setting.
There was one issue I came across: I couldn't find the C++ class folder where my script was. I need it to make BP link both BP and the script together. I looked for a solution PPL and found one. All I had to do was close unreal and VS deleted specific files and let rebuild itself again when it started up it worked and the C++ class folder was shown and the file was there.
Newsflash remember to make a Gamebase for your character and also recompile in UE every time you edit text in your visual studio.
I tried the movement and It works.
Rember t
Next time I'll set up the camera and then later Implement a character model/ with animation movement. Which shouldn't be that hard. I had experience with it. I will see either rest with Visual script BP or a mixture with C++ coding and Visual scripting BP I decide later.
10/18/2023
Today, I was continuing what I was doing on the last self study. I'm going to put a 3d model + animation in the BP. I also wanted to do some other stuff but I didn't have time luckily I discovered something special today. I have implemented a model in Unreal before but because I did it in an empty level, it came out a little different experience when came to movement when usually I will use the TPS/FP and just implement Model + Anim. When added, I imported the model and created an animation blend. I did messy because I just wanted to focus and see how it would look using my controls
Anyway, I implemented the model/anim and added a camera function and when I tested the result was kinda what I wanted but not exactly. First of all the camera was stuck to only left and right, looked up a couple of solutions and I was able to find one apparently I need to find the "pawn control rotation" in my BP and tick it, which allows me to move around up and down as well.
Another issue is that when a character walks left or right, instead of turning to the direction still using the same walking direction (thanks to Blend 1D)) I wanted it to go walk, instead when moving left and right animation stays in the same direction. The reason is that I don't have vector rotation in my code, as well as that the code I wrote was built for Blend not Blend 1D.
The blend is for more advanced directional movement animation whereas Blend 1D is for simple 1 Directional movement animation and the C++ I followed had blend in mind whereas normal unreal engine default had both in mind. Going to more details, there are different types of movement, especially in the third person there open world movement where the character can walk in any direction and your character faces there depending on the arrow keys and you can see your mouse look around and the combat-ready movement which my code was intended for games like COD, Skyrim uses, for honor uses it.
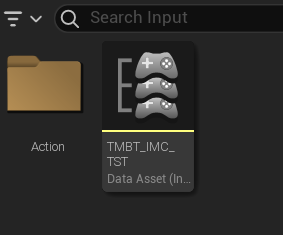
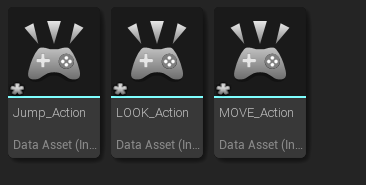
Another thing realized before is that comparing my code to the third person's default code is not just how it was structured, similar but different code, and the fact that movement keys were Bindaction but not an axis. For someone who doesn't know difference is that BindAxis for movement keys like up and down, etc but BindAction, is for action keys like jump, interact, etc. But the thing the movement was using Action was wandering until realized it because the header and CPP were set up using IMC, Input management Context, and Data asset Action, I have come across and I think my teacher mentioned we will go over it soon. This is used to store my key binds instead of project settings making it look more secure and professional which I'm going to try out.

10/19/2023
I'm continuing what I did in the last session with the input/enhanced input. Today, I was planning on going over my new AI book but I had to finish going over the Enhanced Input. Luckily, I found a video detailing how to set it up correctly with bp and code.
Oh yeah, I was able to go over the blend and I was able to add extra movement anim.
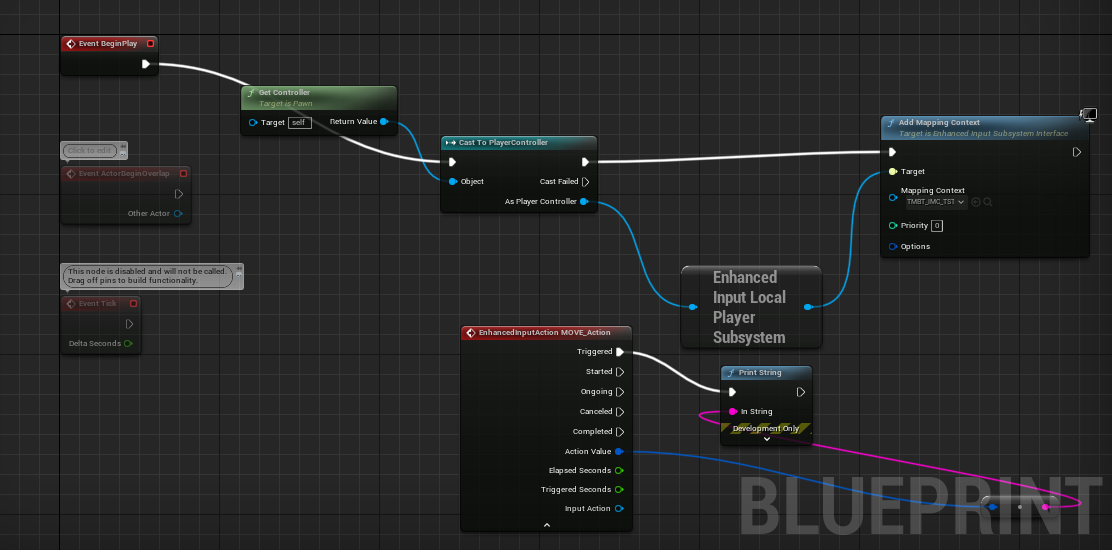
Firstly, I check if my default input class is Enhanced Input. Because I already set up the input class/IMC, I am going straight to where I think I should be. I learned that I have to go to my BP and set up an enhanced input subsystem by connecting to a player controller, which, in Bp, I came across the name on the C++ (#Include Enhanced Input subsystem). Before we do that, I test the Cast to the player controller, which works with the event, begin play + get controller, and use the Print string.
The Enhanced Input Subsystem has a function to allow you to add and remove IMC.
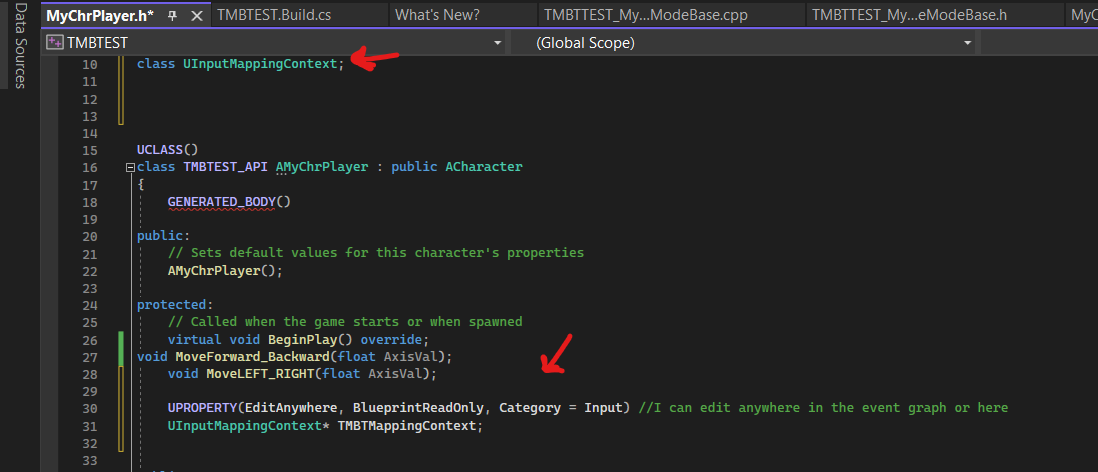
This time, we will set it up in C++ by following the algorithm we made in the blueprint event graph. First, in my header, I wrote in my Uclass () > protected:
under the event begin play , PROPERTY(EditAnywhere, BlueprintReadOnly, Category = Input) //I can edit anywhere in the event graph or here
UInputMappingContext* TMBTMappingContext;
UInputMappingContext* TMBTMappingContext;
Then, create a class UInputMappingContext for it to work.
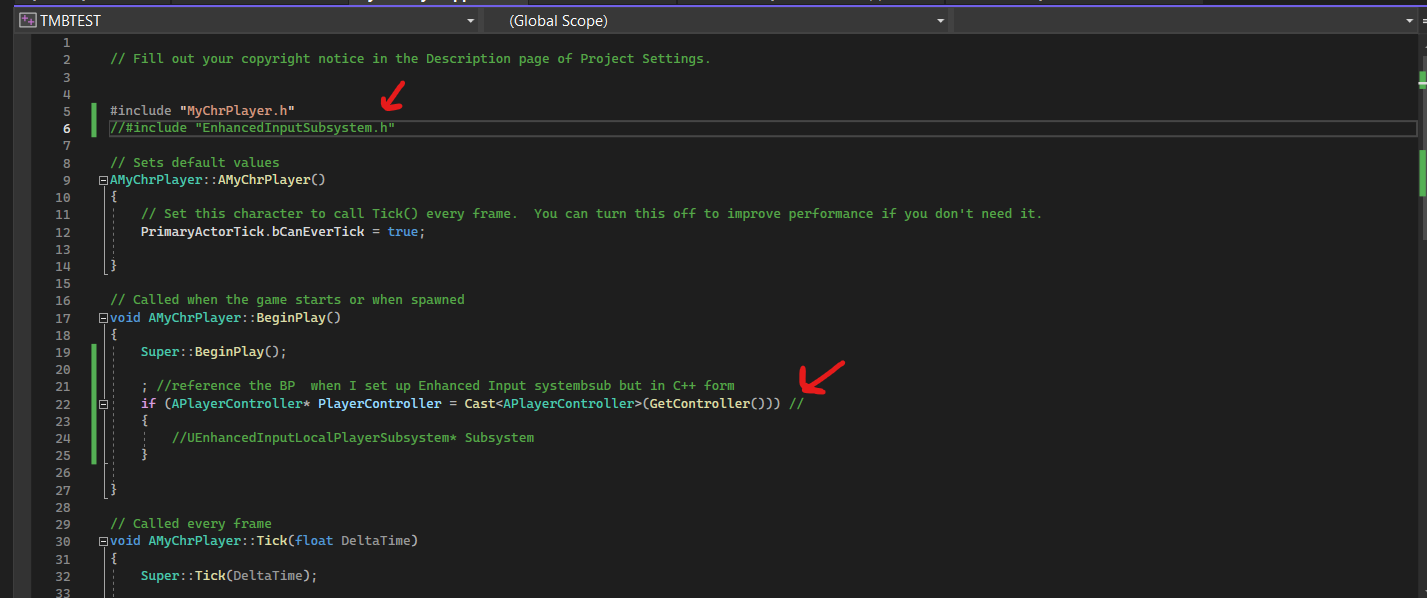
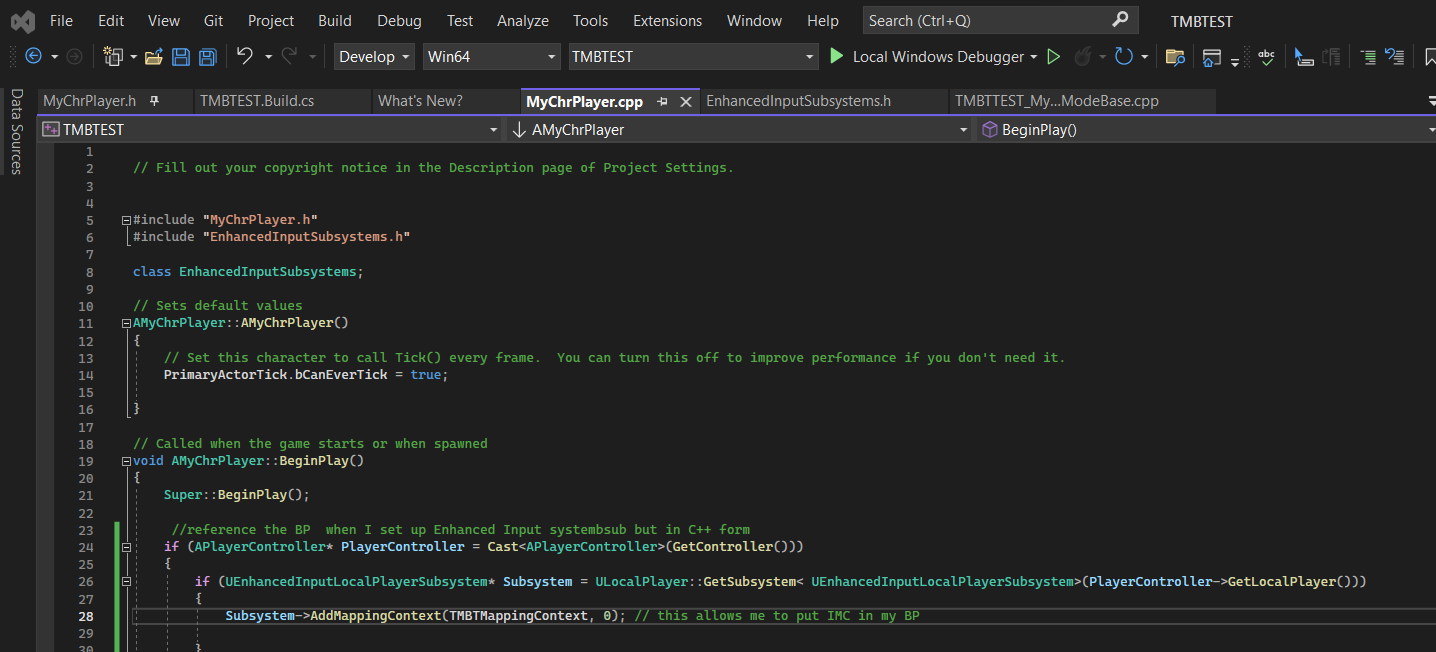
After that, I went to the CPP and wrote under void AMyChrPlayer::BeginPlay()
if (APlayerController* PlayerController = Cast<APlayerController>(GetController()))
{
if (UEnhancedInputLocalPlayerSubsystem* Subsystem = ULocalPlayer::GetSubsystem< UEnhancedInputLocalPlayerSubsystem>(PlayerController->GetLocalPlayer()))
{
Subsystem->AddMappingContext(TMBTMappingContext, 0); // this allows me to put IMC in my BP
}
}
{
if (UEnhancedInputLocalPlayerSubsystem* Subsystem = ULocalPlayer::GetSubsystem< UEnhancedInputLocalPlayerSubsystem>(PlayerController->GetLocalPlayer()))
{
Subsystem->AddMappingContext(TMBTMappingContext, 0); // this allows me to put IMC in my BP
}
}
As well as wrote #Include Enhanced Subsystem. This links the player controller to the subsystem while creating an Input Mapping component in my BP.
I had a massive problem with getting this part set up fine and working; instead, I was getting errors even in my previous attempt—solution to solution. There were times when it looked like it would work but was so close, but no luck. Luckily, there is one solution: https://forums.unrealengine.com/t/unable-to-include-enhanced-input-in-5-1-project/1171982/3.
Previously, I had to go to the TMBT c# file and write "EnhancedInput" in PublicDependencyModuleNames.AddRange(new string[] { "Core", "CoreUObject", "Engine", "InputCore", ______); but didn't
Then I followed this solution and wrote PublicDependencyModuleNames.AddRange(new string[] { ..."EnhancedInput"...});
I went to refresh Visual Studio in Unreal, and it worked, which is suspicious if it was, but now I can continue the rest of the video.
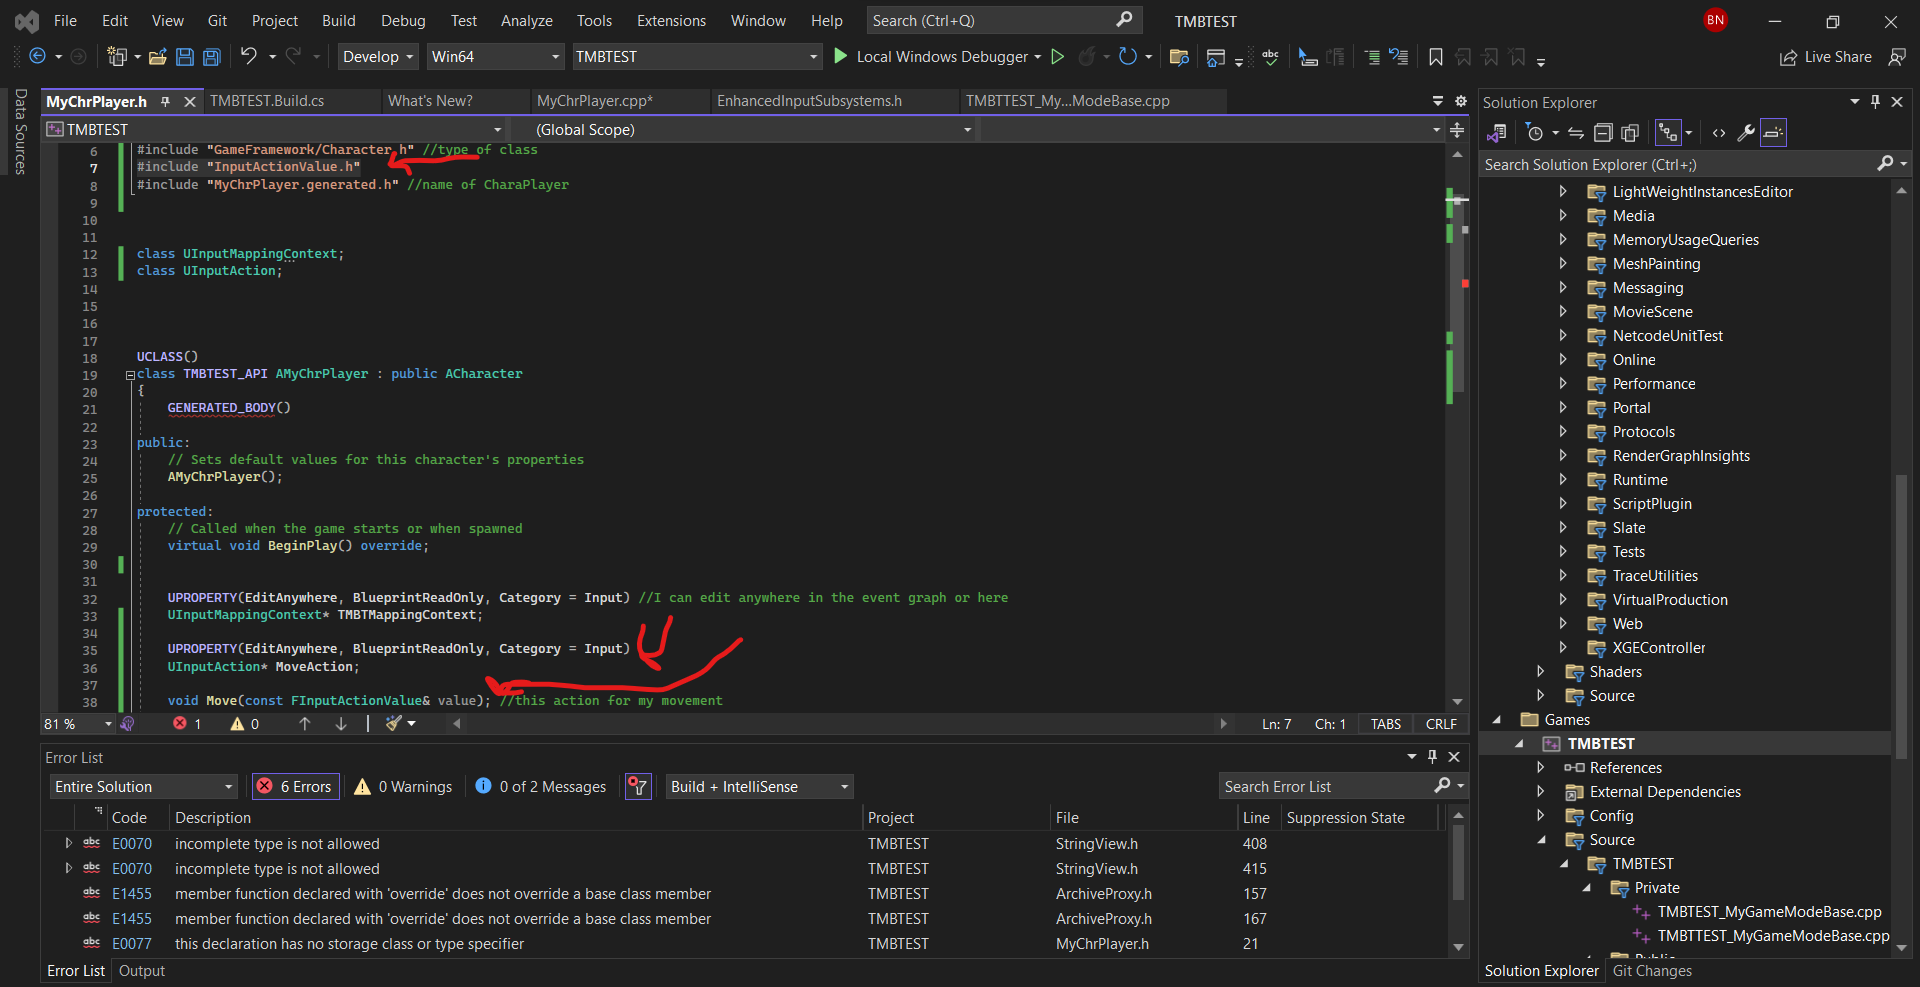
I created an Action Function in the header, void Move(const FInputActionValue& value); //this action for my movement, then created a declaration that makes a function in C++. I made class UInputAction in the header and added the Include # "InputActionValue.h".
Then we go back to the Void Move we created thanks to a declaration, void AMyChrPlayer::Move(const FInputActionValue& Value)
{
const FVector2D CurrentValue = Value.Get<FVector2D>();
if (CurrentValue)
{
UE_LOG(LogTemp, Warning, TEXT("MOVEAction triggered"));
}
}
{
const FVector2D CurrentValue = Value.Get<FVector2D>();
if (CurrentValue)
{
UE_LOG(LogTemp, Warning, TEXT("MOVEAction triggered"));
}
}
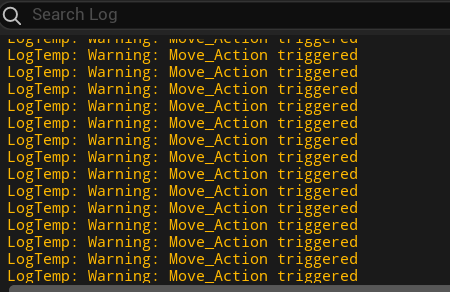
And some of the code instead lets functionality take effect. But before a while, the temp warns you when MoveAction is triggered. Const is like read-only, which means an unchangeable variable.
10/21/2023
Finish on part 2 on the video. There some issue bad issue that was messing up UE. Visual studio and Unreal. Me having debug issue and trouble shooting.For what getting at Unreal isn acting silly and was annoying. Trying out solution that did before just to backfire. To the the point Unreal detaching it self to the code. Just for me retach itself but didn't make different. I had use some old file and from a copy paste of this folder. And combined to of this version. StartUp unreal but something in the Visual studio Overwite itself combined in a way that some of the new line code I wrote either deleted or half done. And some of the Old code was half done or got deleted. Making it hard to compile or refresh Update it through unreal. I had watch videro rewind it couple of time, debug every issue and fix mistake or refill anything deleted back what it suppose to look like. It wasn't easy 'but i was able to get the job done. And now it working.
The line I wrote from last doenst implememt imput but it Had UELog so it can show waring when a Input is triggered.
Next I will follow the next video, of how to move foward and backward while using value type and Negate modifiers

10/26/2023
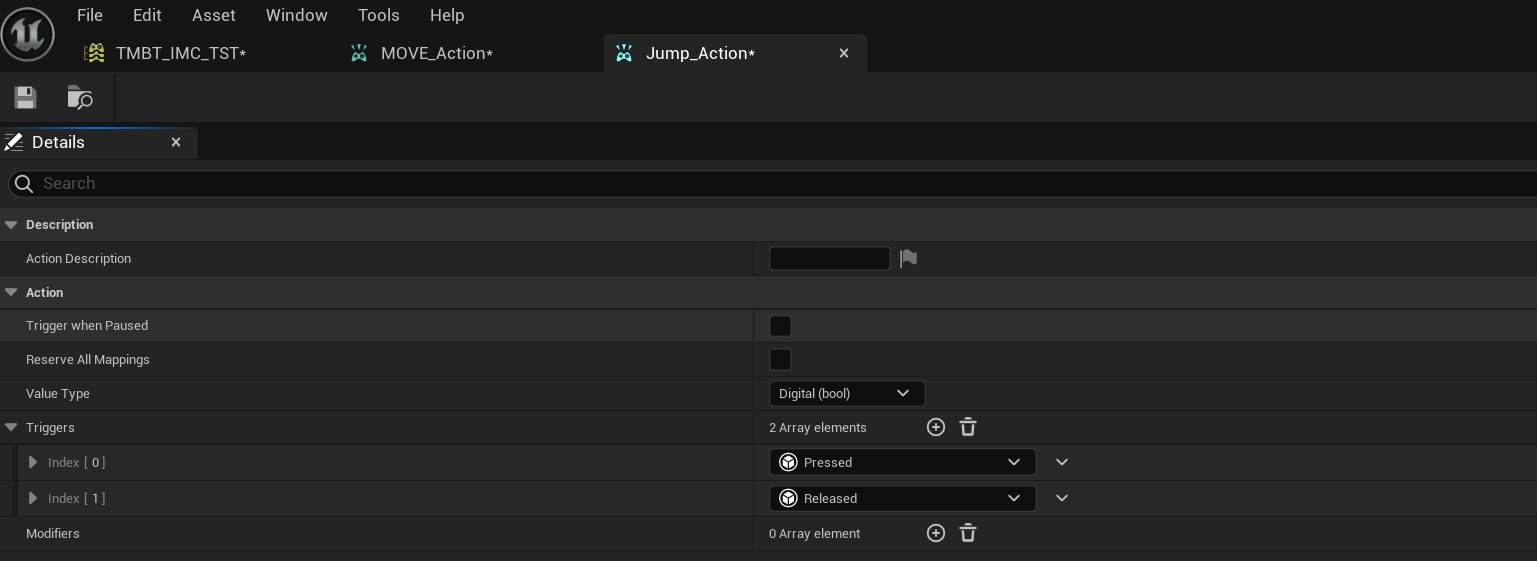
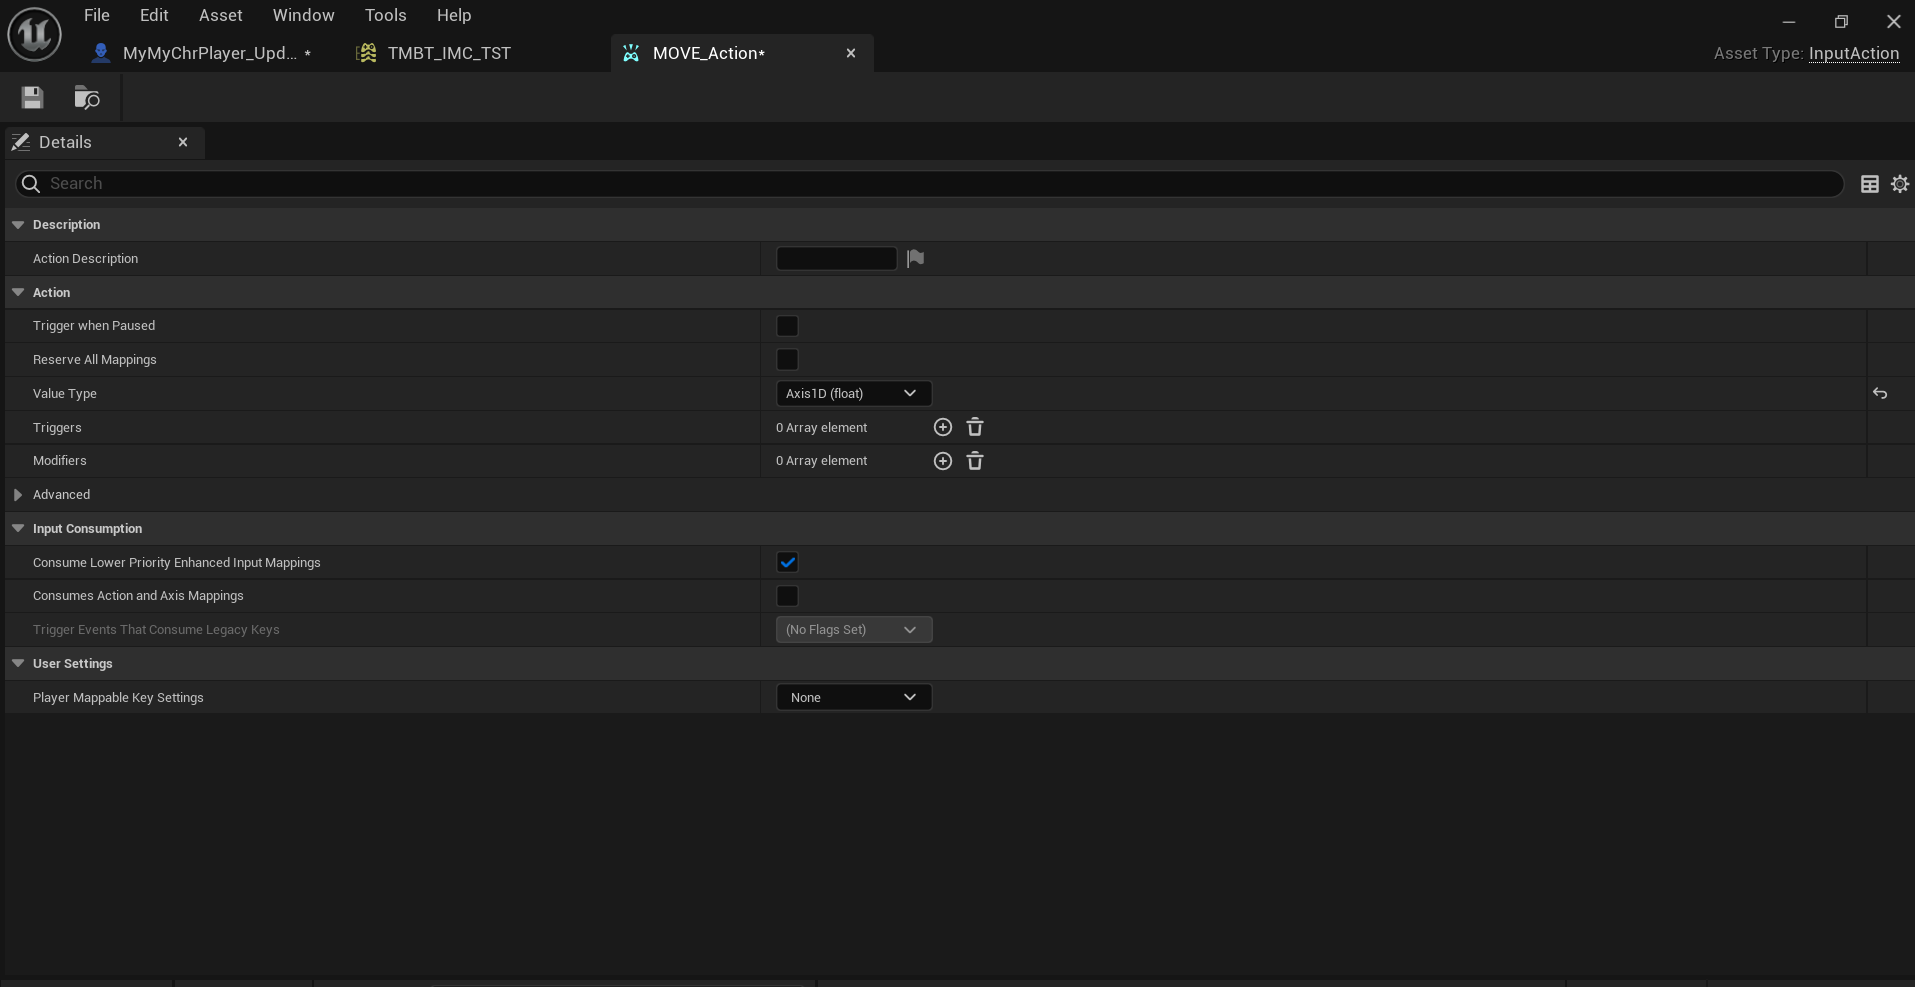
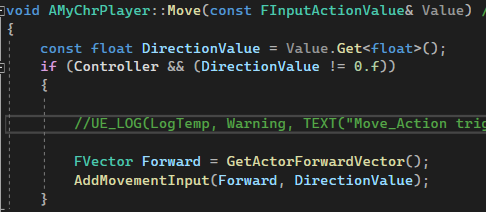
Today I continued the Enhanced input video from previous weeks. This video went over floats and modifier. This video is not that much different from the last part 2 , the only different is that changes(Shown in images) some of the values from bool to float and digital bool to axis 1d. This allows me to mve foward and backward only. So far this video was just a recap with some extra changes.
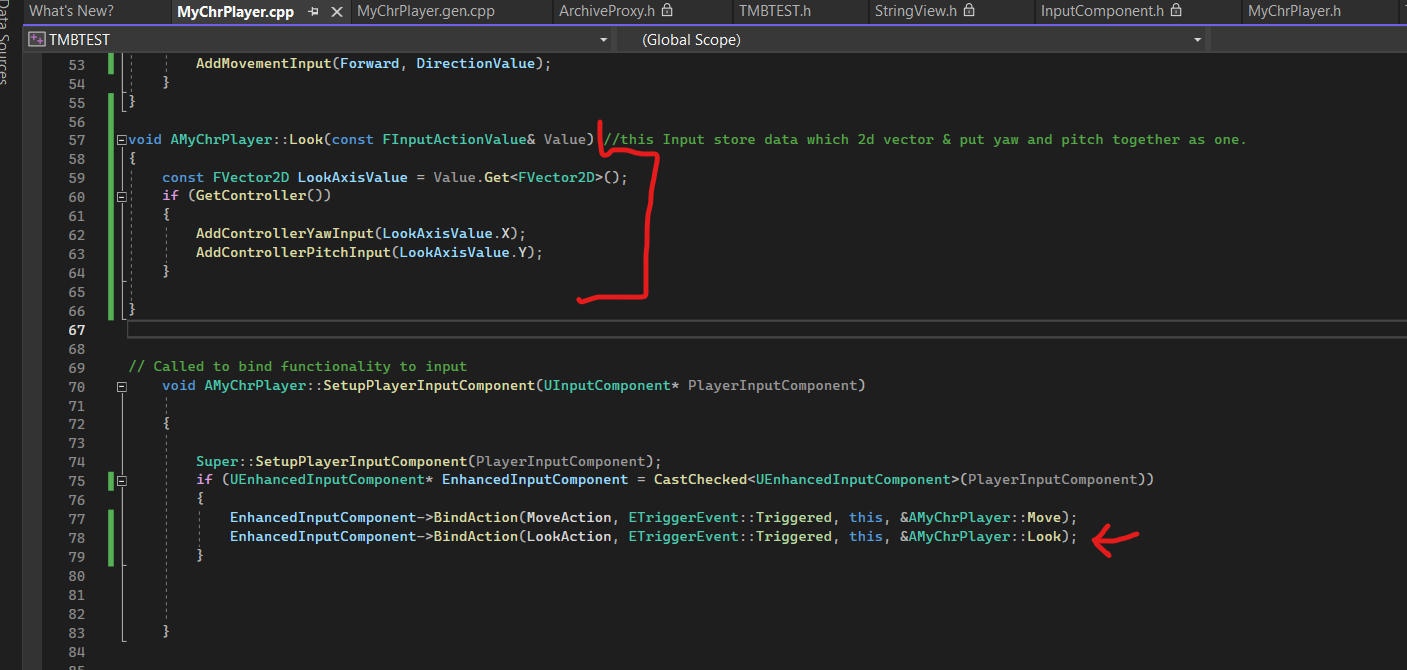
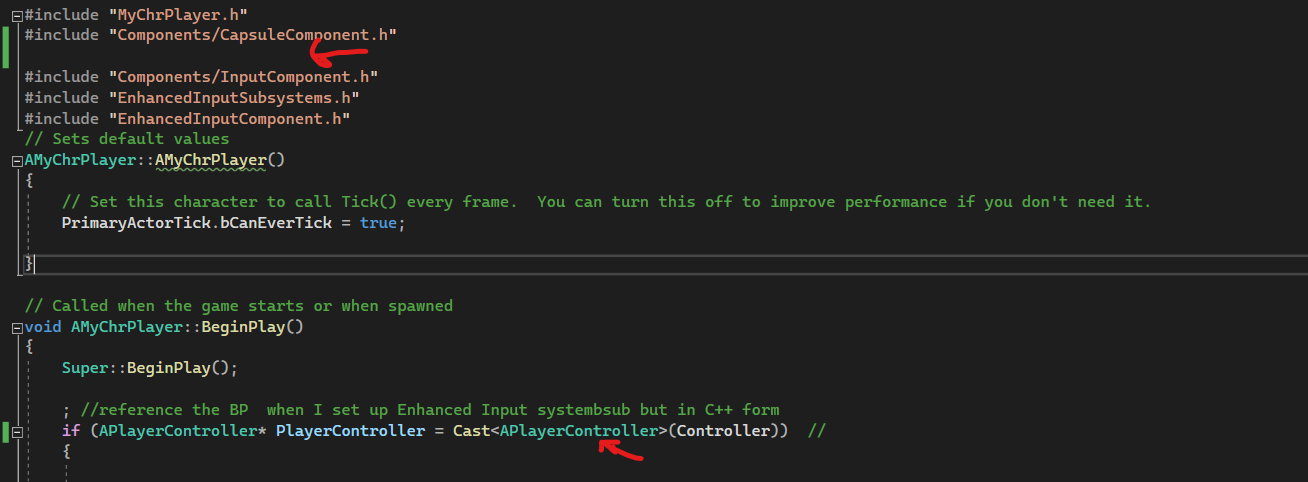
This second video allowed me to look using mouse. Implemented asre similiar for what we wrote for move but with some difference using FVector2D, LookaxisValue, AddcontrollerInputYaw/Pitch input.I was able the camera move. I will then later watch the last video which include the left and right movement Input and allow me to finally blearn out move camera rotation with move ing camera.




11(NOV)/8/2023
I'm finally on the final episode of the enhanced input tutorial.This video will help fufil my input movement needs, like moving all direction instead of up and down and I can move camera freely instead linking to the camera movement.
From this video I will b e tweaking the code and asset from last time and including new stuff to make this possible.
I only mentioning the changes
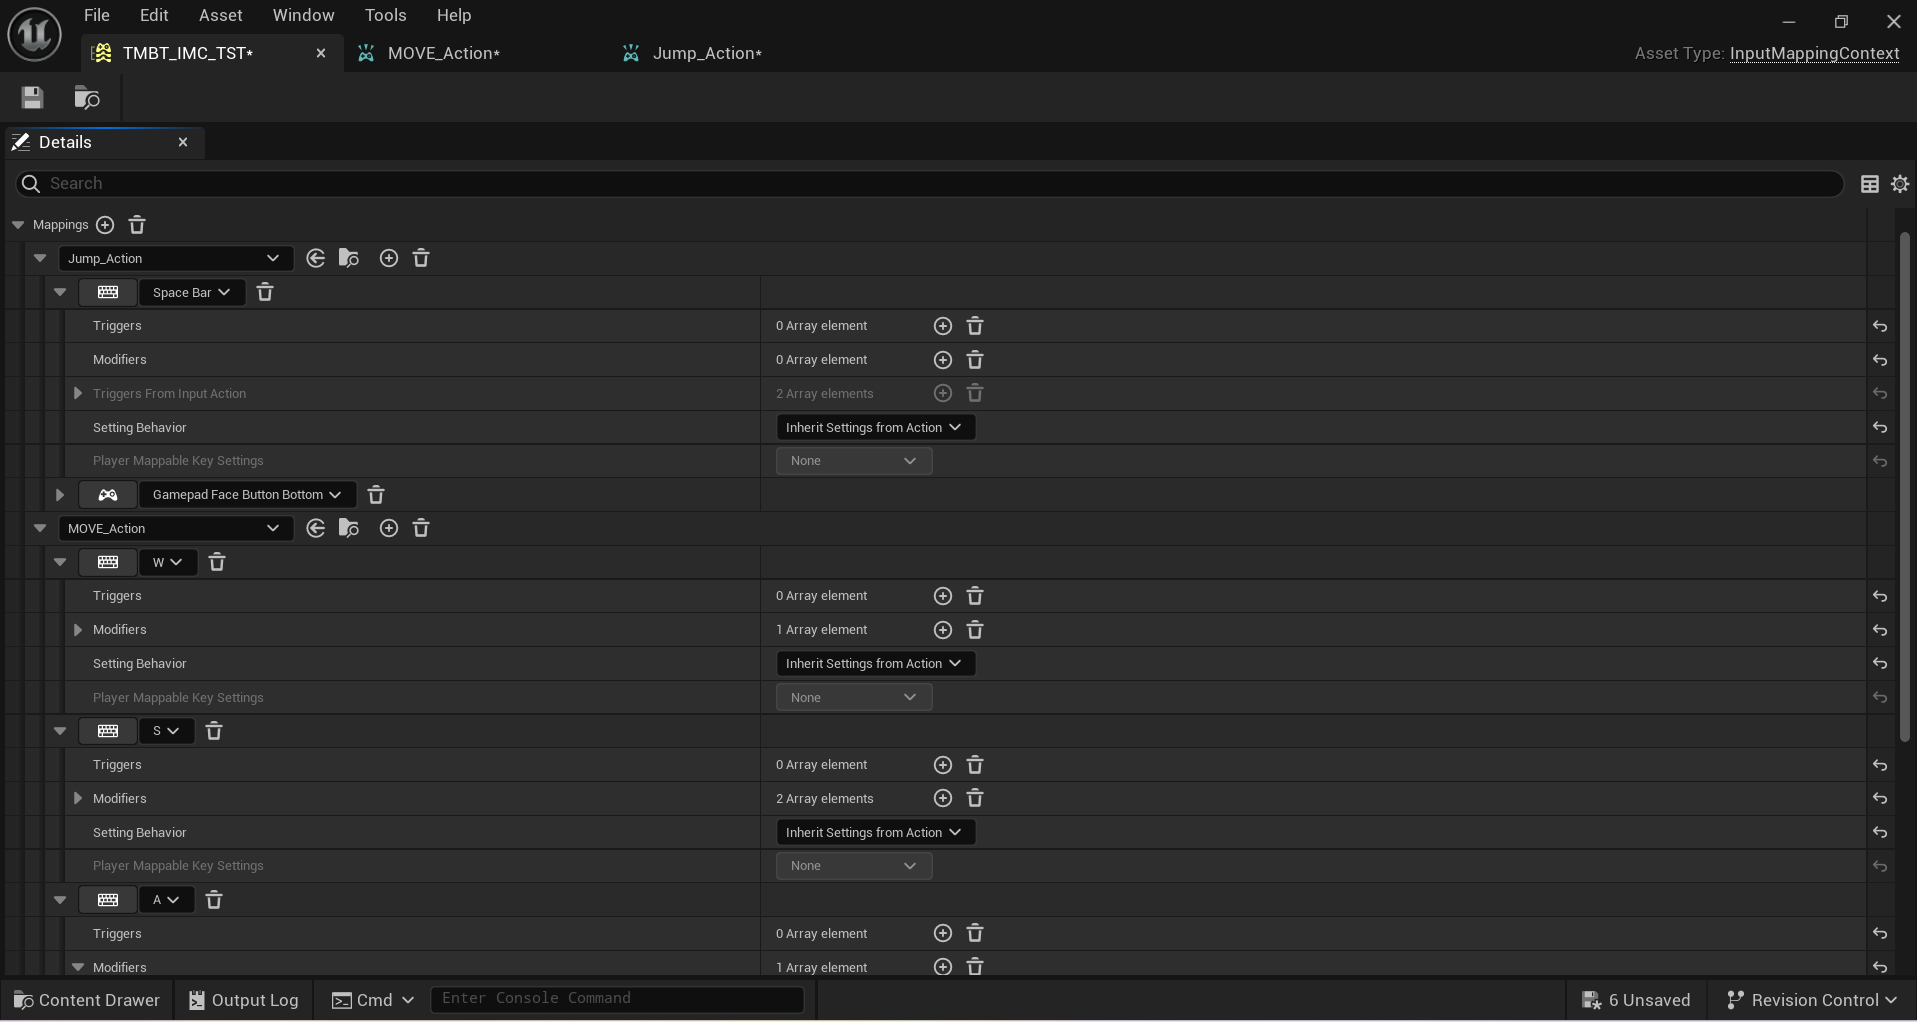
First I open the input mapping context asset file. And add a modifier on W key for movement and made it Swizzle Input axis Values, it changes input key mapping filly Y first by doing that when you press W it gives value postive in the component in the 2d vector. For the S key while it already has a Swizzle Inpute Axis values also give it negate.
Other things that was modified was the Player character MOve and look function struct was edittied like this :
void AMyChrPlayer::Move(const FInputActionValue& Value) // This the where magic happensd allows input take effect
{
const FVector2D MovementVector = Value.Get<FVector2D>();
if (Controller != nullptr)
{
const FRotator Rotation = Controller->GetControlRotation();
const FRotator YawRotation(0.f, Rotation.Yaw, 0.f); //Only use yaw for controller rotation
{
const FVector2D MovementVector = Value.Get<FVector2D>();
if (Controller != nullptr)
{
const FRotator Rotation = Controller->GetControlRotation();
const FRotator YawRotation(0.f, Rotation.Yaw, 0.f); //Only use yaw for controller rotation
const FVector ForwardDirection = FRotationMatrix(YawRotation).GetUnitAxis(EAxis::X); // This foward vector corrosponding on the direction our controller is facing
AddMovementInput(ForwardDirection, MovementVector.Y);// We press W and S that fill up the Y component
const FVector RightDirection = FRotationMatrix(YawRotation).GetUnitAxis(EAxis::Y);
AddMovementInput(RightDirection, MovementVector.X); // We pressing A & D that fill up the X component
}
}
AddMovementInput(ForwardDirection, MovementVector.Y);// We press W and S that fill up the Y component
const FVector RightDirection = FRotationMatrix(YawRotation).GetUnitAxis(EAxis::Y);
AddMovementInput(RightDirection, MovementVector.X); // We pressing A & D that fill up the X component
}
}
void AMyChrPlayer::Look(const FInputActionValue& Value) //this Input store data which 2d vector & put yaw and pitch together as one.
{
const FVector2D LookAxisValue = Value.Get<FVector2D>();
if (Controller != nullptr)
{
if (Controller != nullptr)
{
AddControllerYawInput(LookAxisValue.X);
AddControllerPitchInput(LookAxisValue.Y);
}
}
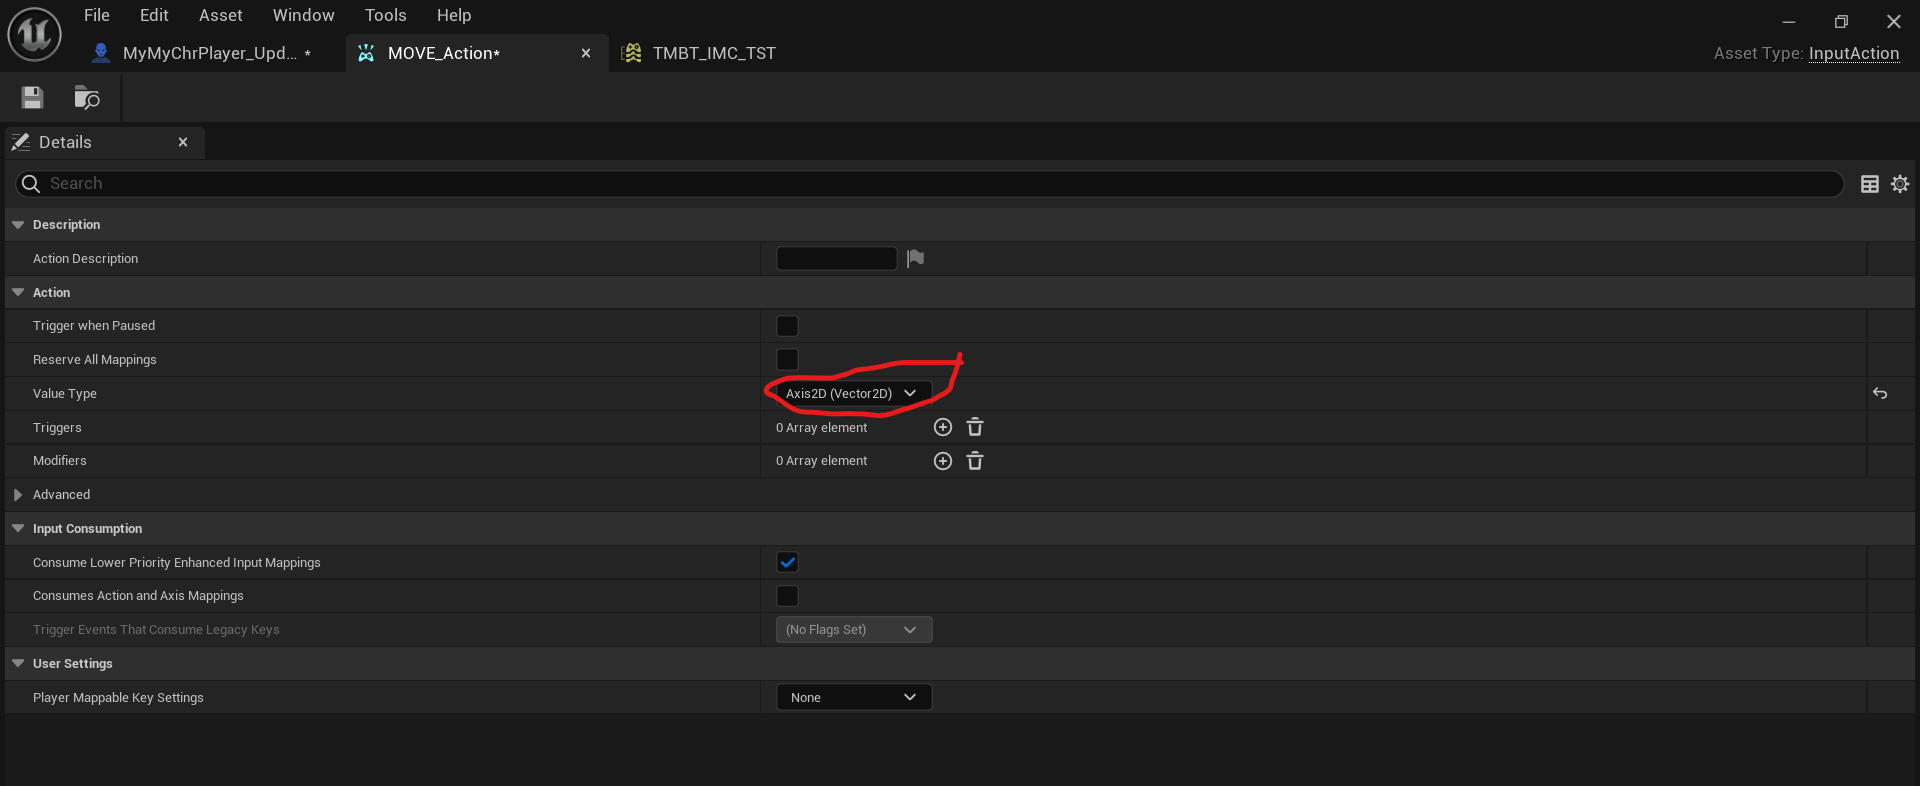
Fastforward, everything was done until there was some complication. Like the camera was the same as before and character movement was stuck to forward and backward. First issue was solved and in the Move asset make sure it axis2D. The second issue was a pain which was the main reason I learned Enhanced input early to use any new code so my camera is free look, liked the guy video. I reverse back and forward the vid, checking if there was undected mistake that I could fix, look online for answer. It was no use. There were time I checked Unreal I came across orient rotation, desired rotation, rotating setting etc bunch of times even edit it but didn't. I even checked unreal default code from other project to compare and tried stuff like if (Controller != nullptr) but didn't make a difference. Until find a solution. Between , character movement, character(self) it has Pawn setting, oriental rotation to movement and character movement settin(rotate).These are important once I sorted it out it worked. A bonus I was able use Blend 1 normal. Meaning I cand do both.
11/13/2023
I will be starting on studing the Inventory system c++ and will following tutorial youtube like before. I started working on it by myself during my engine and pipeline session. Last week I finished on enhanced input, so I decided to go on a different workthrough.
So I start with first on the first Walkthrough which is about Item datastruct. This is what we will base our item our off.
.......
There were some diffculites with ~include which mess up the whole walkthrough.There hyposis that could of help but it would'nt of worked out.
I found a another which exactly what I needed and it short , This allow experiment more afterward. Another thing about I have to watch another video that relate. Which teaches you how to make interact system before I continue.
11/15/2023
While i was contiuied i came across , the problem was the QueryParams.Add Ignored Actor(this); wasn't working I've Ibeen looking for solution online and none of them helped in any way.But now thanks to a friend I was able to finf out what was the issue.Apparently place the word object in queryparams.Which messed up the flow ofthe code.
.....
11/23/2023
I decided take my self study in a differection and use it self study other game engines like unity, godot, unigine etc. and only use unreal when I doing lesson or homework.The reason was that I'm tired of unreal and I always wanted learn unity but because not going to be taught I will teach myself as much as I can.
Luckly I already have unity project that I made during the summer break. Only thing I was able to do was player movement
11/21(22)/2023
I did bunch of research and made youtube playlist of most or some videos that I need to learn in Unity. I'll update it once in the while.This week I'll be learning how to create a Main_Menu that transistion to the next level.I'll be using project file I used during the summer break to learn how to do Third person player movement.
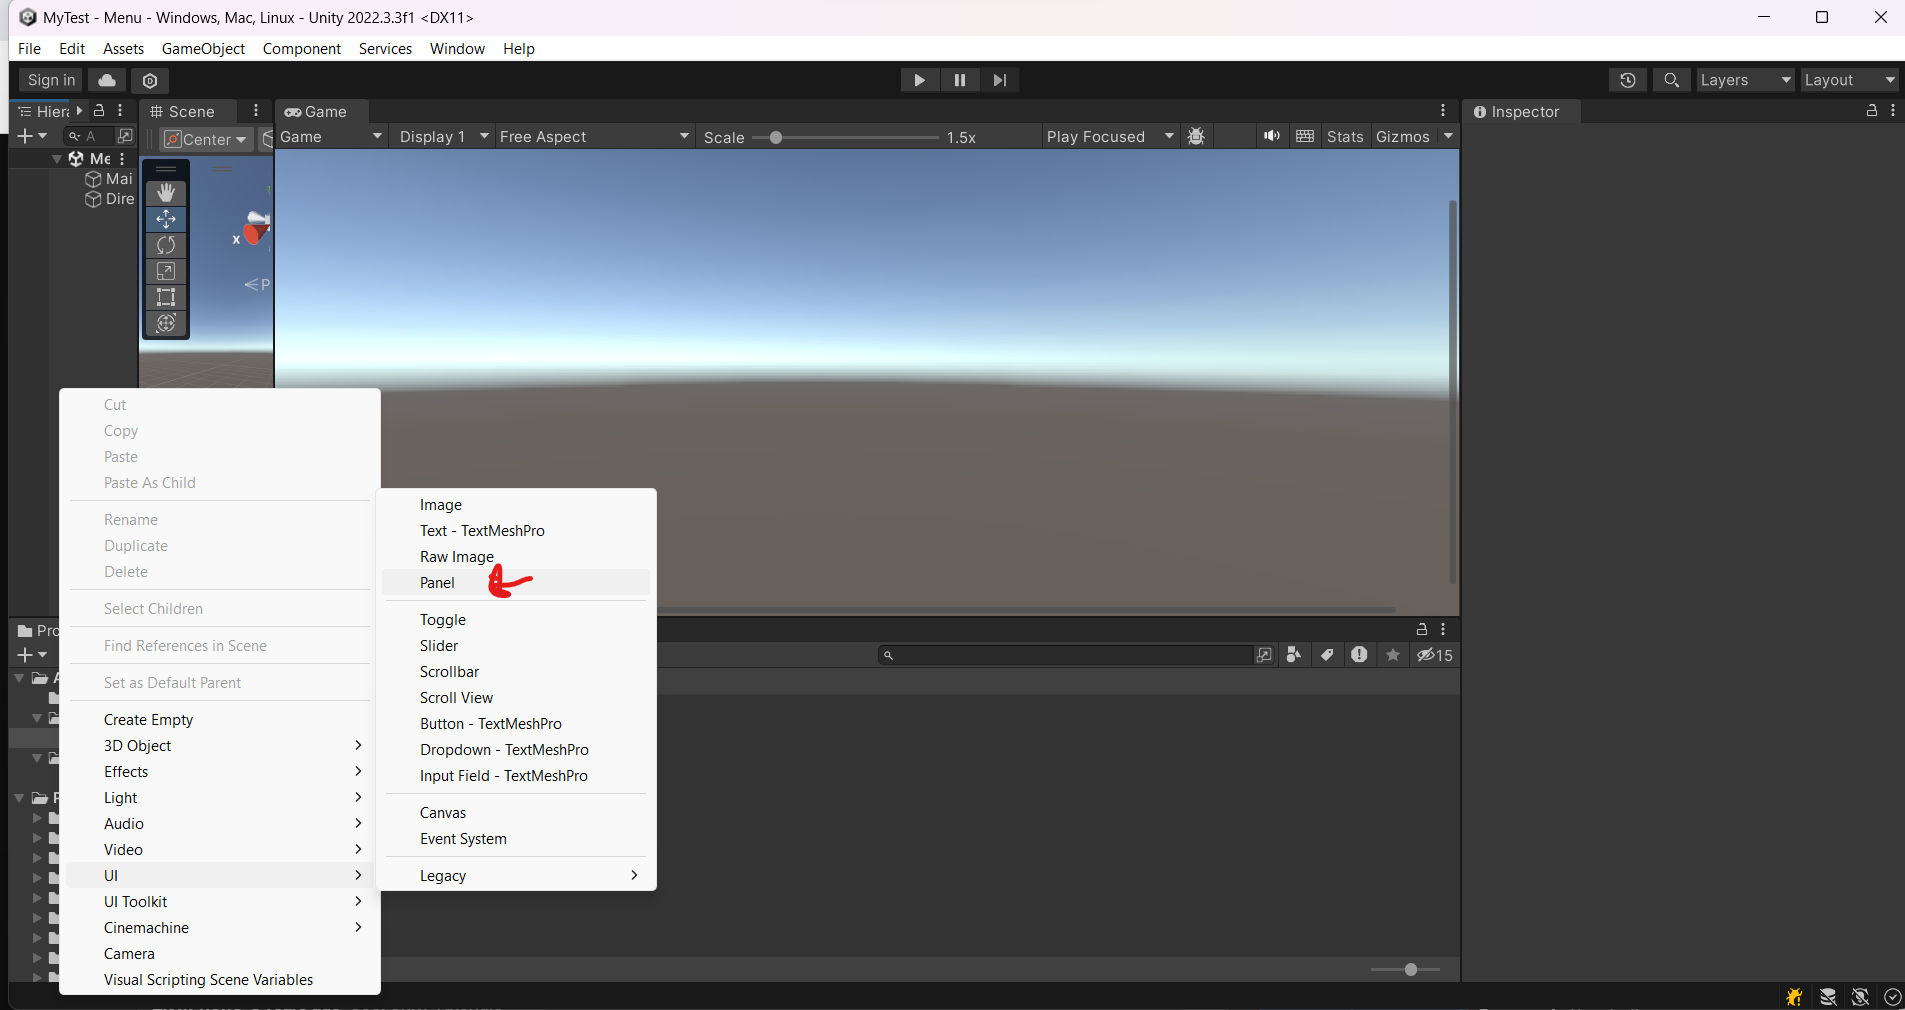
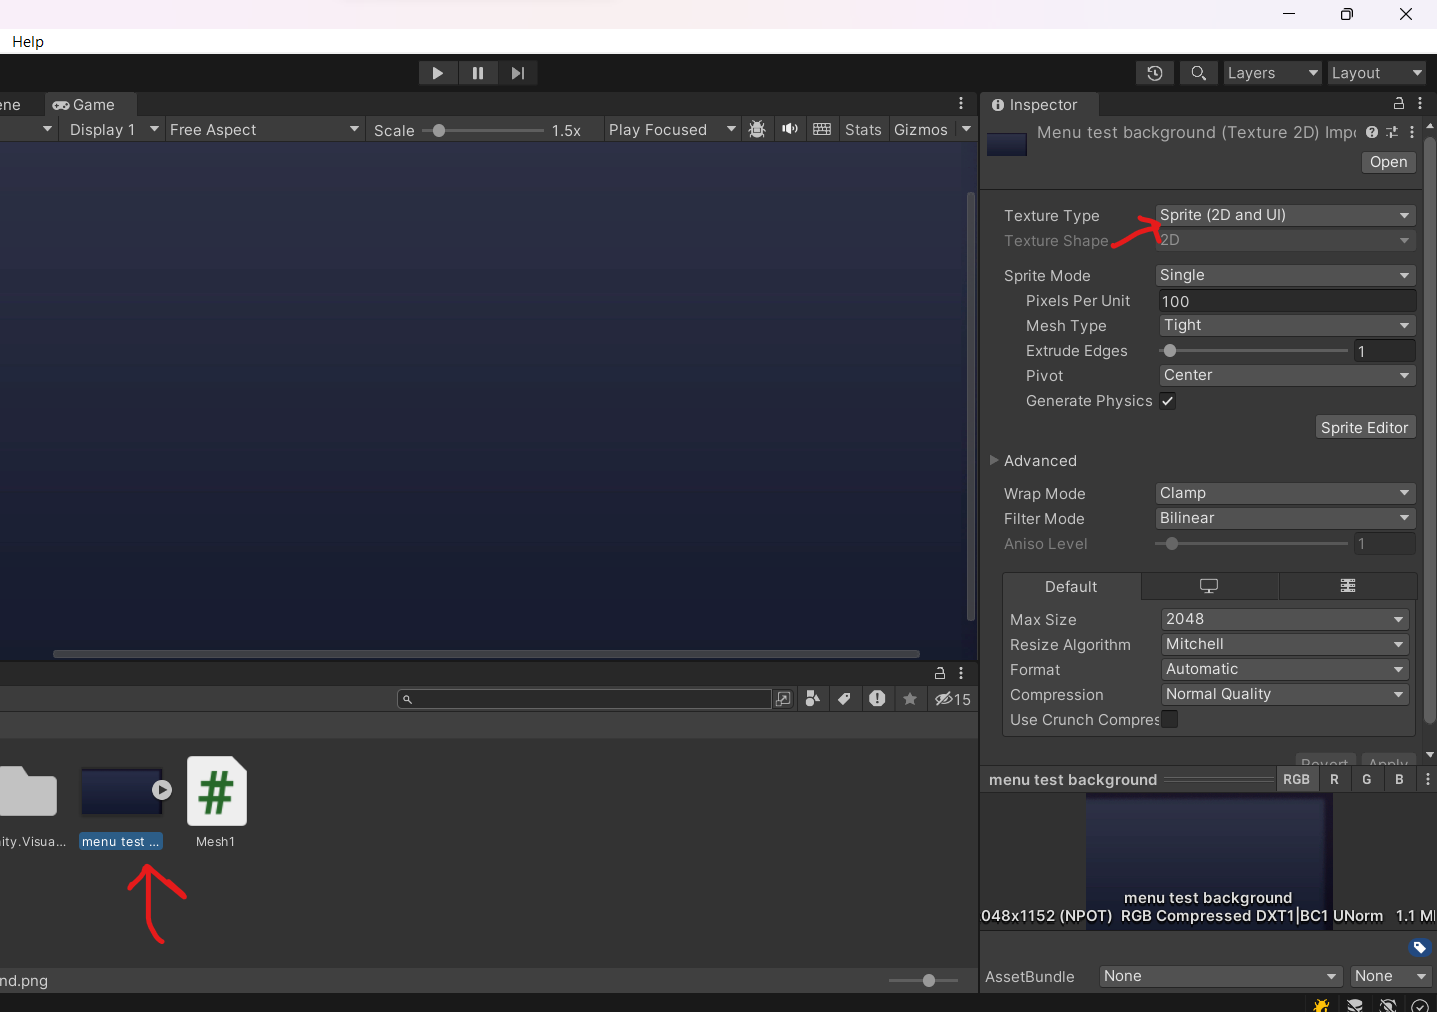
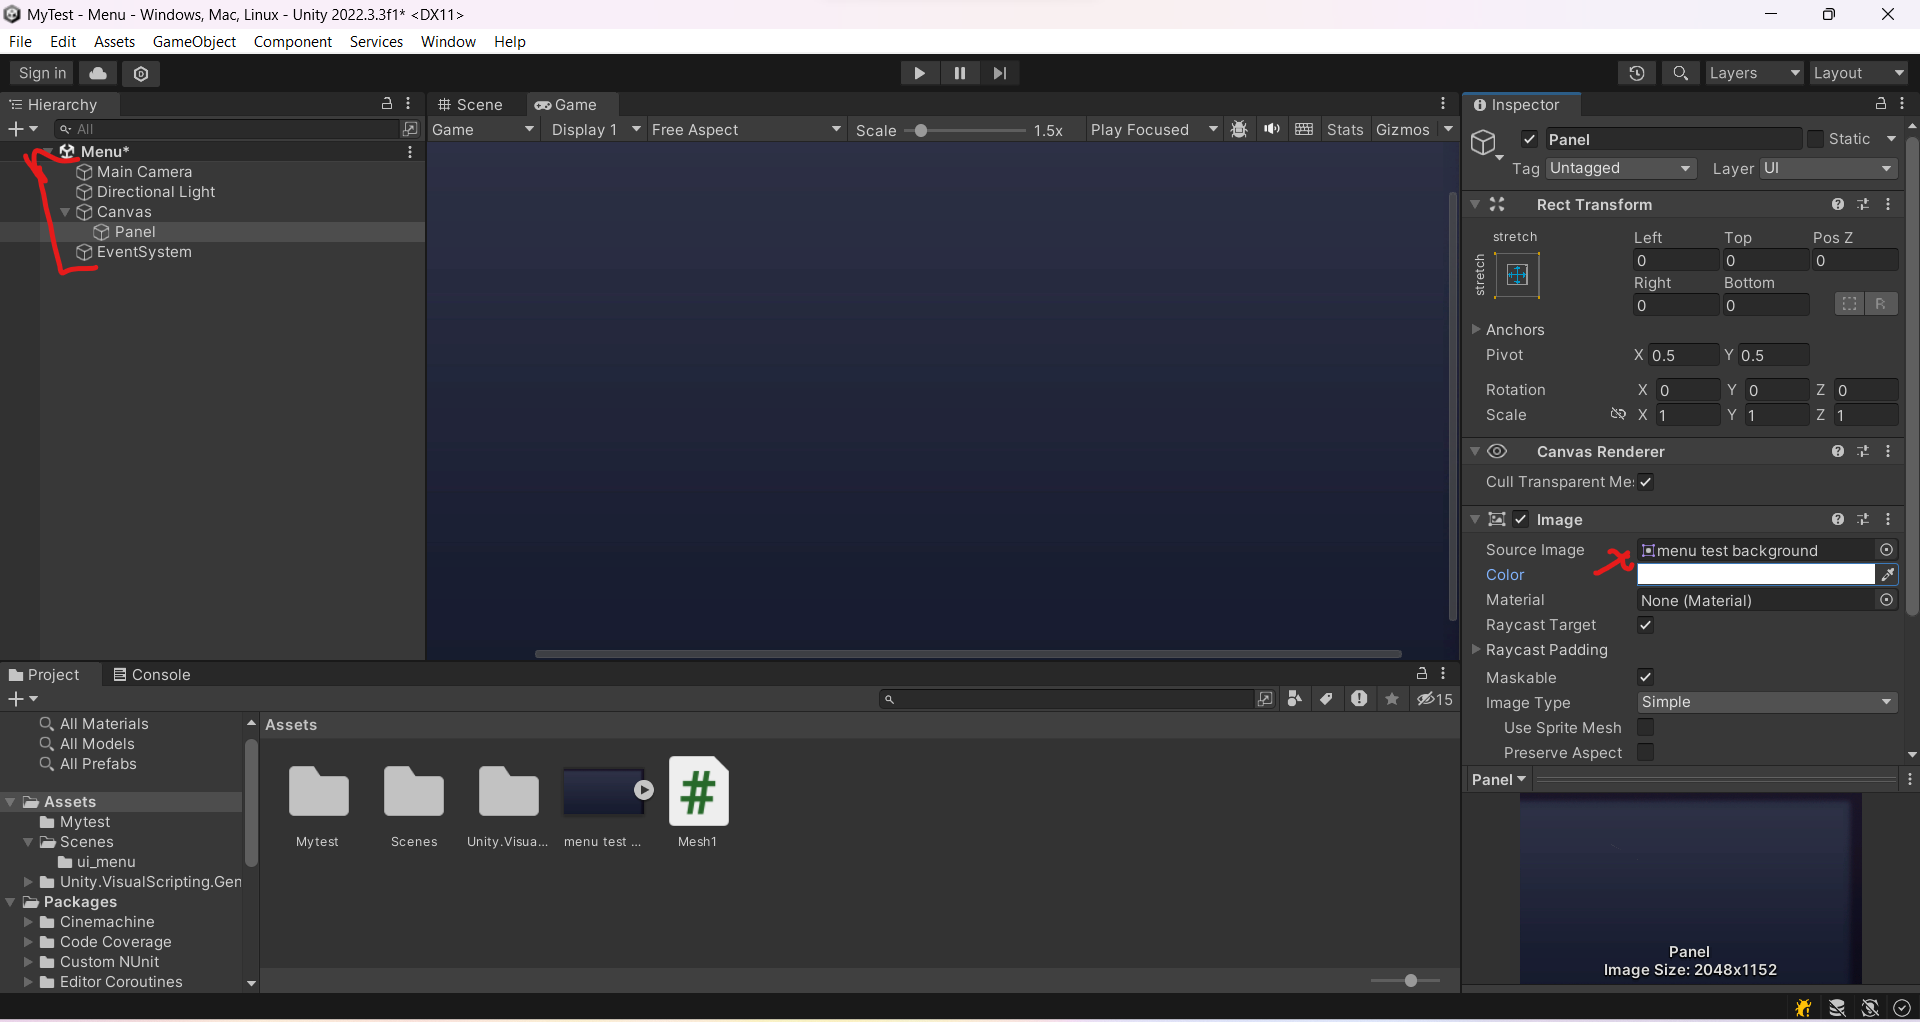
From following the tutorial.I need to make second level which will host main menu. I then needed created my own background design for the main menu so I made it in Photopea and imported in Unity and made sure it the texture type set to "Sprite (2D and UI)" or you will not be able to use it. Then create canvas and panel heirachy in the heirachy section by right click and go to ui and create both put in order Canvas > Panel. In panel which is shown in the inspector on the right, where it says Image and source Images, place the main menu. oh by the way put the scene 2D so you can view it better.
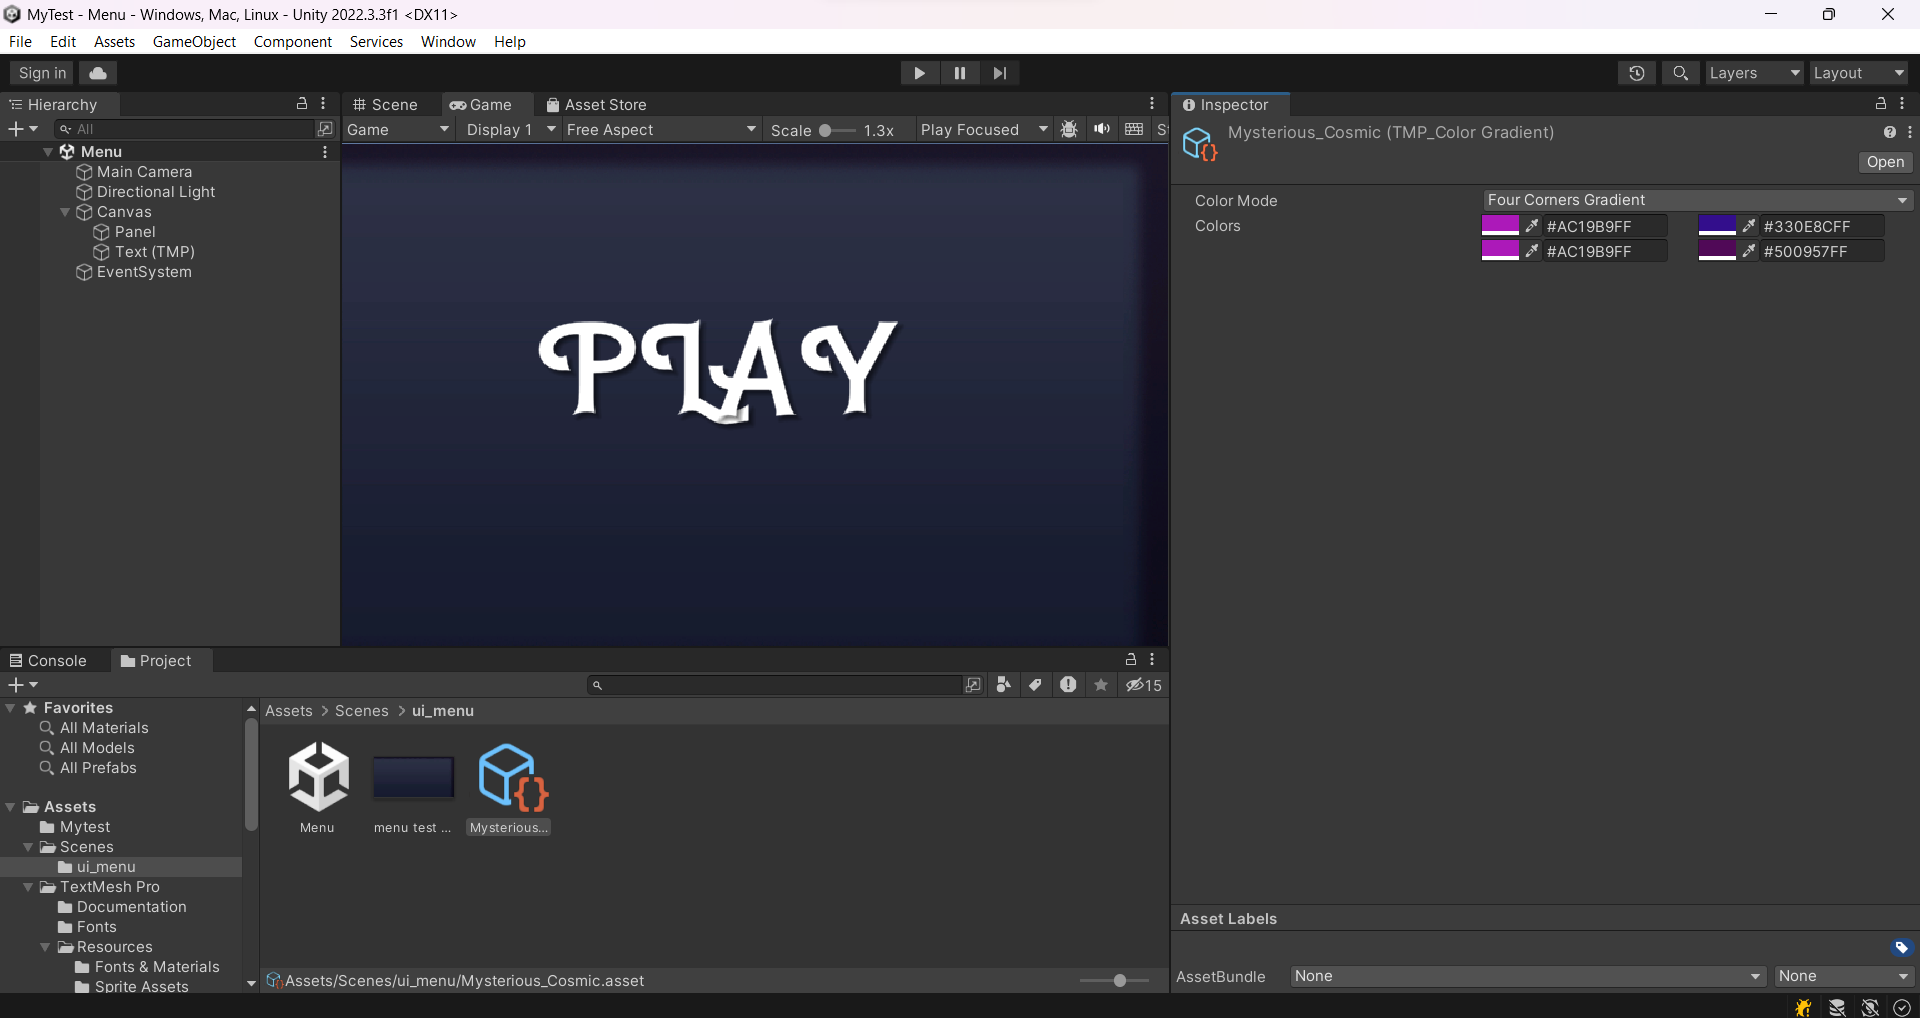
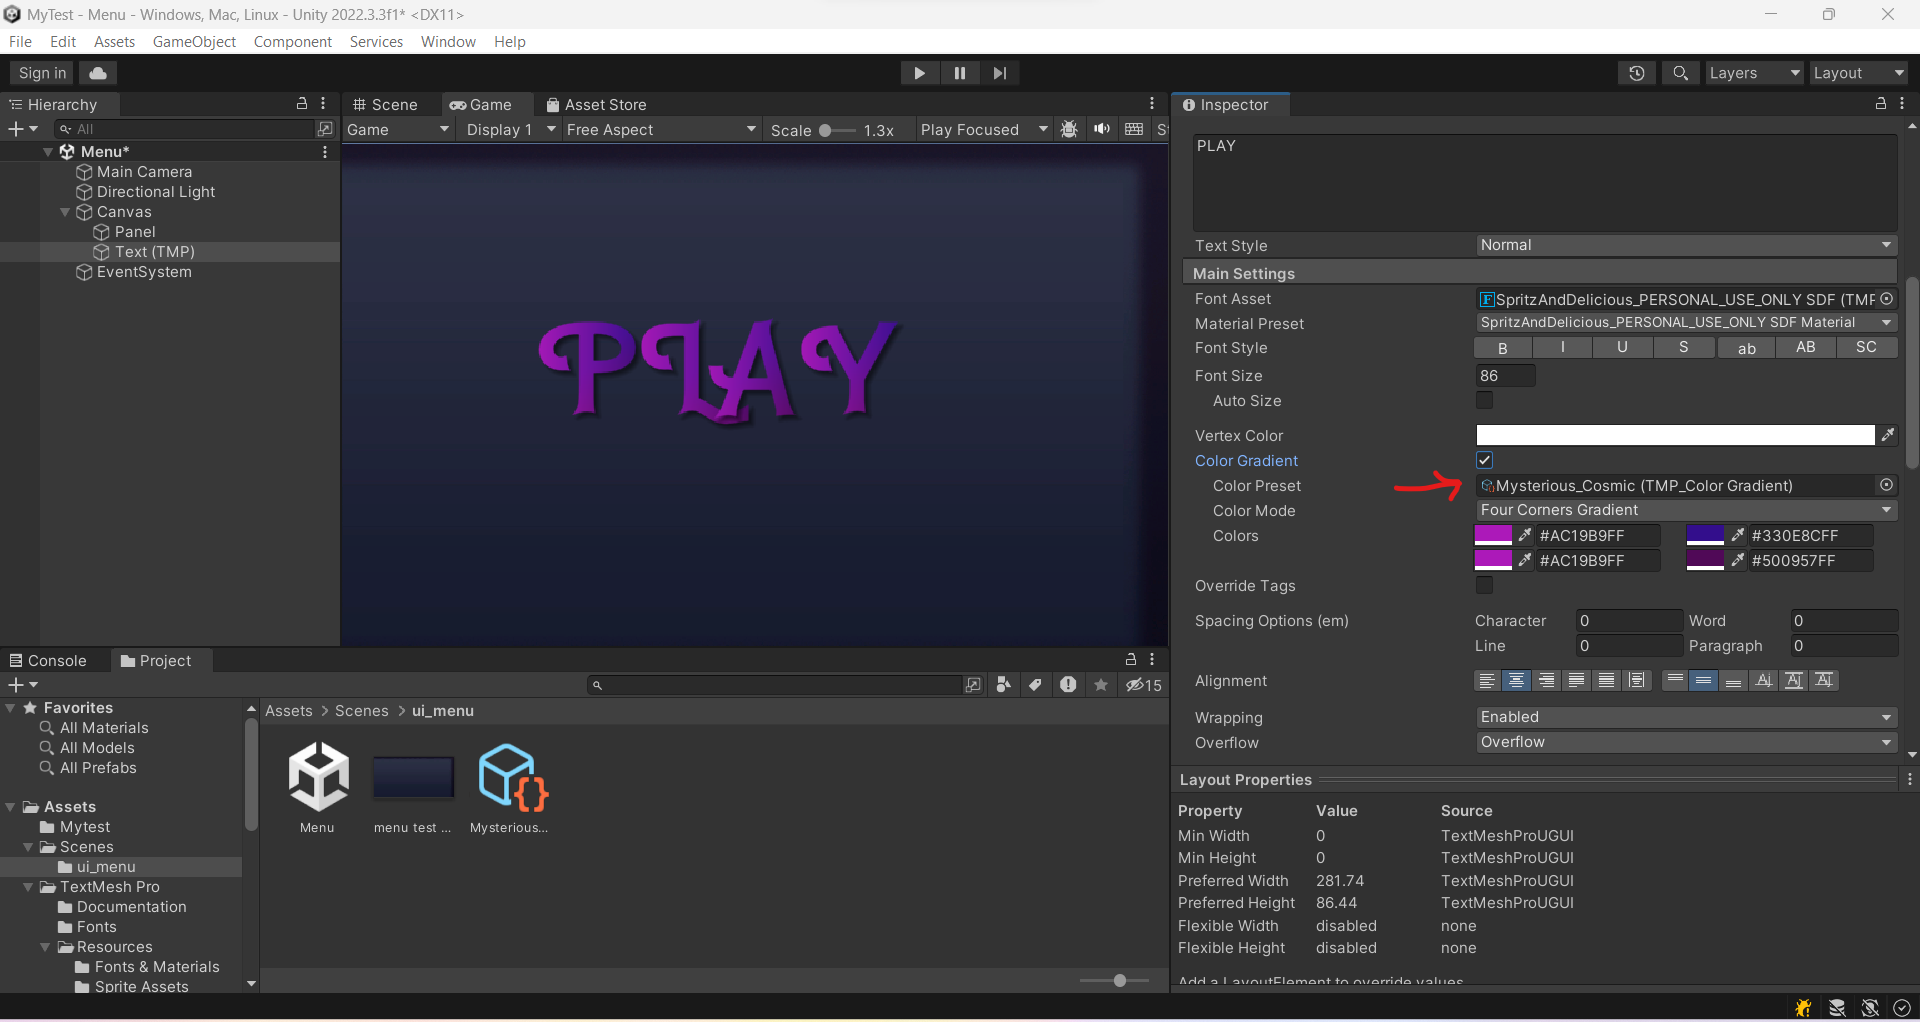
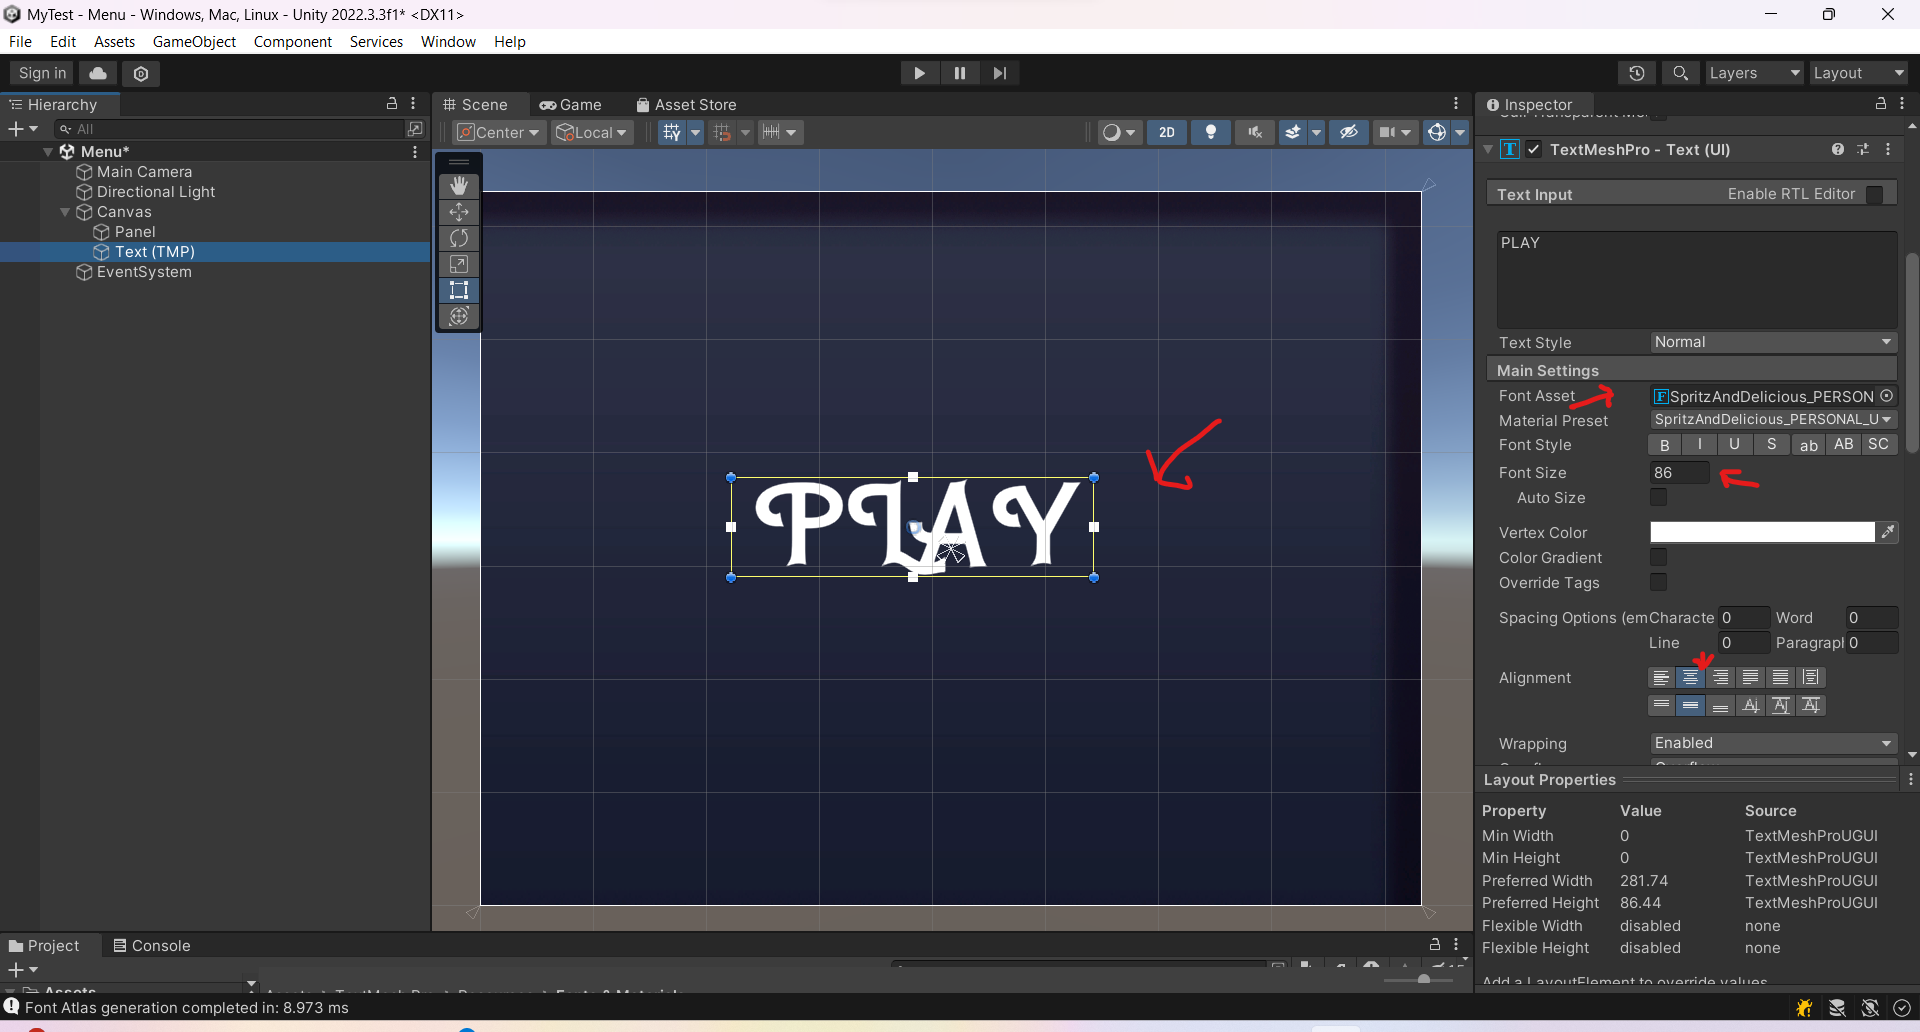
Import any fonts that you have that can work on Unity and then Under can vas right click and make textpro section. This is allow you cool imported and custom looking font/color in unity.I modified text fon in there. But before I did that made my own color gradient shown on my example images.After doing that I place the font and my custom color gradient in the text pro and it did its magic and boom looks great and even messed with shadow etc to give it some effect.
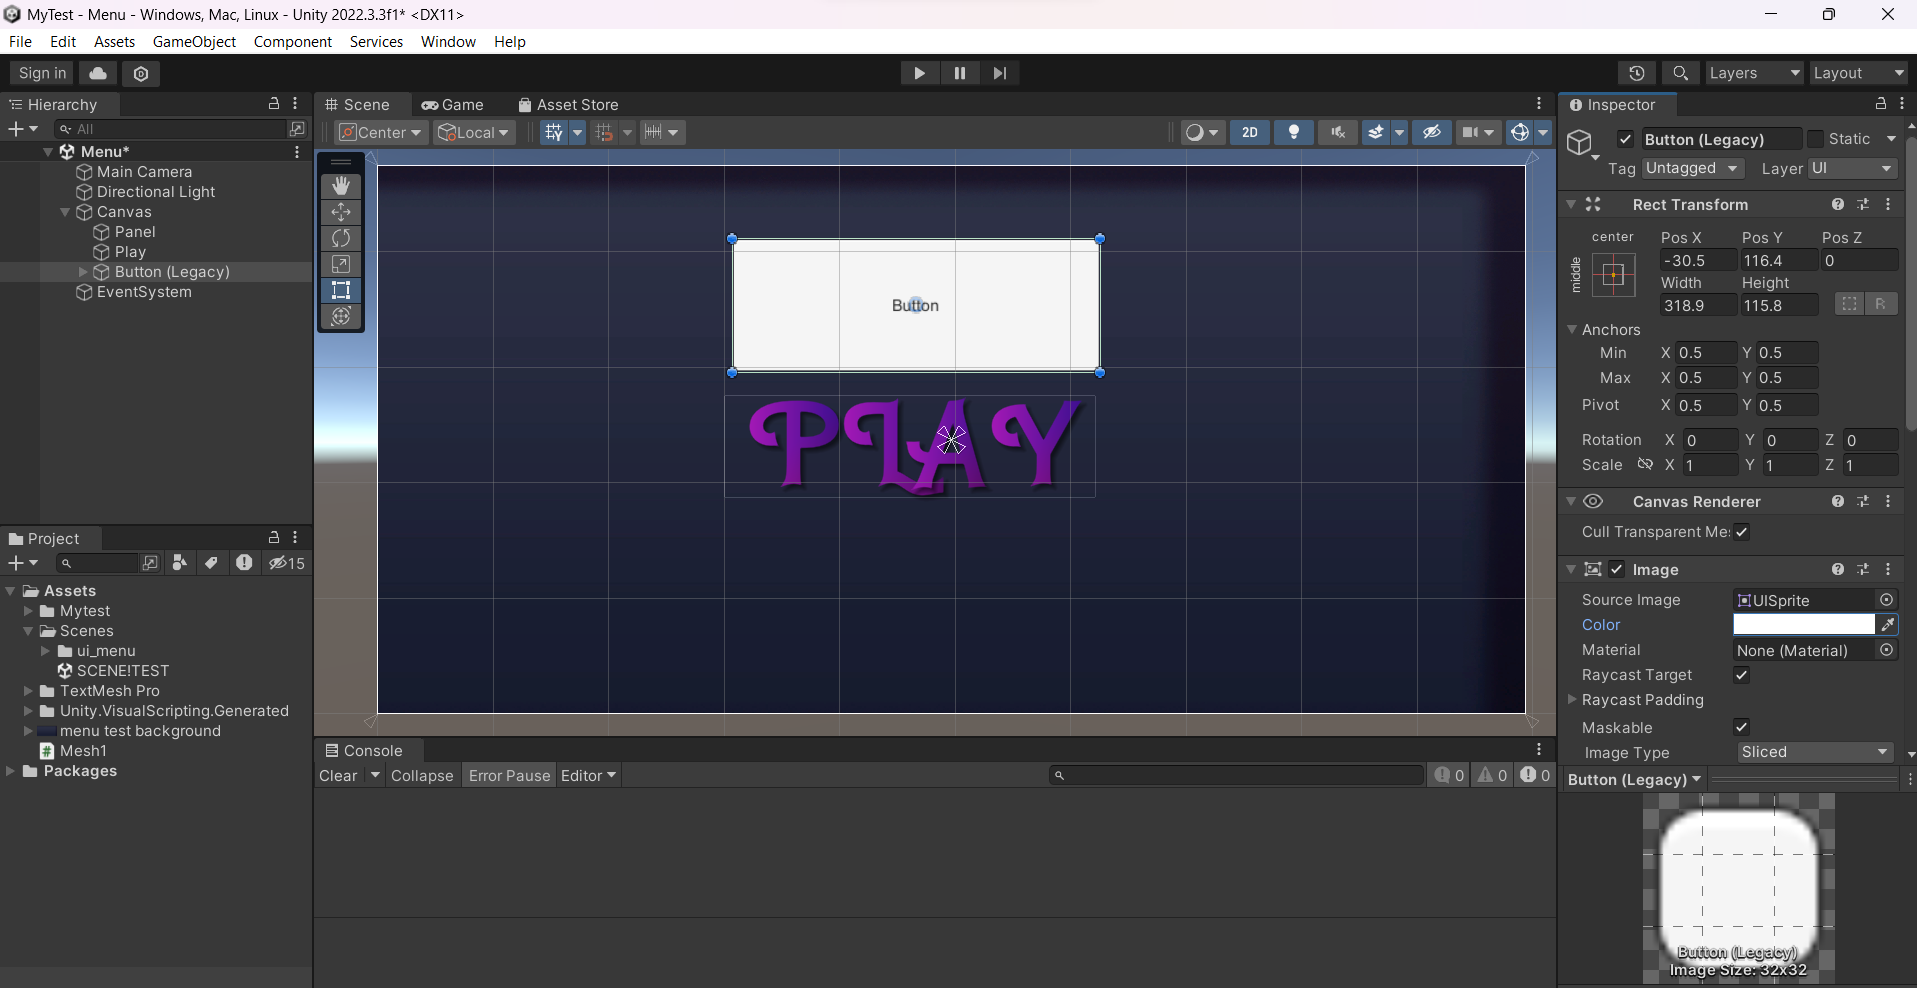
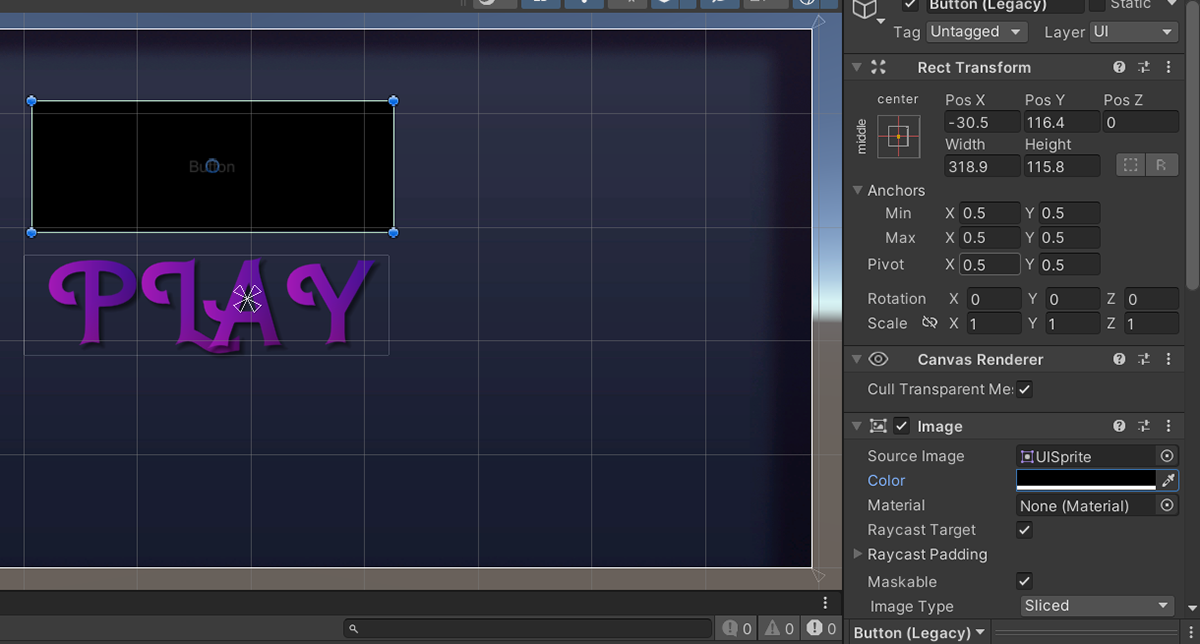
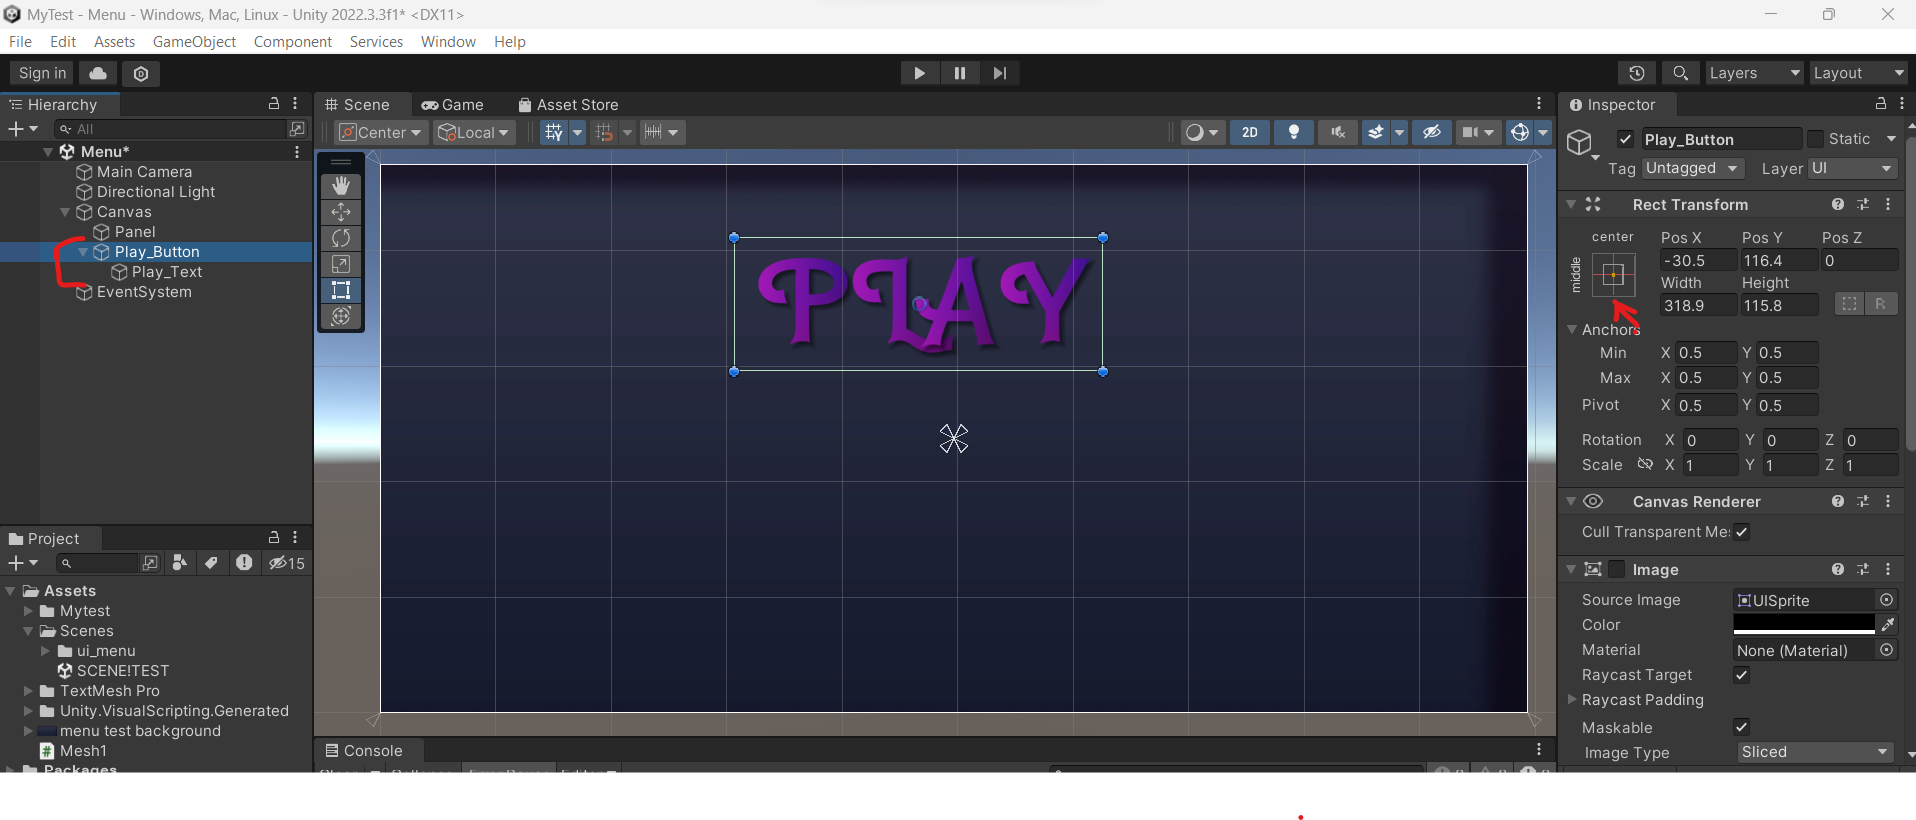
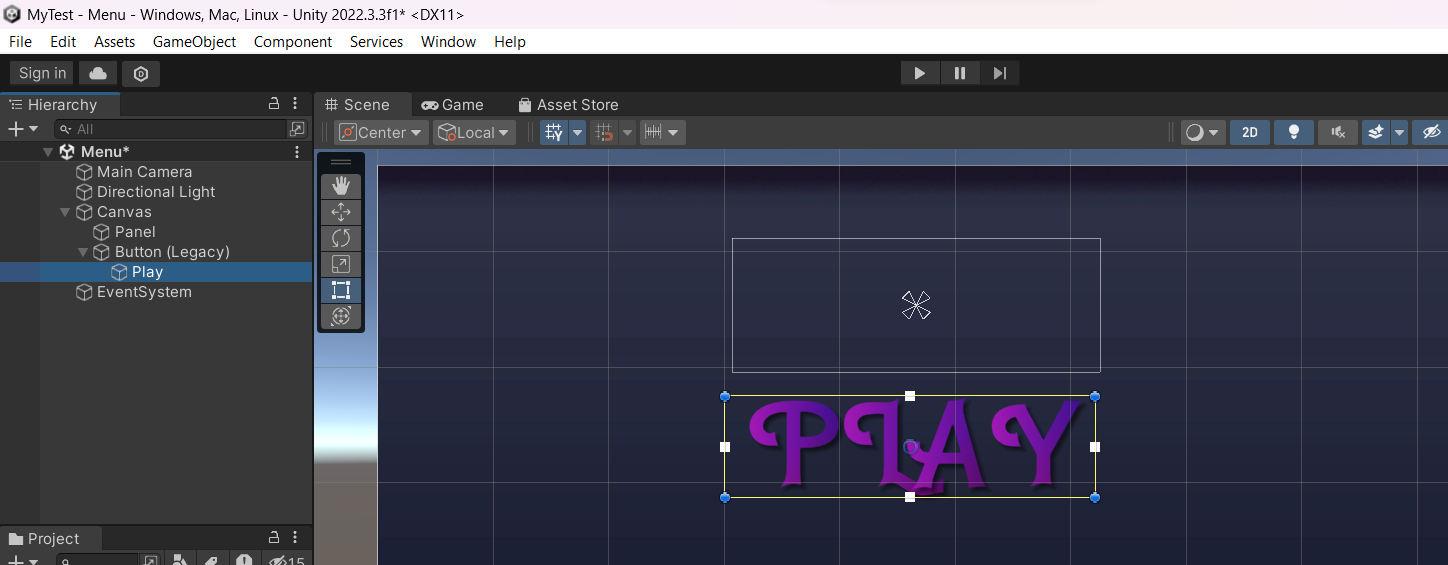
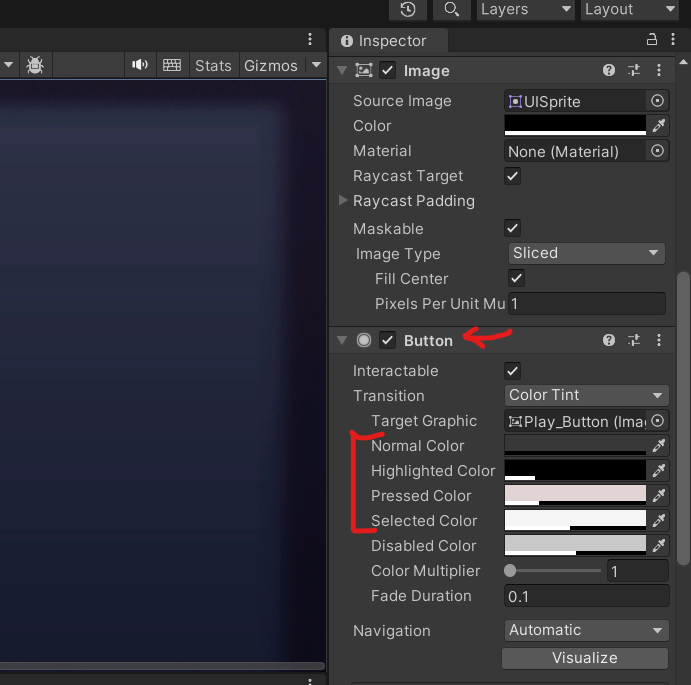
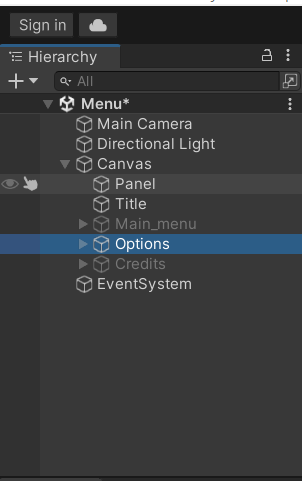
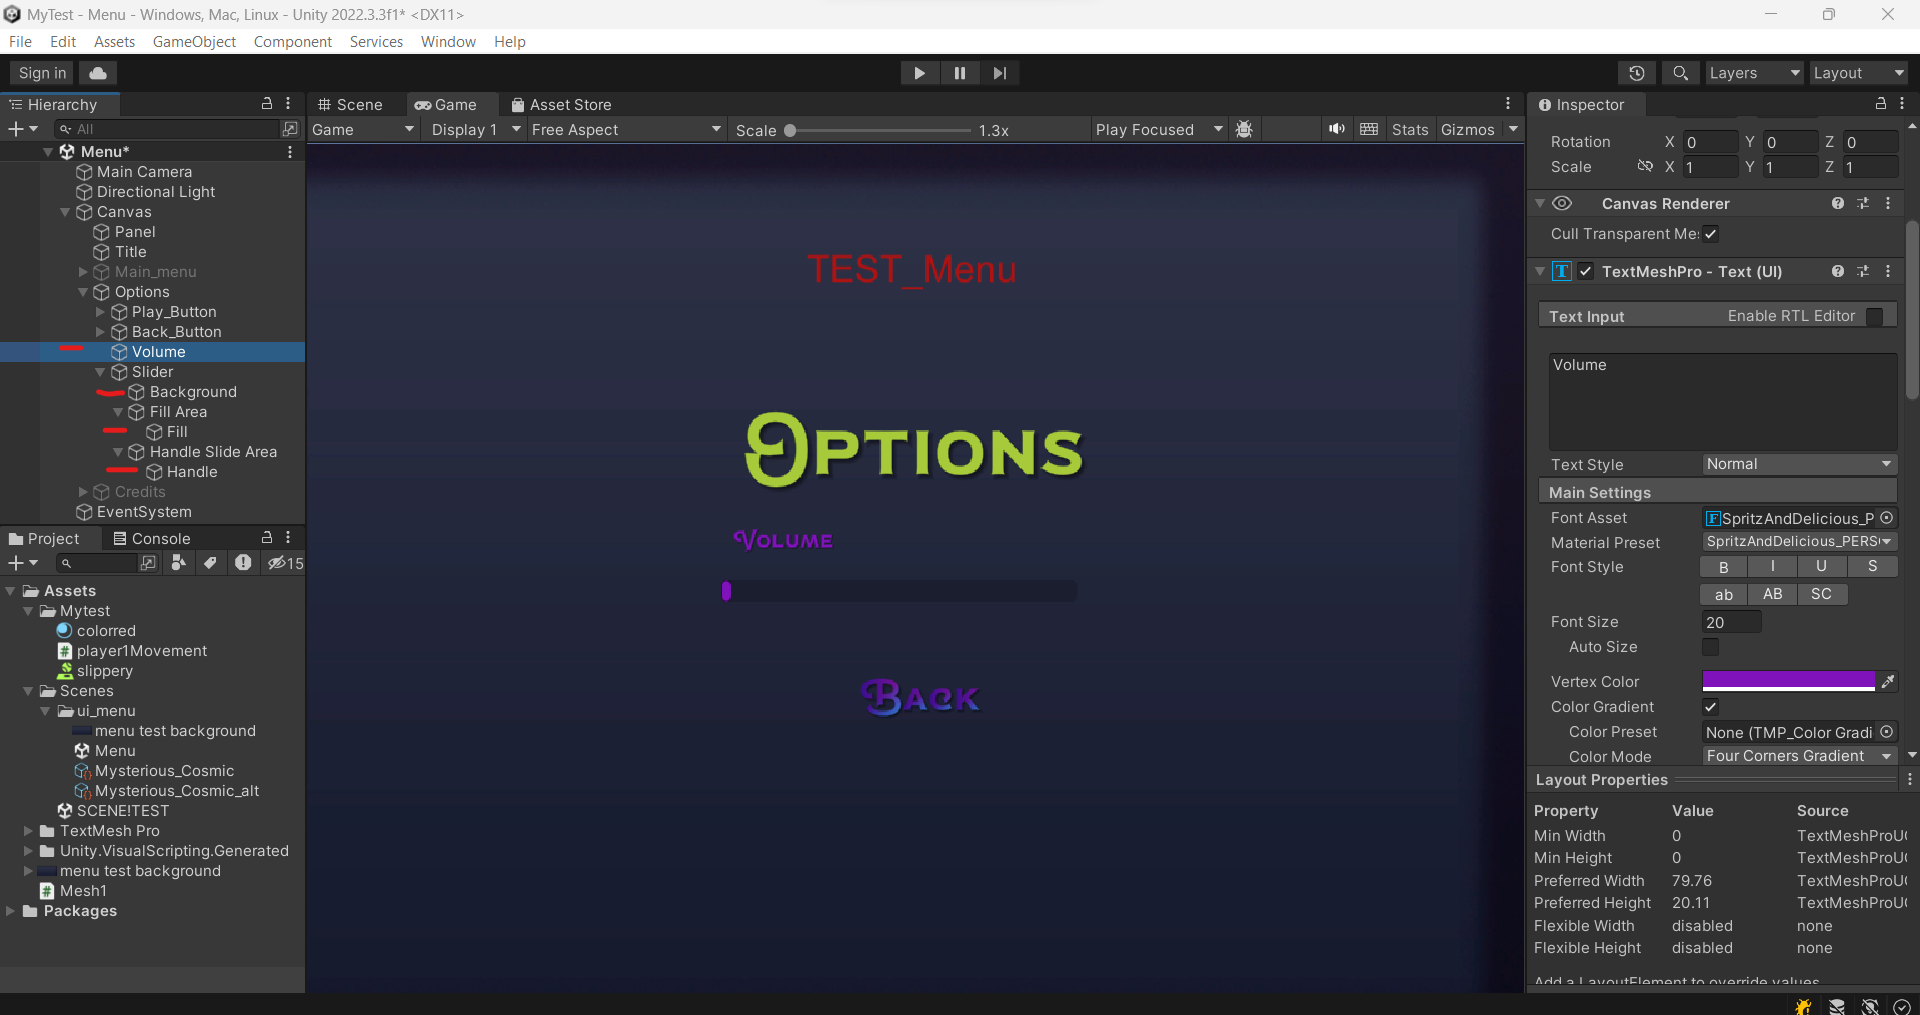
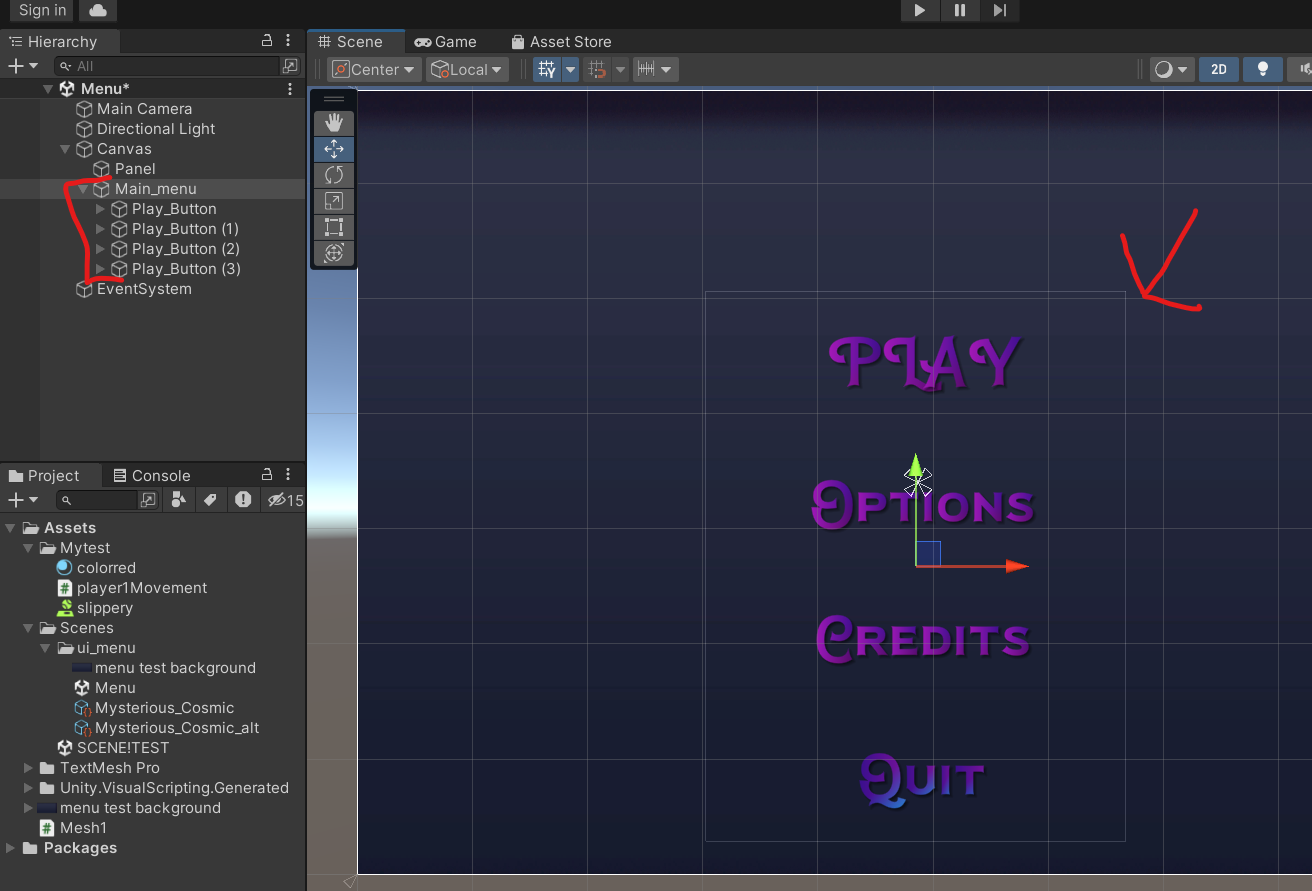
I made a button to put text inside and the button color disappeared to give that effect and illusion. I copied and pasted, renamed it to save time, made a column to put together, and named it "main menu."There is a set color setting for when the button is hovered over and clicked. I also created an option section that I will explore later.
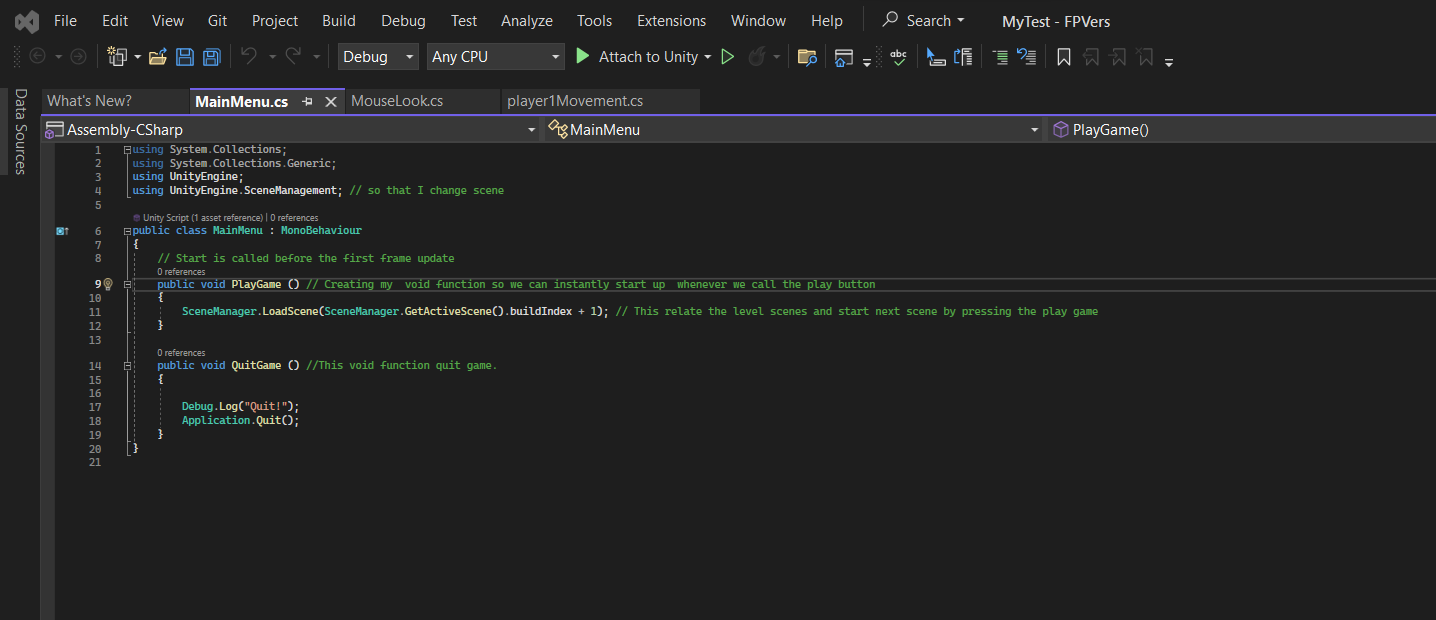
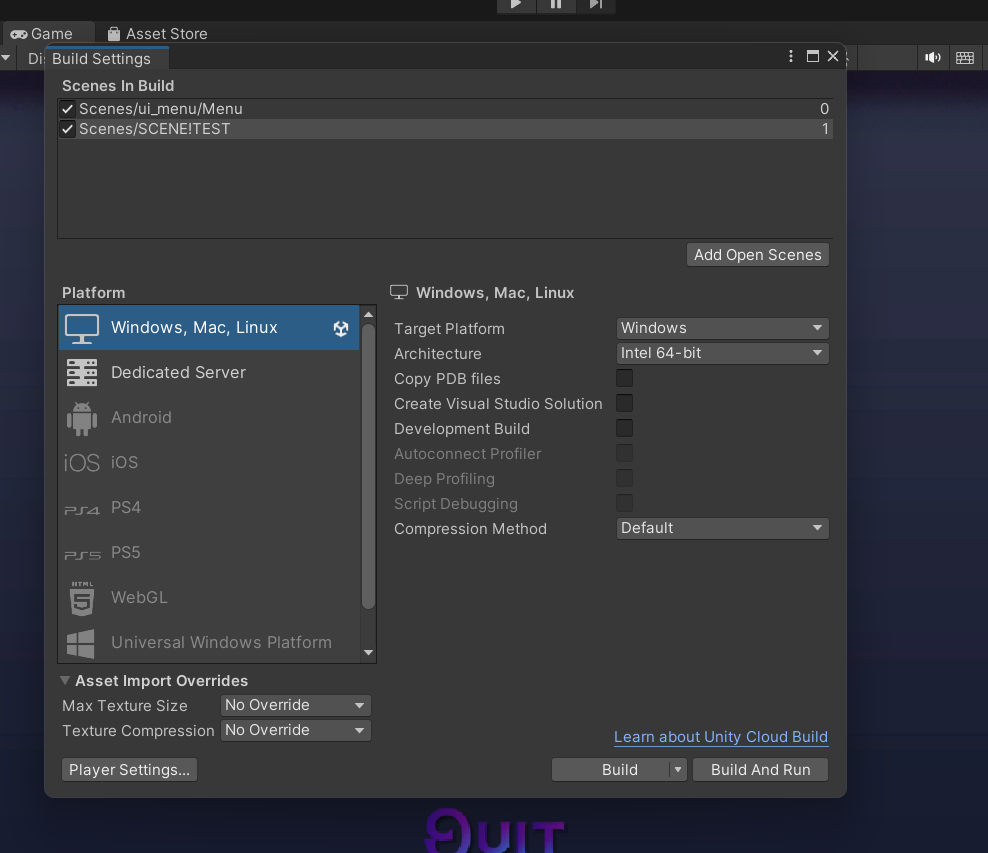
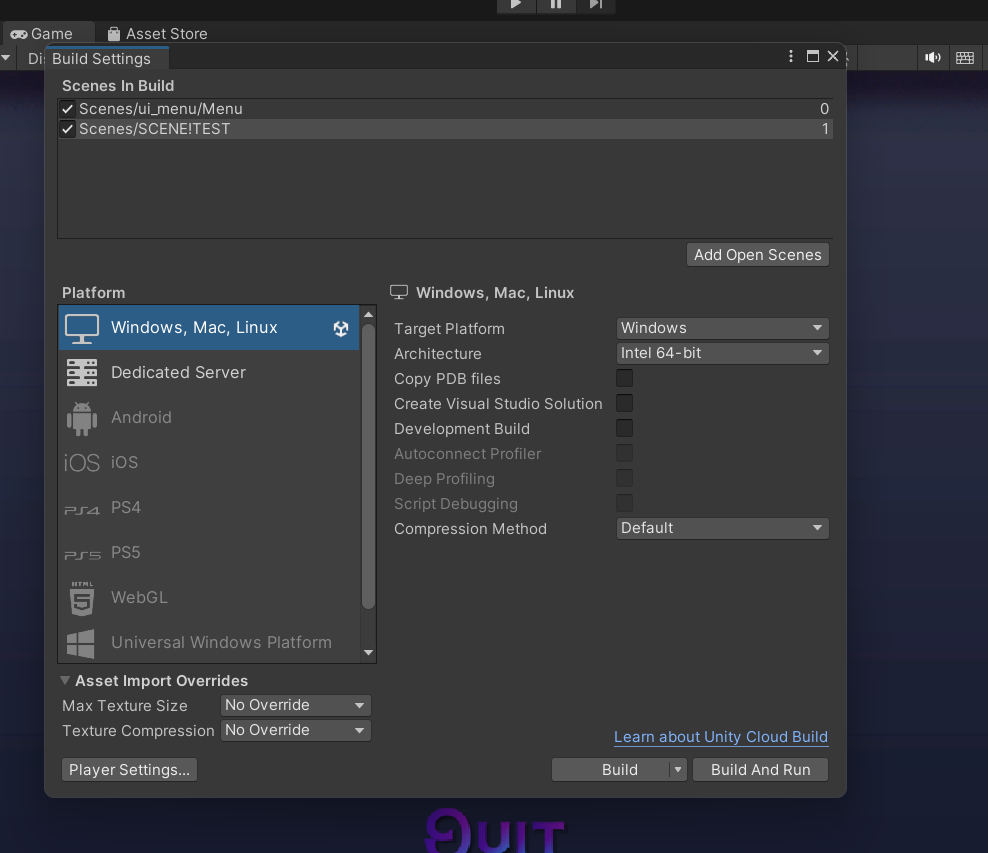
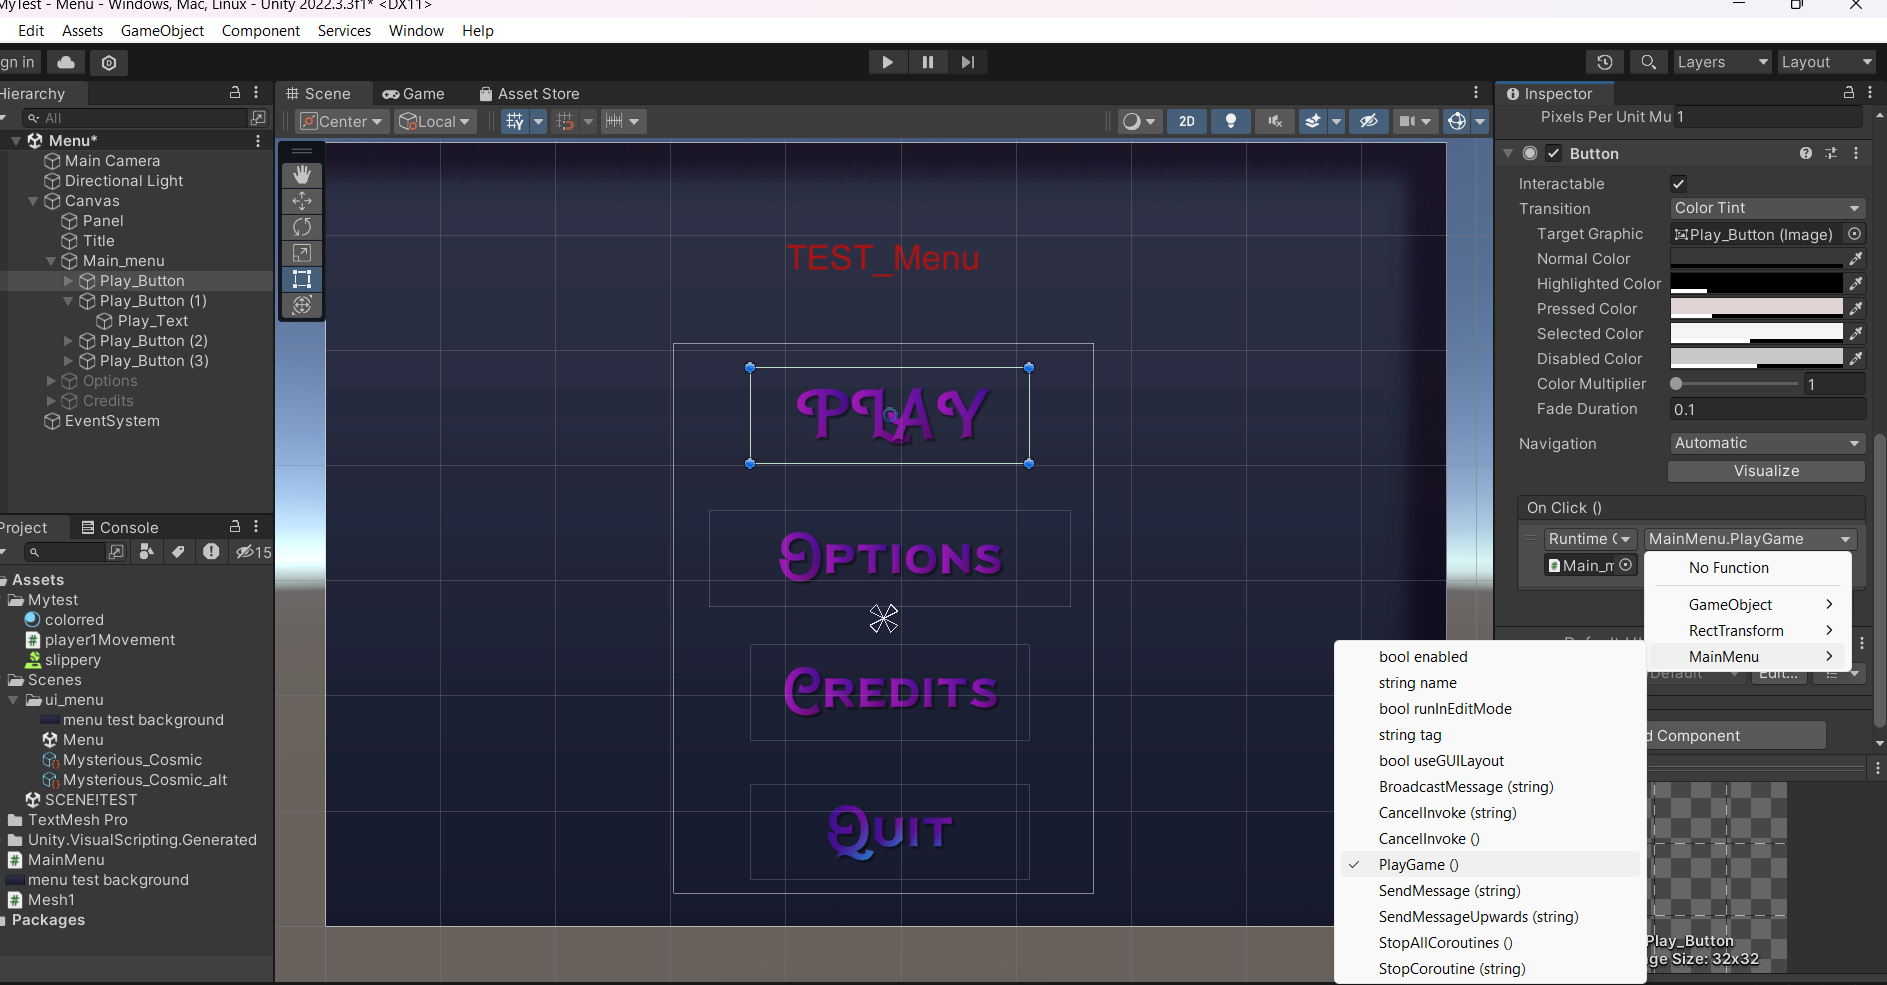
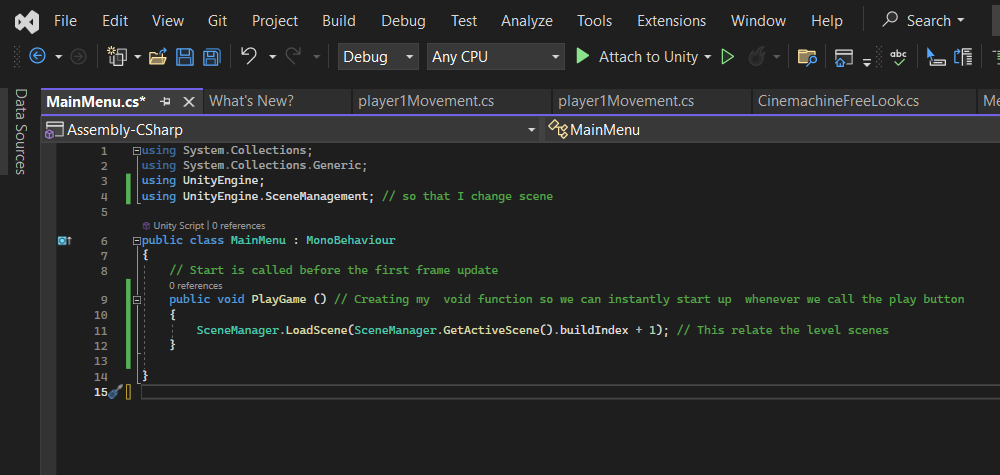
Then we get into meat and potato the main menu function. There wasn't much code to write, but I learned alot shown in my comments. I had to place the level scene of main menu and playable scene in there for it to work . The scenes start from 0 to ?. Then I had to go to where onclicked in my buttons and give button the fuction that I wrote.
So here I made the main menu.
11/29/
FIRST PERSON
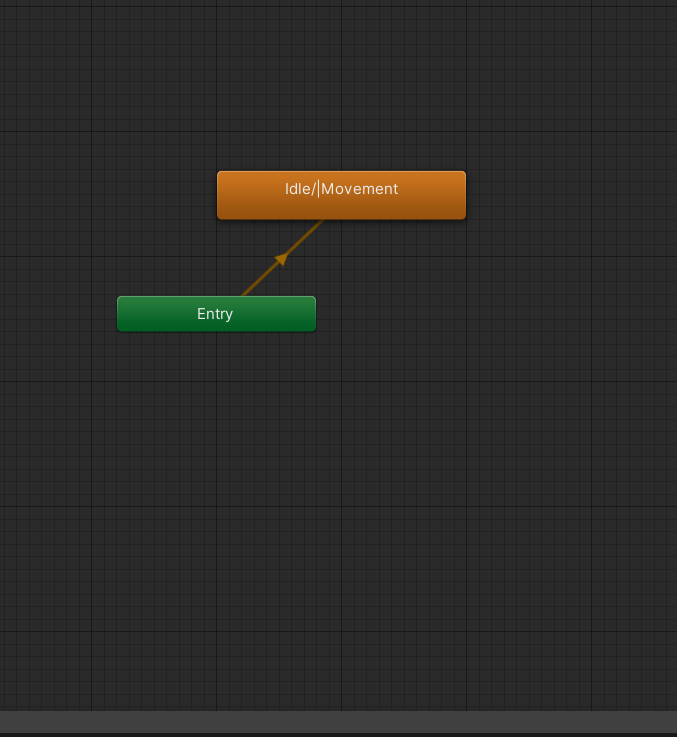
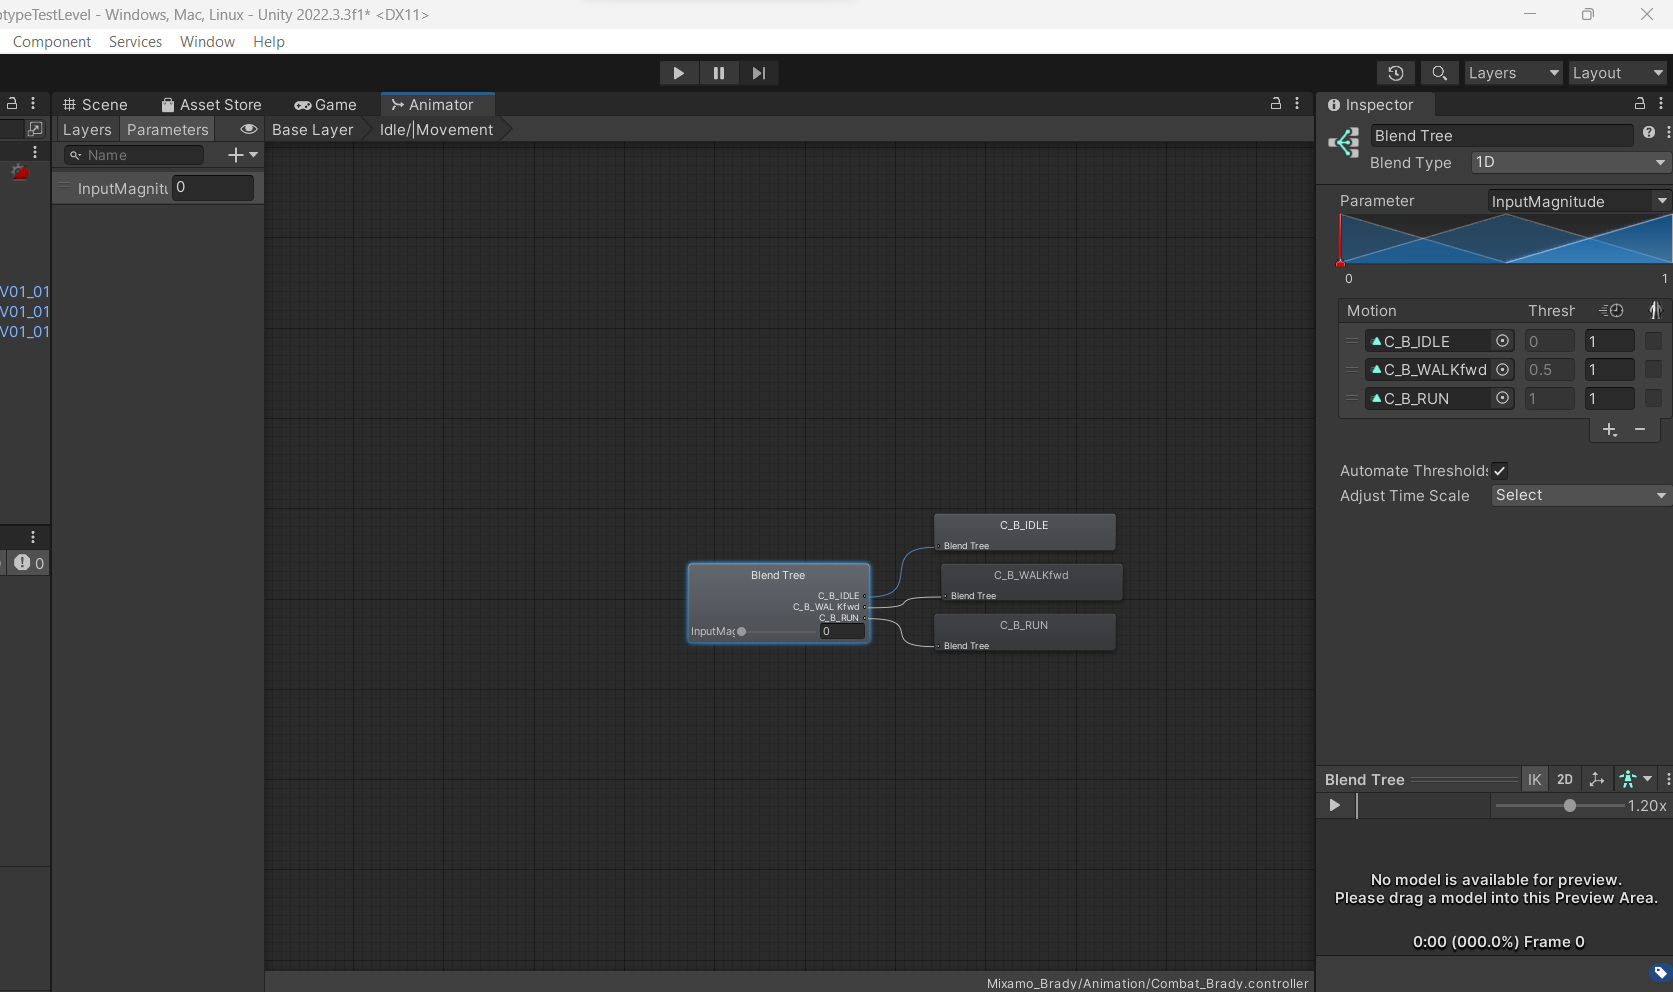
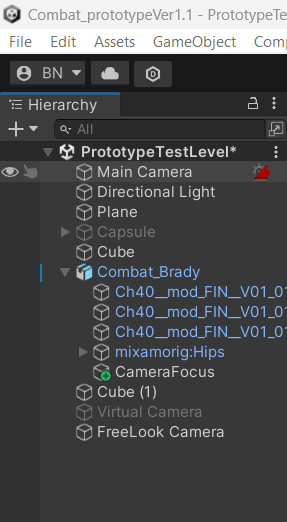
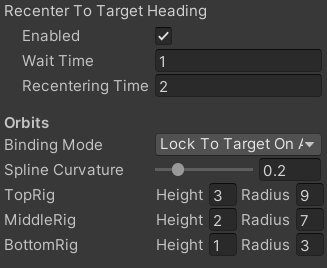
I went on to create a First Person version of the unity project. I just copied the project from my third person but renamed it and built the first-person mechanic. I used a video from the same creator that helped me with the third person in the past and the main menu, Bracket. The process is similar to TP but with a difference First person doesn't use Cinematic, so it uses the Main camera. I had to write some code so the camera only locked to 90 degrees instead of full rotation from up and down. And I was needed to make a ground check. Besides, rest was similar rest of the code was.
Creating the First Person base was great and wasn't that hard.And it was quick as well.
12/6/2023 & 12/7/2023
Dec/6th :
On this day, I continued on my small project prototype, For this and a couple of weeks onward my prototype and self-studies will merge. The reason is the Prototype is part of my assignment, and I usually these days for self-study, so I decided to combine both together, + I learned new things, which was the original plan.
I was able to make the Jump animation for my player thanks to a YouTube tutorial I was watching, the same one that helped me rebuild my third-person build. https://youtu.be/sJvWmFYSQFY?si=XcSZgwadLaCbbHZ7
It took a long to get to it because I had to rebuild TP.
Dec/7th:
I went on to create simple roll animation on my own. I did have a small animation BP influence on where to put the roll state, but I did the rest on my own, learning how the true and false works on unity for the animator and script. I was able to figure it out to make it. Also, later that day in the afternoon/evening, I made a simple Sword animation combat from a video, https://youtu.be/gHaJUNiItmQ?si=64uTs-RXxivsnW2w, But going step up watch a different different way and also include weapon system that switches weapons. I will probably get it done on Friday.
WEEK 13 - 12/20/2023
Unreal Inventory Part 1
Today, I'll attempt to create an inventory on Unreal again using a blueprint. I tried using C++, but it didn't work out; I have had a lot of tries and attempts that will never stop me. I probably won't be taught C++. I want to learn it in this class, but I will only use it for other stuff, limiting my knowledge, and I will be using a blueprint most of the time, so I am preparing my BP skills. I opened up my recent unreal project to build on this. There were a lot of helpful tutorials that I could pick from, so I decided to choose the one I'm currently watching. Every part goes into detail on different aspects of the inventory system.
Even though my game project will be Unity, I hope to have an unreal project to have half on half on what I can do and have both be shown.
From the following part 1, I created the actor component. I named it the Inventory system, which will be where the heavy visual scripting will go to make the functionality of the Inventory system. Then inside the BP , I then have to create two function --AddToInventory....
2024:
Tue/02/27/2024
Today, I will be following this C++ that will be helping game programming. The prof gave it to one of my classmates, who gave it to me. This from prof, from uni in the netherlands.
C++ Fast Track for Games Programming Part 1: Getting Started
The solutuion I found online that some one posted
#include “stdio.h”
#include “stdio.h”
void main()
{
int I = 0;// This is the first value that get printed
do
{
printf(“hello world\n”);
getchar(); // This enter a new line
I++; // this will help increase the value , in this context
}
while(I < 10); // This 0 – 10, and will print the amount number before 9
}
The I++ increase the value meaning the text the that we want to print.
Do is self explanatory,
The int I = 0 , the 0 represent the first value, while(I < 10) ,this mean from 0 to 10( First to tenth value) 0 is less than 10 , this declare that each Text(Hello world)
up to 10 times
While looking at people response , your response to them, took me to w3 school(which I'm familiar with) and there's version of this which short and simple:
{
int I = 0;// This is the first value that get printed
do
{
printf(“hello world\n”);
getchar(); // This enter a new line
I++; // this will help increase the value , in this context
}
while(I < 10); // This 0 – 10, and will print the amount number before 9
}
The I++ increase the value meaning the text the that we want to print.
Do is self explanatory,
The int I = 0 , the 0 represent the first value, while(I < 10) ,this mean from 0 to 10( First to tenth value) 0 is less than 10 , this declare that each Text(Hello world)
up to 10 times
While looking at people response , your response to them, took me to w3 school(which I'm familiar with) and there's version of this which short and simple:
for (int i = 0; i < 10; i++) {
std::cout << "Coding is awesome!" << "\n";
}
std::cout << "Coding is awesome!" << "\n";
}
(But started on Tues lates night) Weds/02/28/2024 to Thurs/02/29/2024
C++ Fast Track for Games Programming Part 2: The Template
Experiement
1. The screen->Clear(__); = The lower the number the darker it is , the higher the number the brighter it is. In this case Blue
2.It changes the text "Hello World" colors, in this instance, From Red to green to Blue
3. This changes the position of text, from center to right
4.Yes
5.Did it
6 Two differences: I see the command prompt doesn't spam and loop, this goes to the console window, and something happened behind the turret
This is my attempt at the assignment:
It took me a while for me to figure out I was suppose to do it, more how to attempt it. I Iknew I had to create the 8x8 grid, which I did. But what I didn't realize at first was that I was supposed to create a word "code" using lines. At first I though I did it right but apparently I didn't but now it works all of a sudden. X1 andY1 is rotation and X2 and Y2 is for length , one of the things I learned I could be wrong and it is a coincidence.
// -----------------------------------------------------------
// Main application tick function
// -----------------------------------------------------------
void Game::Tick(float deltaTime)
{
//Letter C REd
screen->Line(60, 80, 300, 80, 0xff0000);
screen->Line(60, 80, 60, 400, 0xff0000);
screen->Line(60, 400, 300, 400, 0xff0000);
//Letter O Green
screen->Line(120, 157, 240, 157, 0x00ff00);
screen->Line(120, 157, 120, 350, 0x00ff00);
screen->Line(120, 350, 240, 350, 0x00ff00);
screen->Line(240, 157, 240, 350, 0x00ff00);
//LETTER D Blue
screen->Line(240, 157, 240, 350, 0x0000ff);
screen->Line(240, 157, 301, 157, 0x0000ff);
screen->Line(302, 157, 360, 237, 0x0000ff);
screen->Line(360, 237, 360, 350, 0x0000ff);
screen->Line(242, 350, 360, 350, 0x0000ff);
//Letter E Yellow
screen->Line(360, 160, 360, 400, 0xFFFF00);
screen->Line(360, 160, 480, 160, 0xFFFF00);
screen->Line(360, 270, 480, 270, 0xFFFF00);
screen->Line(360, 400, 480, 400, 0xFFFF00);
}
